This is the Coastal Overview for Start Point to Lizard Point. Detailed coastal overviews are intended to be read alongside local area charts so that the key considerations may be noted and pencilled in well in advance. The intention is not only to make passages safer, by highlighting coastal dangers, but also to make them more enjoyable by unavailing all the Havens along the way so that the occasional coastal gem might not be overlooked.
Why sail this route?
This is the primary coastal overview for vessels cruising the West Country providing coastal overviews and the directions to visit the many havens along this sailing area. Cruising encompasses a combination of long passage runs, to move between coastal sailing grounds and more detailed inshore navigation within the sailing areas. Coastal overviews strive to meet both these needs by providing a combination of the key coastal characteristics for the passages passage and immediate offshore area dangers to assist in local approaches. They serve to provide the overview information to lead a vessel to the initial fixes of the desired havens. The route, as shown, need not be adhered to if sections of the coast are being bypassed.Tidal overview
Today's summary tidal overview for this route as of Thursday, April 25th at 15:38. Tidal streams are for the turning point 3 miles south of Start Point.
West-southwest going
(HW Dover -0120 to +0445)
Now
(Tidal flow )
Ends in 01:52:18
(Thu 11:26 to 17:31)
East-northeast going
(HW Dover +0445 to -0120) 
Starts in 01:52:18
(Thu 17:31 to 23:51)

What are the navigational notes?

The course from Start Point to Lizard Head is about 63 miles west-southwest and here the coast turns more Oceanic. 'The Start' acquired its name for signalling the sea change from the Oceanic to that of the English Channell and so west of Start Point the ocean swell is much more prominent. This can often create lumpy sea conditions for coastal sailing and make some anchorages uncomfortable. Sometimes Atlantic depressions can be detected before they arrive by their long spectrum waves arriving on the coast in advance of them, or the depression tracks away to the north so that the swell appears to be completely divorced from the observed weather. Either way, the sea here is distinctly different and should be a consideration.
The land between the Lizard and Start Point is, generally speaking, moderately high, and being for the most part double, exhibits a great variety of elevation to a vessel when seen from offshore as is seen from varying positions. It also contains many deep openings between Helford and Looe, which at a distance seem to destroy the connection. At 9½ miles northeast of the entrance of Falmouth, and nearly midway between the Lizard and Rame Head, Dodman Point stands out boldly to seaward. It is a precipitous bluff 112 metres above the sea, its steep face being towards the east, and declining gradually to the westward. Gribbin Head to the westward of Fowey, and immediately succeeding the deep bight of Polkerris, is distinguished by a daymark beacon tower 33 metres high, standing on an elevation 104 metres above high water, and then to Looe the land continues high and irregular; rather declining towards Whitsand Bay, but rising again in the vicinity of Plymouth.
Keep a sharp eye out for lobster pots as there marker buoys may be encountered anywhere along this coastal area, either singly or in attached strings, sometimes as much as 6 miles offshore.

A few miles north of a direct line between Lizard Point and Start Point, 13 miles southwest of Plymouth and 8 miles south of Rame Head, lies the isolate but dangerous Eddystone Rocks. The cluster is awash at high water springs and do not completely cover. It's northwest side is clear of danger but the other sides are foul, particularly the northeast side, which should not be approached within a mile. A small patch called N.E. Rock lies 300 metres northeast from the lighthouse, which uncovers to 0.9 metres at low-water springs.
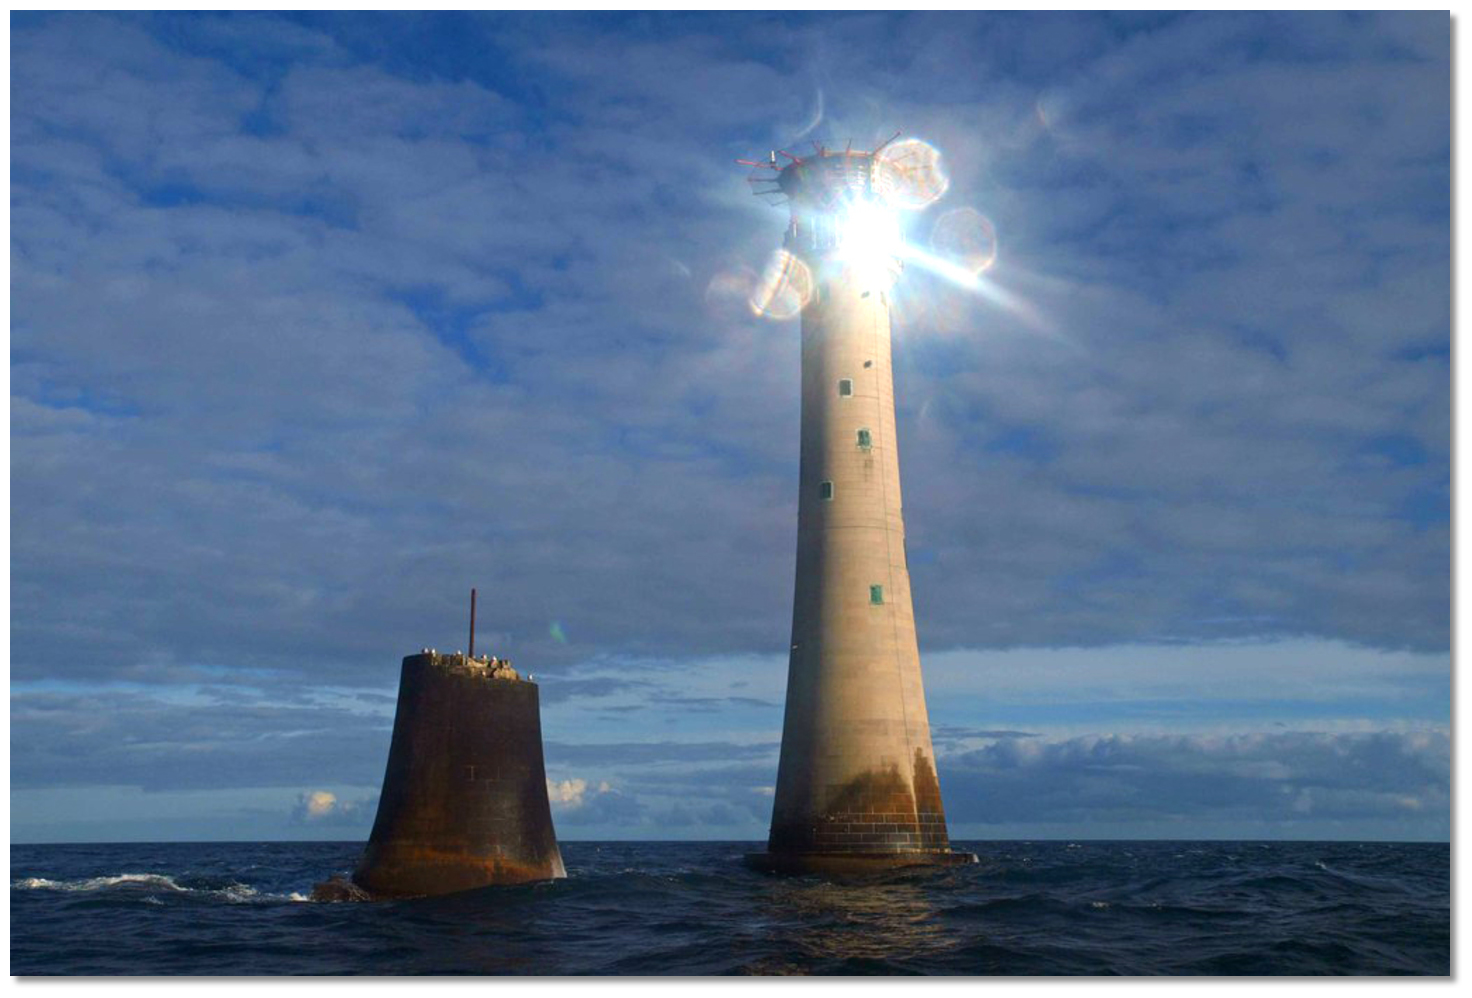 The sun glints on the solar panels on Eddystone lighthouse
Image: Steve Fareham via CC BY-SA 2.0
The 1882 circular granite tower on Eddystone Lighthouse was the fourth lighthouse to mark the small but dangerous cluster of rocks. The prominent tower is 49 metres high and surmounted by a helicopter platform. It exhibits a light Fl (2) 10s at an elevation of 41 metres above high water which should be seen from a distance of 17 miles in clear weather.
There is a stump close to Eddystone Lighthouse which is the remains of Smeaton's Tower the third structure that marked the cluster. After serving for 120 years cracks appeared in the rock upon which Smeaton's lighthouse stood necessitating the new tower in 1882. The top half of Smeaton’s tower was dismantled and re-erected on Plymouth Hoe as a monument to the builder.
Another outlying set of rocky pinnacles is Hand Deeps that lie 3⅓ miles from the Eddystone which has a least depth of 7 metres. This is marked by a lit west cardinal, Q(9) 15s. In bad weather, their position is shown by a short breaking sea in their vicinity, and in fine weather by the tide rippling.

 Start Point as seen from the east
Image: Graham Rabbits
Start Point runs sharply almost a mile into the sea on the south side of Start Bay near Dartmouth. It may be recognised by its rugged, cock’s-comb like appearance and a conspicuous white lighthouse that stands 130 metres inside of its eastern extreme. The five hillocks on the ridge within the lighthouse are each about 60 metres above high water.
 Start Point lighthouse and the Black Stone rock
Image: Anthony Parks via CC BY-SA 2.0
The tall circular white tower of Start Point Lighthouse has a walled enclosure and residence and its light at an elevation of 62 metres above mean high water should be visible in clear weather from a distance of 25 miles.
Start Point Lighthouse Fl(3)10s 62m 25M, F.R. 55m 9M, Horn (1) 60s position: 49° 57.609'N, 005° 12.129'W
The five hillocks on the ridge near the lighthouse are each about 60 metres high. Within a mile of the point, the land rises steeply to 120 metres. Two prominent radio masts stand on the heights, about a mile west by northwest of the point.
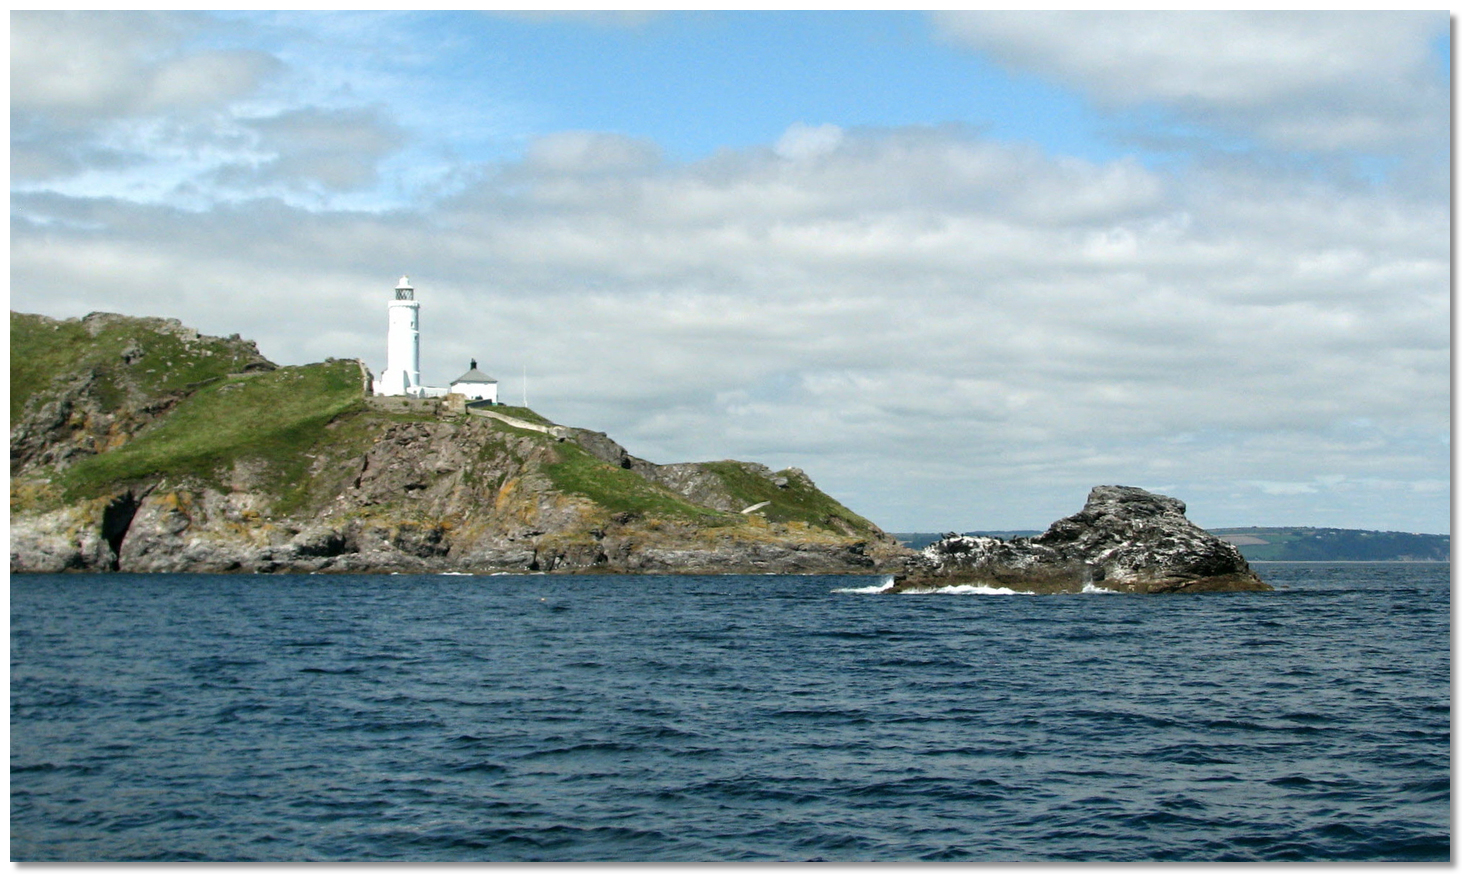 Black Stone Rock
Image: Graham Rabbits
The only dangers in the vicinity of Start Point are the Black Stone, drying to 6 metres, and Cherrick Rocks, drying to 1 metre, that lie about 500 metres south by east from the Start Point. It is nevertheless advisable to stand well of Start Point as tidal rips occur up to a mile south and east of the point that is particularly pronounced during spring tides. The velocity of the stream off the point is 3 knots, but when blowing fresh there is a strong race, both on the flood and ebb. In fair weather, a westbound vessel may avoid the overfalls and optimise a fair tide by passing close to seaward of the rocks at about HW Dover -0130 before the race starts in earnest and just as the favourable west going streams south of Start Point commence. Situated a mile to the northwest of Start Point, Hallsands
 makes the ideal tide-wait anchorage to optimise this timing.
  Peartree Cove and Peartree Point as seen from the west
Image: Philip Halling via CC BY-SA 2.0
Peartree Point, ¾ of a mile westward from the point, is 180 metres high and it has the always visible 3 meters high Great Sleaden Rock and Little Sleadon, drying to 3 metres, close south 150 and 200 metres off the head. But also a rock that only dries to 0.5 metres about 500 metres southward.
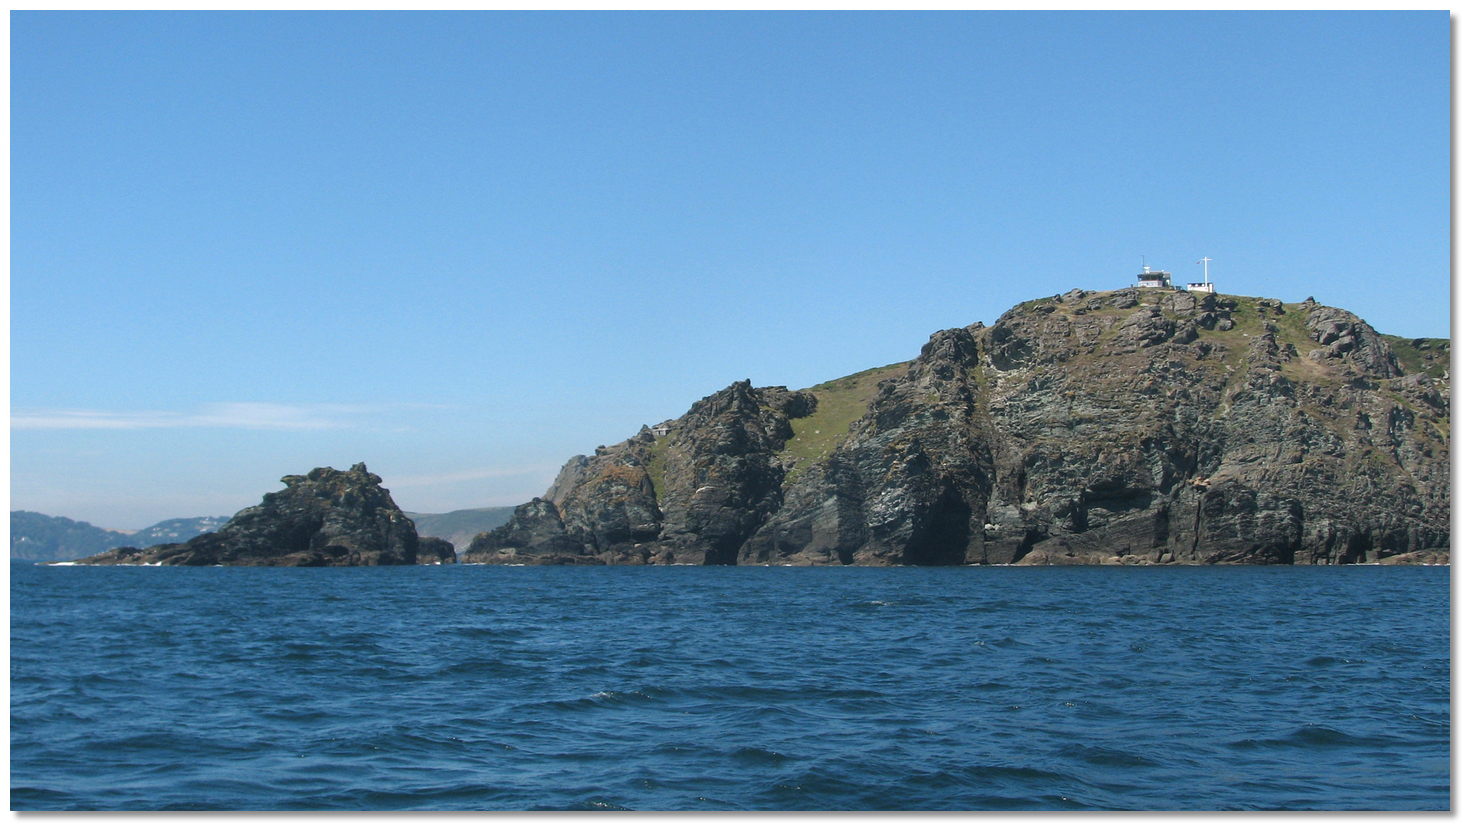 Prawle Point with its prominent coastguard station
Image: Graham Rabbits
Located 3¼ miles west-southwest of Start Point is the prominent rocky headland of Prawle Point with a prominent coastguard station. The shoreline bends north-westward for 2 miles to the entrance to the Kingsbridge Estuary, also erroneously known as the 'Salcombe Estuary', that runs from Kingsbridge in the north to its mouth near Salcombe. Here close to its mouth is small well-sheltered and extensive yachting centre of Salcombe
 .
. The Range
Image: Will via CC NC 2.0
Approached between Prawle Point and Bolt Head, 2½ miles west, the entrance to the Kingsbridge Estuary is made recognisable by the sudden turn to the northward of the cliffs at Bolt Head. The inlet is fronted by The Range that is clear of dangers save for the deep Rickham Rock in the western side that is of small extent, with 2.7 metres of water lies ¼ of a mile off the eastern shore. The Range is open to the southward and any blow from that direction throws a heavy sea into it which makes it dangerous to cross the bar.
 Sandhill Point, centre, within the harbour
Image: Lucky Larry via CC NC 2.0
The entrance is then obstructed by a bar made up of a ridge of sand extending from Limebury Point, on the eastern side to ¼ of a mile above the Great Eelstone, a high overhanging rock on the western shore. The bar has not more than 0.7 to 2 metres on it at low-water springs and a heavy sea breaks over it in southerly gales. It is inadvisable to attempt to cross the bar on an ebb tide with strong onshore winds or swell but at other times is easily navigable with care.
 Salcombe lies on the west bank immediately upriver of Sandhill Point
Image: Michael Harpur
The deepest channel is marked by leading marks on Sandhill Point within the harbour and by night by a sectored light, directional light and beacons in line 000°T. The leading line is marked by a red and white striped pole with red topmark on Poundstone Rock in transit with a rear beacon on Sandhill Point which is white with a horizontally striped red and white diamond topmark. By night this rear mark also displays a sector light Fl. WRG 2s with the white sector 357° - 002°T.
A convenient tide-wait anchorage in prevailing conditions can be found by anchoring close to Starehole Bay's
 southeast headland where it is possible to watch the breakers on the bar subside. Then allow some time for the height of tide to increase which should be given a considerable margin if any swell is running. Enfolded by sheer cliffs to the prevailing winds it is normally well sheltered and has excellent holding Starehole Bay is a fine anchorage of its own.
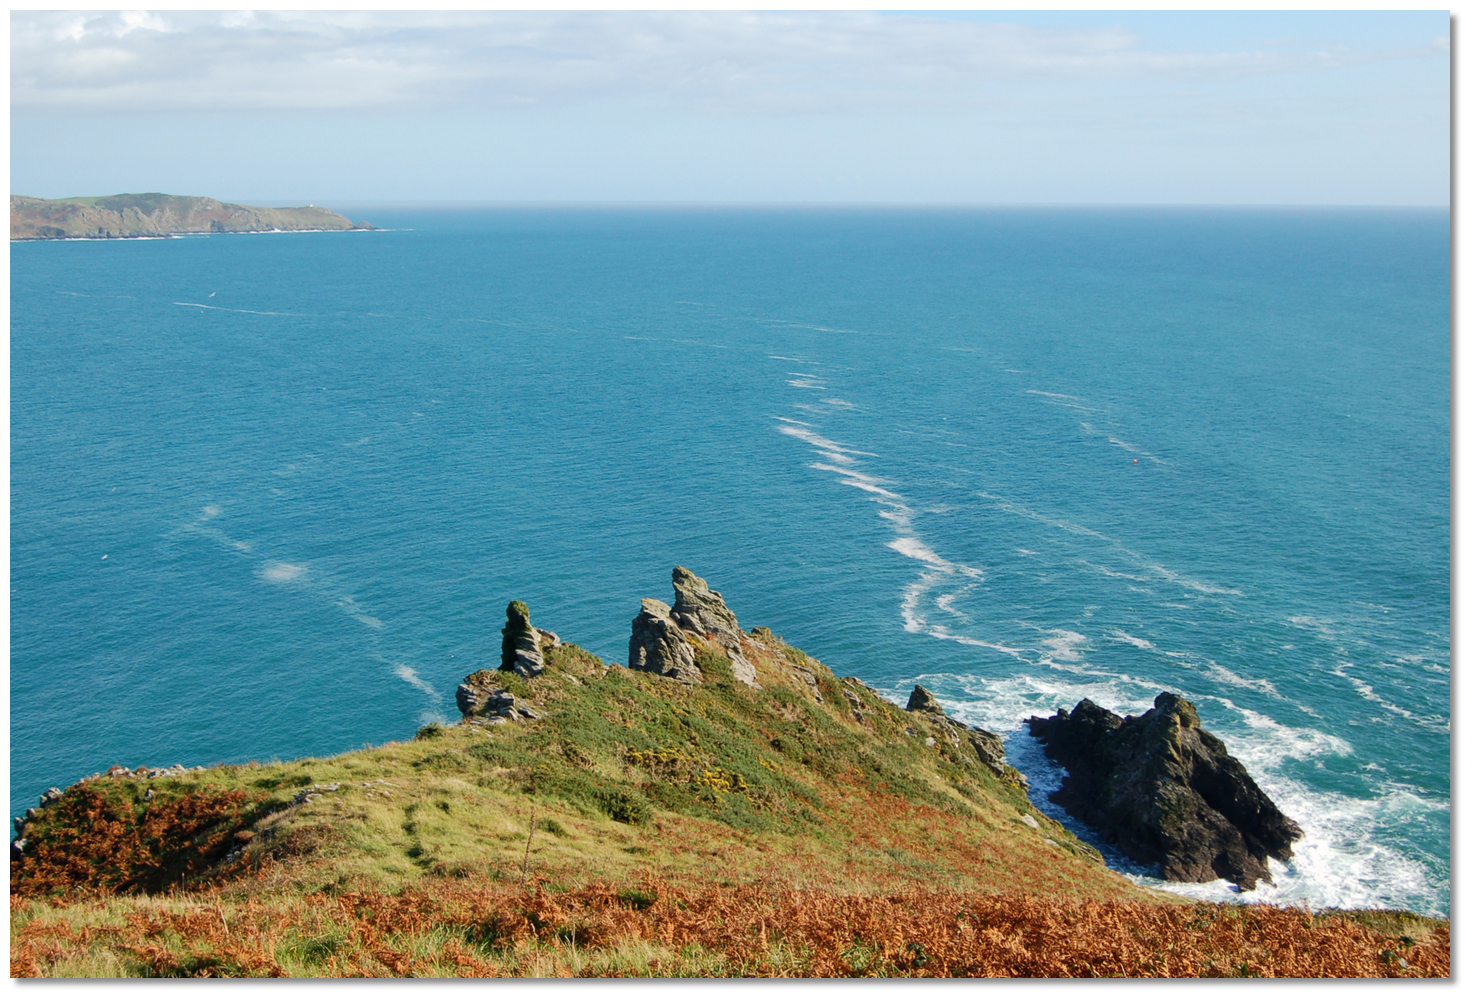 View from Bolt Head to Prawle Point with the Mew Stone bottom right
Image: Nilfanion via ASA 4.0
Located 5½ miles westward of Start Point the 128 meters high Bolt Head is a prominent headland. A coast guard station stands on Bolt Head and a conspicuous radio tower is situated about a mile north-westward of it. At its base are two conical high-water rocks, the Great Mew Stone and Little Mew Stone.
 Bolt Head as seen from the east
Image: Graham Rabbits
Bolt Tail is situated 3¾ miles north-westward of Bolt Head. Between them a succession of dark rugged-looking cliffs that rise abruptly to the height of 120 metres, with few trees, and intersected by deep ravines.
 The Ham Stone
Image: Richard Knights via CC BY-SA 2.0
The Ham Stone is a rugged, black rock, 11 metres above high water, lying a ¼ mile offshore nearly midway between Bolt Tail and Bolt Head, and a little eastward of the beach of Soar Mill Cove, the only beach near. There are a few sunken rocks near it. At a ½ mile eastward of the Ham Stone, and the same distance offshore, with 1.1 metres over the shallowest head are the sunken Gregory Rocks.
 Bolt Tail as seen from the northeast
Image: Jason Ballard
Bolt Tail rises to a height of 87 metres about a ⅓ of a mile within its extremity and is prominent from seaward. The coast northward from Bolt Tail is high, precipitous, and rocky, particularly in and near Hope Cove
 , which is a ¼ mile within Bolt Tail.
  Yachts anchored off Hope Cove with Bolt Tail in the backdrop
Image: Michael Harpur
Hope Cove and Chesil Bay are the traditional weather wait locations for vessels confronting easterlies or north-easterlies when working their way 'up Channel'. In the days of commercial sail, dozens of vessels would be found off Hope Cove waiting for a favourable wind shift. So it serves boaters to this day and as a convenient stopping place in settled conditions. It also makes a delightful anchorage with offshore winds but the holding-ground is not good and it would not be a place a vessel could be left unwatched for extended periods.
 Hope Cove
Image: Michael Harpur
Bigbury Bay lies between Bolt Tail and Stoke Point, 6½ miles west-northwest. It is an extensive bight into which the Erme and Avon Rivers flow. It is exposed to the full force of southwest gales, and its coast is rugged and fronted at low water by rocky ledges and scattered rocks, but all these dangers are within a ½ mile from the shore, which may be approached in fine weather by vessels keeping near the land for smooth water, or to avoid the tide.
Between Bolt Tail and the mouth of the River Avon and, 2¼ miles to the northwest, the coast recedes to form a bight, the cliffs of which lower to the eastward and become broken into heads, which are fronted with extensive rocky ledges.
 The rocky ledge leading out to the Thurlestone Rock with Bolt Head in the
backdrop
Image: Nilfanion via ASA 4.0
In the depth of this bight, and 1¼ miles from the Avon, is Horsewell Bay, which has a long sandy beach, and is remarkable for its low shore, as well as for having near its south comer a curious 10 metre high perforated rock, called the Thurlestone, which from seaward can resembles the hull of a stranded ship. The Thurlestone stand a mile north of Bolt Tail and is connected with the shore at low water by a rocky ledge. Between it and the north point of the bay, is a dangerous reef called The Books, which dries at low water.
The River Avon
 is entered the bay 2⅓ miles north by northwest of Bolt Tail. The Avon is one of South Devon most beautiful rivers, particularly above the weir at Aveton Gifford, 4½ miles within the entrance, where it runs between grassy banks over clean gravel till its character changes to a mere wild moor-side brook. In the low and navigable parts below Aveton Gifford, at certain times of tide, it has the appearance of a noble sheet of water, with open woodland shores, broken here and there by a bay or creek. But at low water, the river and its entrance almost entirely dry to clean sand so this is the reserve of boats that can take to the bottom or are equipped with beaching legs.
  The entrance to the River Avon
 Image: Michael Harpur
Across the entrance, which is only navigable for vessels carrying less the 2.5 metres that can take to the hard, is a bar which dries. Consequently, it cannot be entered when there is any swell. From the high, dark, cliffy eastern head of Lower Cellars, a sandy tongue of land and spit extends well over toward a bend in the shore close within the western Mount Folly headland. This then makes a sudden and awkward turn in the channel almost round through 90° into narrows that contracting the width of the stream and create tidal streams that can attain 5kn on the ebb. Consequently, the best time to enter is an hour before local HW which is HW Dover -0523 or HW Plymouth +0015.
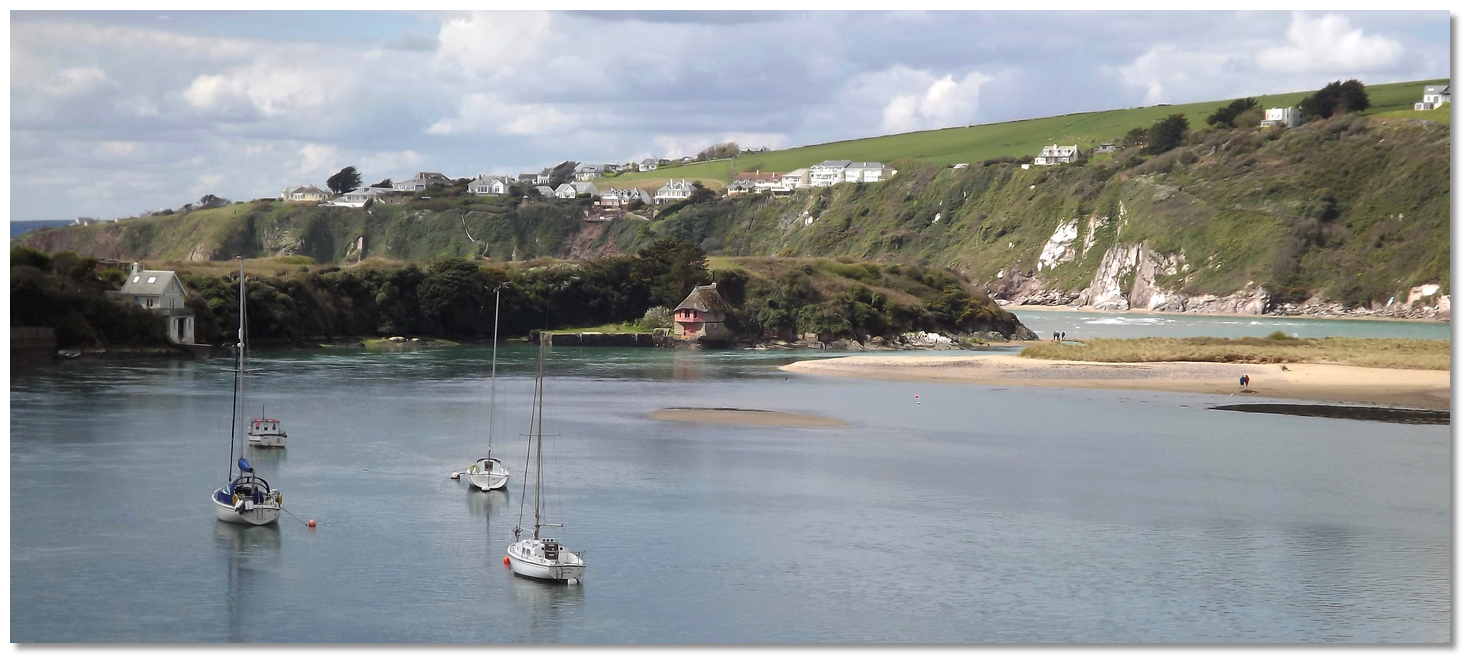 Boats on moorings at Bantham just within the entrance to the River Avon
Image: Mark Coleman via CC BY-NC 2.0
One mile within the entrance is the beautiful and unspoiled village of Bantham with a streetscape that is strikingly similar to how it was in the 1800s. There are several Grade II listed buildings including a row of well cared for 17th-century former fishermen’s thatched cob and stone cottages with tiny sash windows running down from the pub towards the beach. Though a challenge to enter, once in, the Avon River offers perfect shelter and it has to be one of the most pretty anchorages on the south coast.
 Burgh Island at low water
Image: c.art
Burgh Island lies close off the north entrance point of the river. It is a 47 metres high rounded lump of an island and a small ruined chapel stands on the summit. A church, with a conspicuous spire, stands at Bigbury, 1.8 miles to the northeast of the island. At low water, the island is connected with the land on the west side of the entrance to the Avon, by a sandy neck. A rocky ledge which dries at low water extends 400 metres in an easterly direction from its eastern point. 600 metres south-westward from the centre of the island and on the approaches to the river, is a dangerous sunken rock, known as the Blind Mare or Murray’s Rock.
 The cliffs between the Avon and the Erme
Image: Andrew via CC BY 2.0
Between the Avon and the Erme, a distance of 3 miles, the coast is composed of whitish cliffs, from 60 to 90 metres high, having their base fronted with projecting ledges and numerous scattered rocks. Near the River Avon, the cliffs are lower and are separated by small bays with sand and shingle beaches. In Challabrough Bay, the first westward of the Avon is a long sandy beach. Near the Erme end of the bay is Wells Rock, with 1.3 metres of water over it, which is the most outlying danger on this part of the coast. It lies a ½ mile from the shore at the of the eastern entrance point of the River Erme.
 The mouth of the Erme River with Edward's and Mary's Rock showing
Image: Andrew via CC BY 2.0
The mouth of the Erme River
 , located near the head of Bigbury Bay, can be identified by clumps of trees just within the west entrance point. The river dries and can only be entered by small craft with local knowledge.
 Erme River at low water
Image: Andrew via CC BY 2.0
The bar dries at low water, and vessels of up to 3 metres that can take to the mud can ascend the river for a little over ½ a mile when the water is smooth. This river cannot be entered when there is any swell to make broken water on the bar. Mary’s Rocks lie 800 metres outside the bar and dry at low water nearly across the entrance from the eastern shore. Edwards Rock, with 1.2 metres of water on it, is 400 metres outside them.
Stoke Point is a low peak with a light-coloured base. It is the southeast extremity of a hilly peninsula that forms the eastern entrance point of Wembury Bay and the south side of the mouth to the Yealm River. Conspicuous cliffs stand about ½ a mile northward of the point.
 Wembury Bay and Yealm head as seen from the west
Image: Michael Harpur
Yealm Head, situated about a 2¼ miles northeast of Stoke Point and 1.2 miles east of Great Mew Stone, is the western extremity of the peninsula. The outer or south point of Yealm Head is low at its extremity and may be known by having the measured-mile beacon, painted white, on its western face. The coast between them is craggy and reef-strewn, with numerous dangers lying within the 20-metre contour.
_showing.jpg) Wembury Bay with the Blackstone Rocks (or Church Ledge) showing
Wembury Bay with the Blackstone Rocks (or Church Ledge) showingImage: Andrew via CC BY 2.0
Between the Mew Stone and Yealm Head is a bight named Wembury Bay, which receives the waters of the Yealm River in its northeast corner. The bay has irregular depths of 3.4 to 7.3 metres, rock, sand, and gravel, with rocky patches near the shore. Two detached reefs, named the Slimers, 200 metres apart and partly dry at low water, lie on the western shore of the bay about 300 metres off the east side off Great Mew Stone.
 St. Werburgh's Church overlooking Wembury Bay and Great Mew Stone
Image: Michael Harpur
On the eastern shore are two patches called the Ebb Rocks, on the westernmost of which is 600 metres from the south point of Yealm Head, is a rock nearly awash at the lowest tides, that has come as a surprise to many vessels. The bay is ¾ of a mile deep, and the same in width at the entrance between the Slimers and Ebb Rocks. It can be used as an anchorage in settled or offshore conditions but it can only be considered a tide wait for vessels bound into the River Yealm.
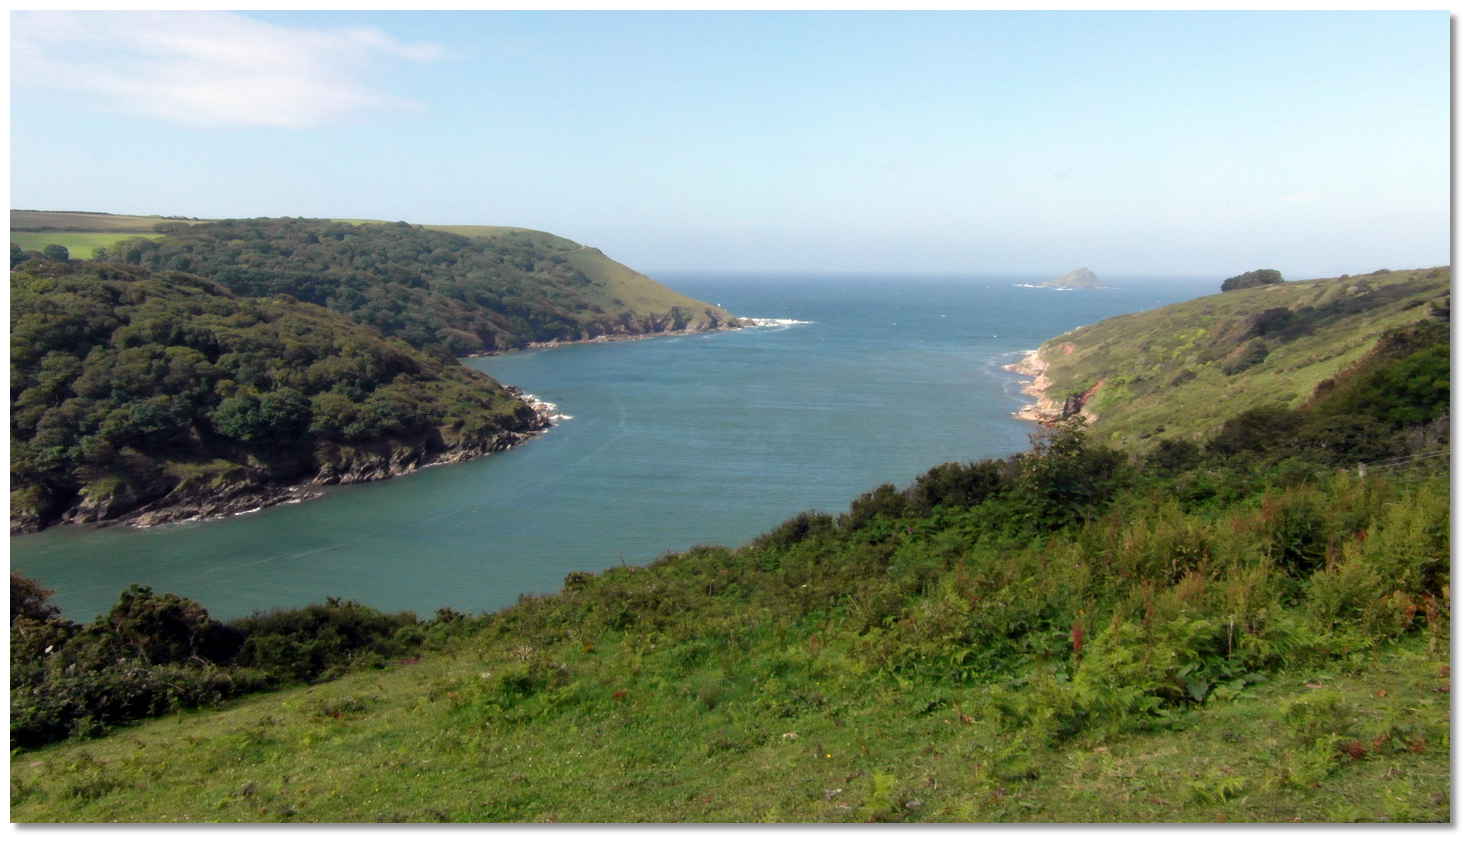 The entrance to the River Yealm
Image: Tom Bastin
Near the entrance of the River Yealm are two tidal ledges that materially reduce the space of navigable water in the bay. Blackstone Rocks or Church Ledge, which projects 400 metres from the shore in a southerly direction from St. Werburgh's Church, and Mouthstone Ledge, projecting 200 metres from the inner point of Yealm Head.
 The River Yealm as seen from the coastal path on it western side
Image: Andrew via CC BY 2.0
The River Yealm
 is a tranquil, unspoilt and very popular leisure harbour entered from the northeast part of Wembury Bay. It is easy to make out from being at the commencement of a long easterly range of cliffy shore and from the dark zigzag line marking its course through the coastal ranges 100 metres in height. Steep-sided and narrow, largely untouched and largely forested down to the river's edge it is simply beautiful.
 River Yealm
Image: Michael Harpur
The entrance lies between Season Point on the north and the inner point of Yealm Head on the south and it has a bar which dries to 0.6 metres. It is 350 metres wide and any vessel drawing more than 3 metres and waiting tide should not proceed beyond this. About a mile within its entrance are the waterfront towns of Newton Ferrers and Noss Mayo on its eastern side with ample berthing opportunities.
 Great Mew Stone and Little Mew Stone with Rame Head in the backdrop
Image: Nilfanion via ASA 4.0
The Great Mew Stone is a precipitous rocky islet 57 metres high, with scanty vegetation and a sharp apex, lying about ½ a mile southward from Wembury Point. The passage between is filled with rocky ledges and has a narrow channel only available for local boats with good a good working knowledge of the area. The Little Mewstone is a dark rock 15 metres high, situated about 100 metres southwestward of the Great Mew Stone.
 Great Mew Stone
Image: CC0
Between the islands of Great Mew Stone and Penlee Point opposite, 3.2 miles westward, is Plymouth Sound the entrance to the Port of Plymouth
 . Enclosed by the mouths of the River Plym and River Tamar, which are naturally incorporated into Plymouth Sound to form a boundary with Cornwall is the city of Plymouth. With a population of over quarter of a million, it is the 30th-most populous built-up area in the United Kingdom and is home to several marinas, docks, a ro-ro ferry terminal and HM Naval Base, Devonport, is situated in the west part of the port.
 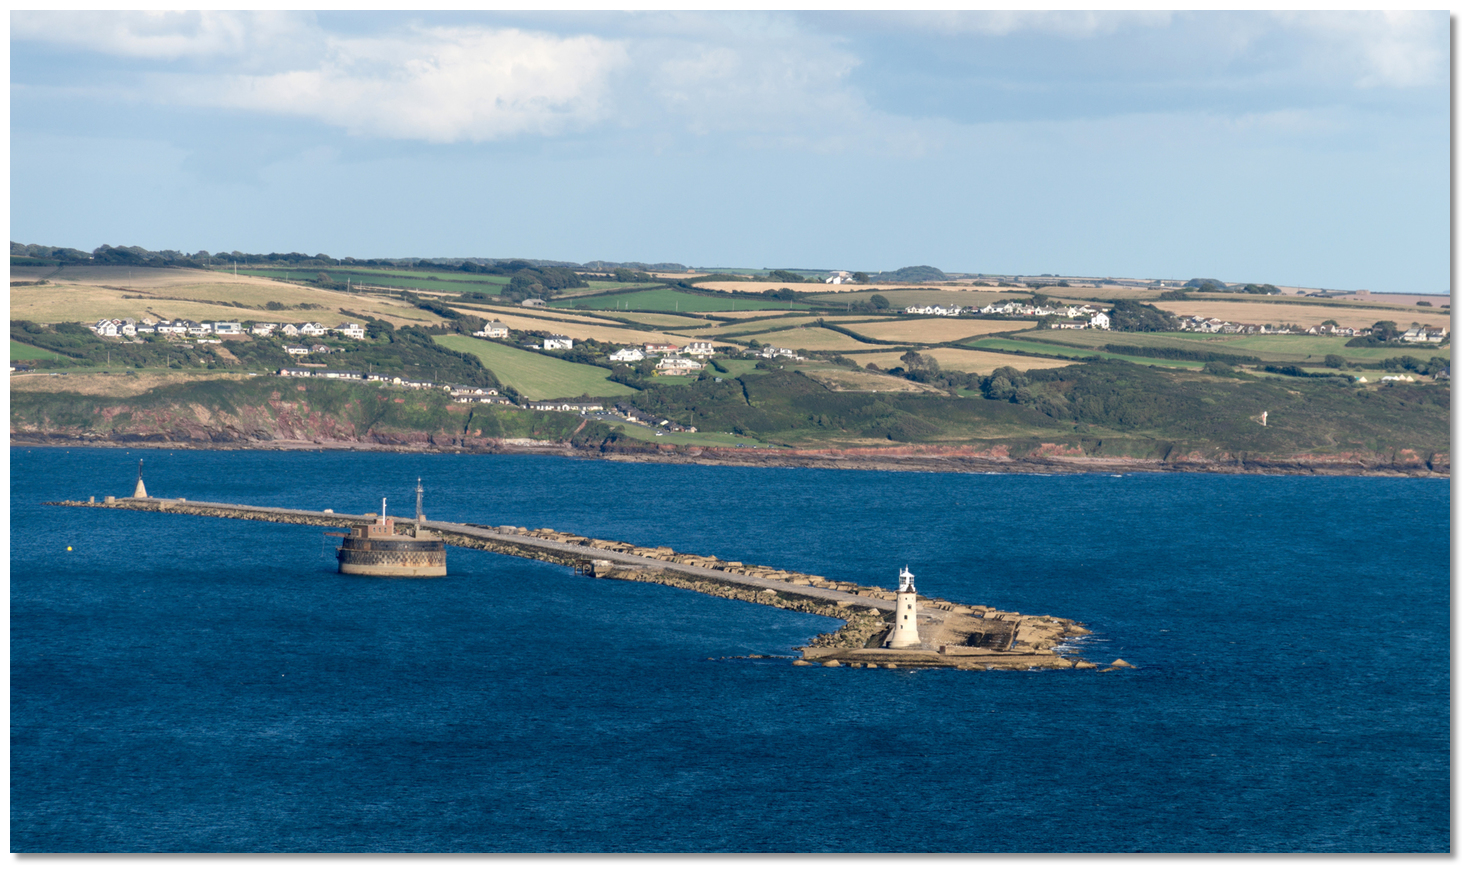 Plymouth Breakwater as seen from the western side above Kingsand
Image: Prtaylor73
The harbour is sheltered by the detached ¾ mile long Plymouth Breakwater. This breakwater lies at the east side of Plymouth Sound with its west end situated about 1½ miles northeast of Penlee Point. Plymouth Sound has general depths of 26 to 5.5 metres. The sound has several shoal
areas that are to the largest part the concern for commercial shipping but this is not a place for leisure craft to cut corners.
The dangers outside the breakwater of Plymouth Sound, are, on the eastern side of the reef off the Mewstone Ledge, the Shag Stone and rocks in its vicinity. On the western side is the Draystone Reef and in the centre the Knap, Panther, and Tinker Shoals which are more of a concern for large vessels.
The Shag Stone is a small square-headed rock about 2.5 metres above high water, lying mile from the Renney Rock that is always dry to 1.8 metres, with a reef of detached rocks dry at low water between them. It has a red and white beacon on it that is a conspicuous mark in the daytime and is on the outer edge of a rocky ledge which skirts the shore between the Mewstone and Bovisand Bay. To the northward of the Shag Stone as far as Andurn Point, this ledge extends a ½ mile offshore.
The outer Mewstone Ledge runs out 300 metres in a south-westerly direction from the peak of Little Mewstone and dries to 0.2 metres CD. The Shagstone beacon on with the breakwater beacon, at its eastern end, leads nearly ¼ of a mile westward of the Mewstone Ledge reef.
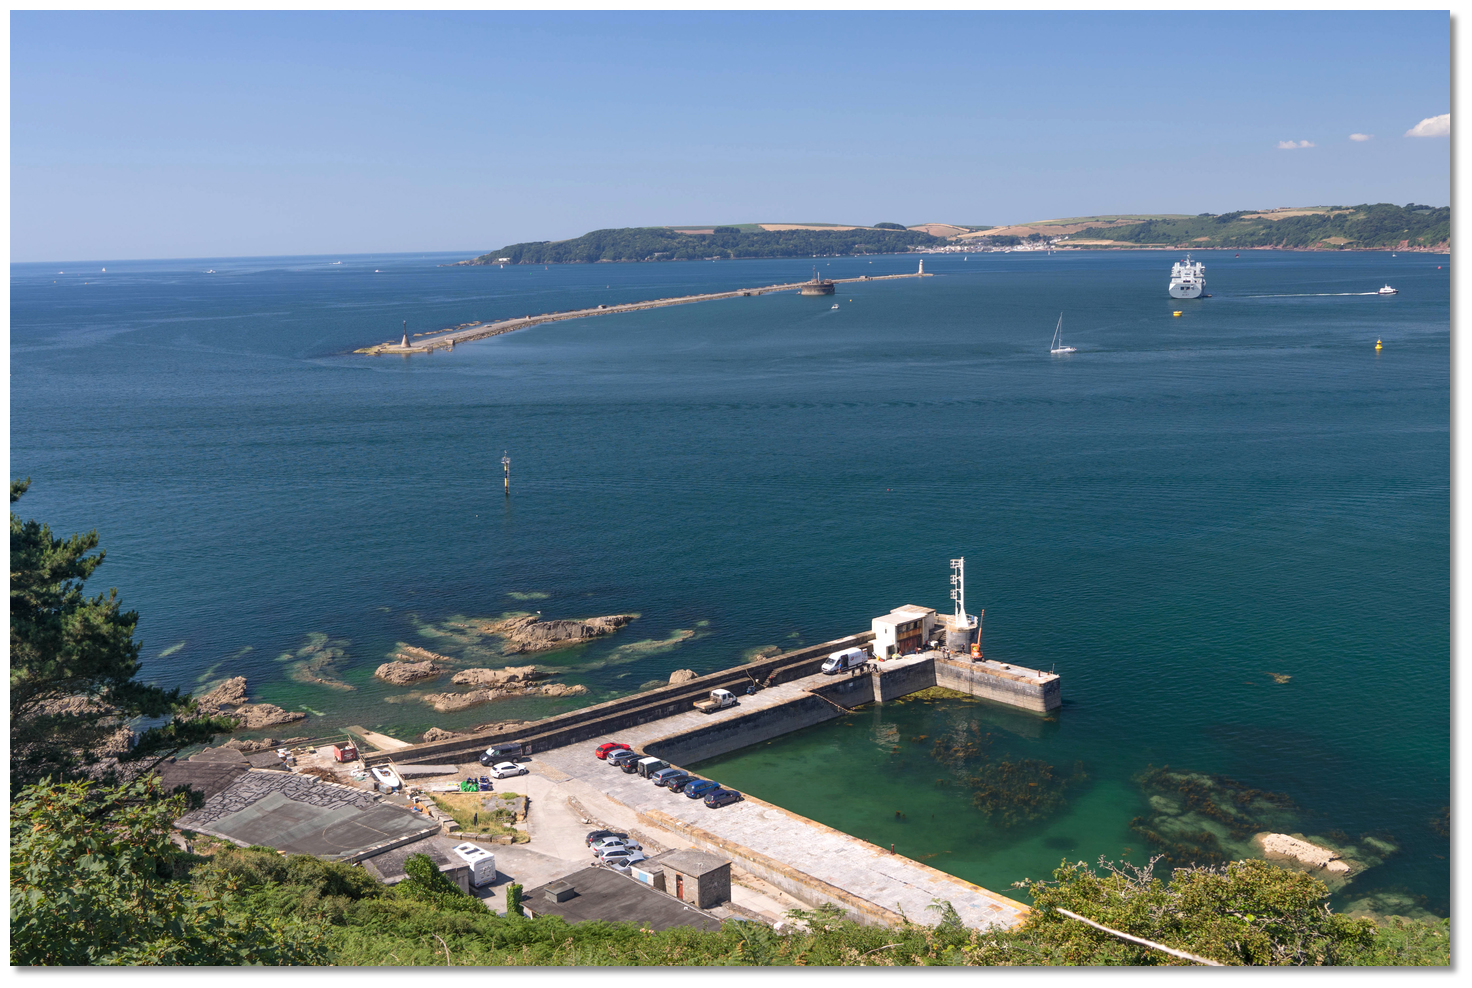 Plymouth Breakwater as seen from above Bovisand Pier
Image: Michael Harpur
On the western side, Draystone Reef projects nearly 300 metres to the southeast from Penlee Point and is marked by a port buoy, Fl(2)R.5s 300 southeast of its outer extremity.
 Penlee Point may be readily identified by a prominent white building
Image: Lewis Clarke via CC BY-SA 2.0
The Knap and Panther Shoals, southwest of the breakwater and marked by a starboard buoy, constitute nearly a continuous shoal of sand and rock but having 9.2 to 4.9 metres at low water over their shallowest heads, present little concern to leisure craft. Tinker Shoal is shallower with 3.5 metres over it could present deeper craft with an issue in a deep swell and it can have heavily breaking seas over it in developed southerly conditions. During these times the western entrance is the better option. It is a ¼ mile long east and west, about 200 metres wide. Tinker Shoal's centre lies ¾ of a mile south from the east end of the breakwater and is marked by cardinal at either end.
 The River Tamer is entered west of the city of Plymouth
Image: Michael Harpur
Above Plymouth, the River Tamar
 is navigable on the rise for 12 miles to Calstock where 0.7 metres LAT will be found. Hamoaze, entered from the west side of Plymouth Sound, is the lower part of the river and can be considered its river mouth.
  Calstock with its magnificent railway viaduct
Image: Michael Harpur
Though shallow in its upper reached, the River Tamar fairway carries 2.4 metres as far as Neal Point, 1¼ miles above Tamar Bridge. After this shallow patches will be encountered on the approaches increasingly encountered with diminishing deep pools further upriver.
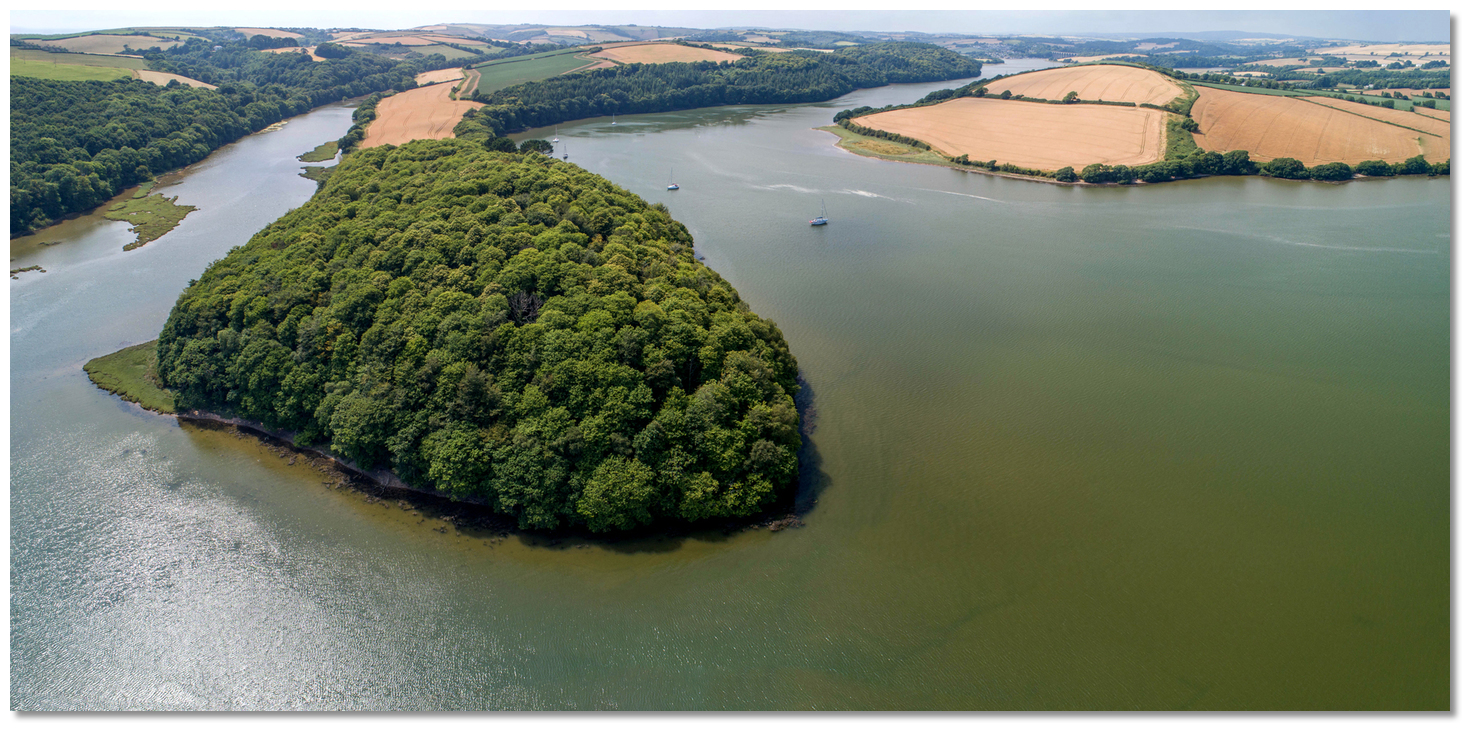 Dandy Hole anchorage St. German River
Image: Michael Harpur
The first major tributary to the Tamar St. German River which opens on the west side of the river below the Tamer Bridges and just past Devonport on the opposite bank. It has good water in its marked channel for 1½ miles and several deep pools after this. The tide flows up the St. German as far as Tideford, which is 6 miles from its junction with the Tamar, and the private quay at St German's, 2 miles below this, may be reached at high water by vessels drawing 1.8 metres that can dry when the tide is away.
 The River Tamer offers excellent cruising for deep and shallow draft vessels
alike
Image: Michael Harpur
The river and its surrounds are a World Heritage Site due to its historic mining activities and it is a cruising mecca for vessels that take to the mud. Deeper-draught vessels should not be put off as the river and its tributaries also offer a surprising amount of useful deep water berths with perfect protection.

 Rame Head as seen from the northwest
Image: Lee Morgan via CC NC-SA 2.0
This highly prominent headland of Rame Head is located at the west side of the entrance to Plymouth Sound and it appears from seaward as a conical hill. It rises to a height of 102 metres.
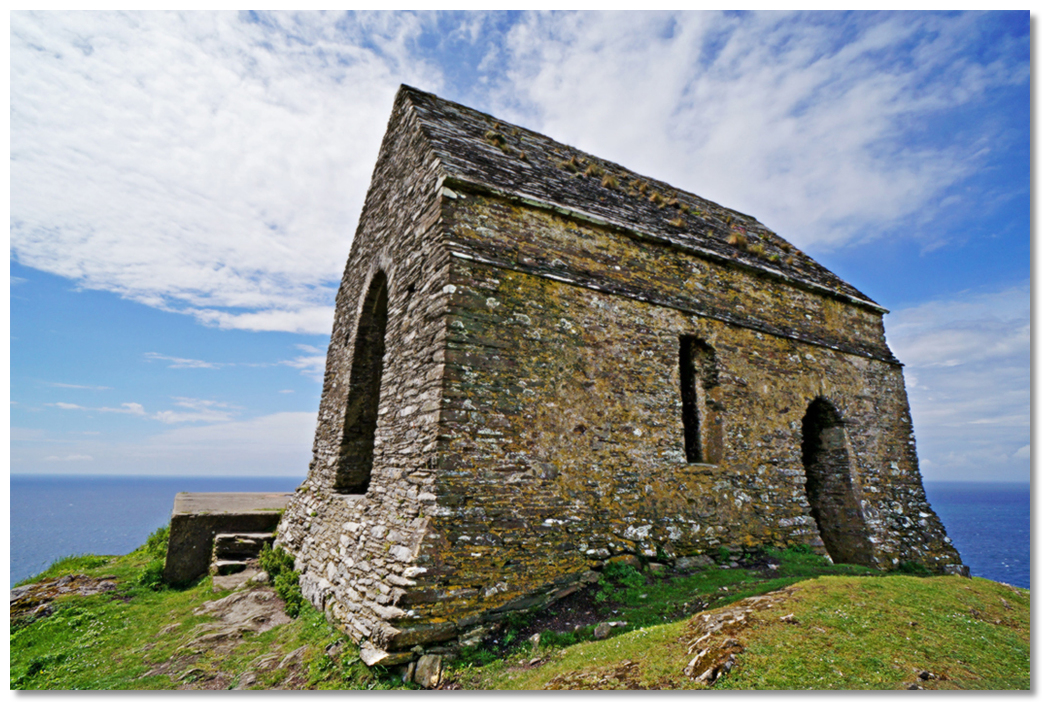 The chapel at Rame Head
Image: Joe D via CC ASA 4.0
From Rame Head the coast bends round north-westward for 4½ miles to Port Wrinkle, forming Whitesand Bay, which is exposed to the whole force of south-westerly gales. The bay has some shoals of which the Knight Errant Patch has a few shallow spots of 5 metres which can be turbulent.
The coast is high and rugged, the cliffs varying from 30 to 75 metres in height, and is bordered by alternate patches of sand and rock, which extend up to 200 metres from the foot of the cliffs. Vessels should not approach it within 10 metres at low tide.
A good anchorage with offshore winds can be found in the bight in the southeast part of this bay in Polhawn Cove over a sandy bottom. A detached rock called Peader Rock, which dries to 1 metre and covers at a quarter flood, lies off Queener Point that marks the entrance point in the cove ½ a mile north of Rame Head. There are also detached rocks awash at low water springs at the same distance off the southern point.
 The southern end of Whitesand Bay
Image: Philip Halling via CC BY-SA 2.0
About 4½ miles north-eastward of Rame Head is the tiny pier harbour of Portwrinkle which was founded as a pilchard fishery. The old 17th-century walls of the Banjo Pier are still standing providing limited shelter to small boats. The village has a harbour and two beaches are accessible from it. Although the village has no shops, apart from the beach car park cafe, there is a post office in the nearby village of Crafthole.
 Portwrinkle at high water
Image: Bob Jones via CC BY-SA 2.0
There are two channels into it between the rocks, supported by beacons that lead through the eastern and western channel. A small arms firing range is situated on the shore of Whitsand Bay, about 1½ miles east of Portwinkle. Red lights and red flags are displayed from flagstaffs in its vicinity when firing is in progress.
 Portwrinkle at low water
Image: Nilfanion via ASA 4.0
The Long Stone Rock, 18 metres above high water, lies close to the land, a mile westward Portwrinkle and of 4 miles from the entrance to Looe Harbour. About 2 miles eastward of Looe is Seaton Beach and Head. The cliffs along this part of the coast are from 20 to 90 metres high, and the outlying rocks extend in some places up to a ⅓ of a mile from the shore.
 The entrance to Looe Harbour
 Image: Michael Harpur
Looe Harbour
 is situated 9 miles west by northwest from Rame Head and about a mile north of Looe Island at the mouth of the River Looe. It is a small drying harbour used by small fishing vessels and pleasure craft that can take-to-the-hard. It has depths of 4 metres at HWS and 3 metres at HWN and the entrance is 60 metres wide.
 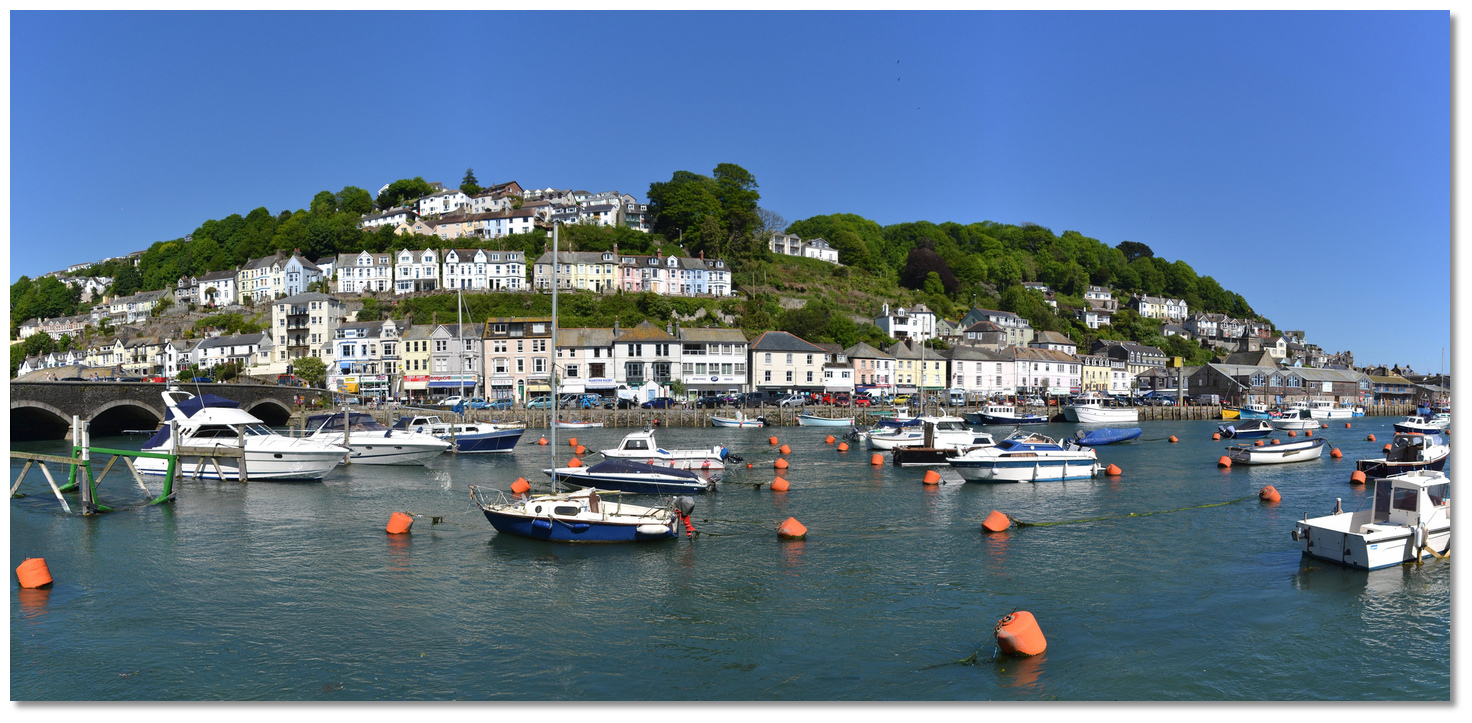 East Looe
Image: Robert Pitman
A stone bridge spans the river about 0.4 miles above the entrance. Vessels up to 16 meters in length and 2.9 metres draft can enter but must be able to take-to-the-hard as at the lowest tides the harbour dries to the entrance. It is possible to anchor in Looe Bay which affords good sand holding and shelter from west winds and is exposed only to the south through east.
 Looe Bridge at low water
 Image: benjgibbs
Looe Island, also known as St. Georges Island, lies ¾ of a mile south of the entrance to the harbour close south of Hannafore Point to which, at low-water springs, it is nearly connected with the island by flat shelving rocks. The small island is a ⅓ of a mile wide and 45 metres high.
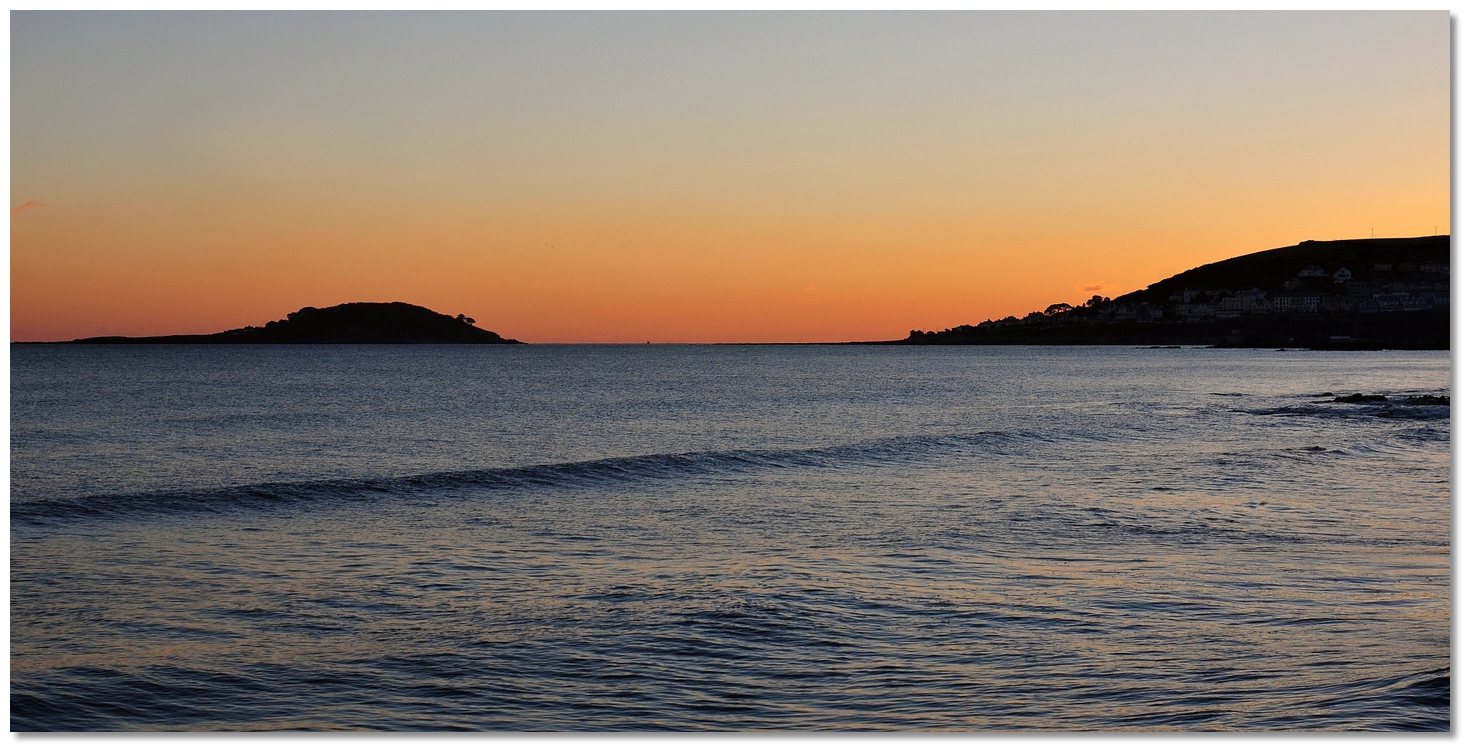 Looe Island at sunset
Image: Robert Pittman
A ¼ of a mile off its southeast extremity are the Ranny Rocks that dry to 4.6 metres and cover at one-quarter flood. The lit ‘Ranny’ south cardinal is moored 250 metres from The Rannys, Q(6)+LFl.15s.
 Landing beach on the southeast side of Looe Island
Image: Robert Pitman
There is a small boat passage between Looe Island and the mainland, from Portnadler Bay to Looe Bay, over the shelving rocks that nearly dry at low-water springs. At most other times the channel is available and local boats will be seen passing between Looe Island and the mainland. But this is strictly the domain of local boaters and newcomers should not attempt the rocky passage without the benefit of local knowledge. Vessels proceeding to Looe Harbour should round the island at a distance of at least 1½ miles and then pass to the east with Looe Light bearing not more than 313°T.
 Looe Island as seen from the west
Image: Peter Edgeler via CC NC 2.0
From Hannafore Point the shore trends westward for nearly a mile from which it turns south for a
⅓ of a mile to Hore Stone Point rising all the time with cliffs from 10 to 20 metres high.
 Hore Stone Point seen over Talland Bay
 Image: Edmund Shaw via CC BY-SA 2.0
The shore then bends to the northwest forming Talland Bay, which is a mile wide and bordered by a rocky foreshore, before turning south to Downend Point. A prominent monument is situated on Downend Point which should be given a wide berth as it foul with rocks that extend out 200 metres offshore.
 Polperro Harbour situated at the head of a small narrow inlet
Image: Michael Harpur
The Downend Shoals lie a mile southward of the headland. With a least depth of 2.6 metres over them, they should be passed well to seaward if there is any sea running. A ⅓ of a mile west of the monument and close east of the Polperro Harbour, a light is shown from a pillar, 3 metres high that stands on Spy House Point. The white sector 288° - 60° clears the dangers west and east of Polperro Harbour.
 Polperro Harbour's Peak Rock with Spy House Point in the backdrop
Image: Nilfanion via ASA 4.0
Polperro Harbour
 is situated a ½ a mile west of Downend Point and 1 mile eastward of Nealand Point. It is a small narrow inlet at the head of which is the fishing-town and tidal harbour of Polperro that is used by fishing vessels and leisure craft. The entrance to the inner harbour is about 10 metres wide. The inner harbour dries to 2 metres and more but it has depths of 3.4 metres at HWS and 1.5 metres at HWN.
 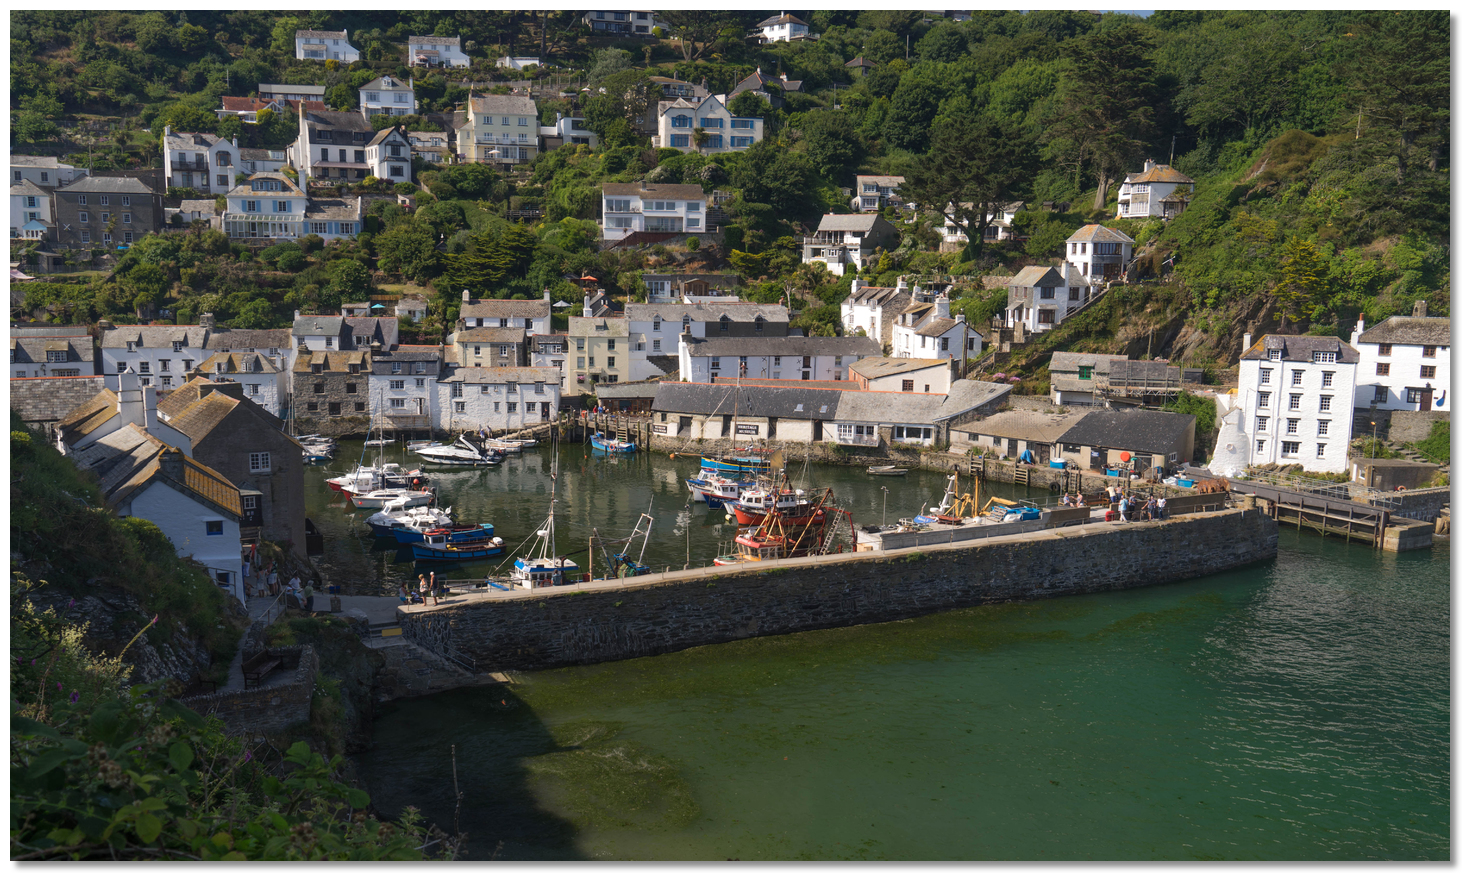 Polperro Harbour
Image: Eugene Birchall via CC BY-SA 2.0
The sand dries to just above the East Pier, a distance of 50 metres outside the entrance to the inner harbour, at the lowest tides, but beyond this, the depth gradually increases to 3.8 metres where there are moorings. The harbour is principally a tourist town today as it is exceptionally pretty. By arrangement with the harbourmaster, it offers up to two medium-sized vessels the possibility of drying in the inner harbour or mooring afloat in its approaches.
 Polperro Quay
Image: Nick Amoscato
Vessels intending on visiting the harbour should note the position of the Polca Rock, with 1 metre over it, situated about 160 metres southwest of the light the prominent light that stands on Spy House Point. The harbour is approached from southeastward, aligning the south face of East Pier with the east face of West Pier to create the safe approach alignment of 310° T.
 Polperro's entrance
Image: Nick Amoscato

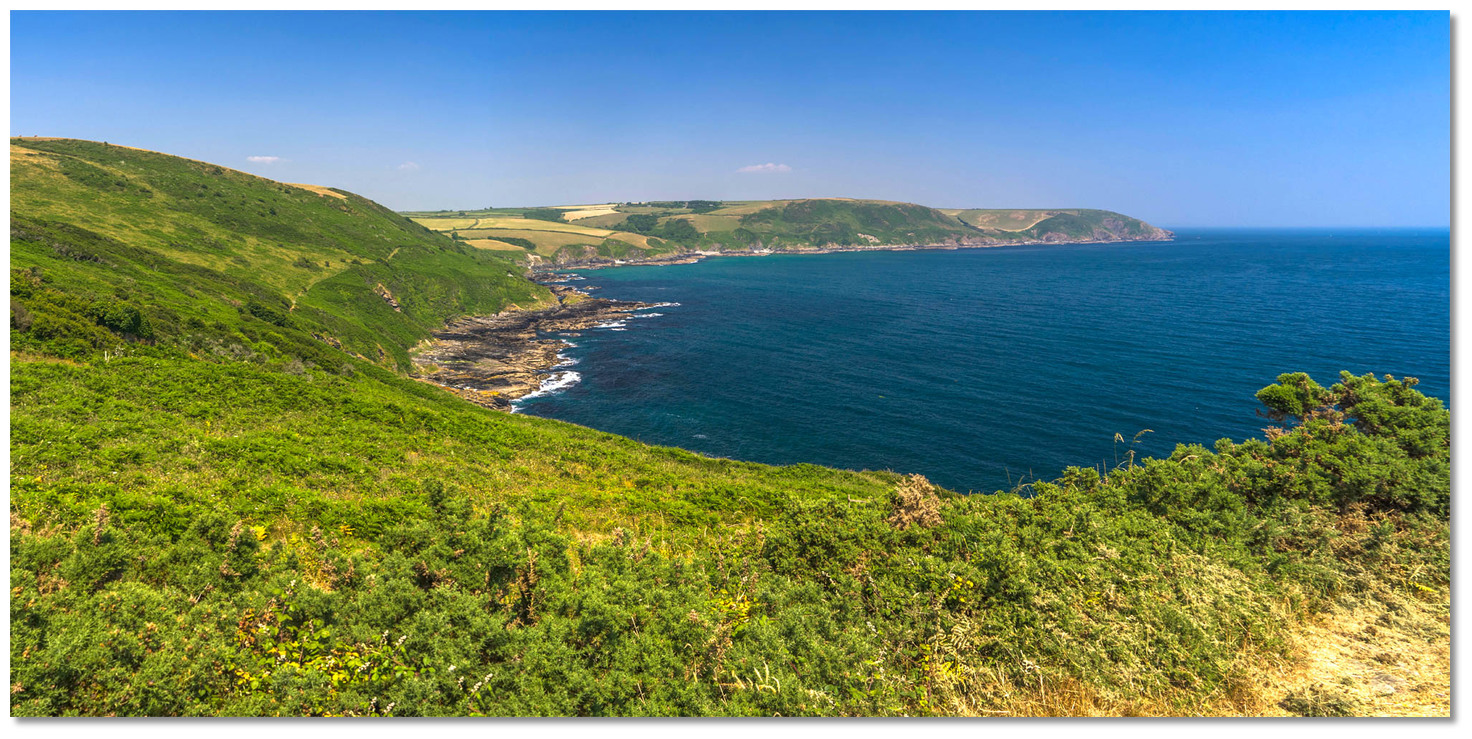 Lantivet Bay as seen from Pencarrow Head
Image: Michael Harpur
The coast trends southwest by west for 1½ miles from Downend Point to Nealand Point and the rocks extend 200 metres offshore. Nealand Point situated a mile westward of Polperro is remarkable for its overhanging cliff. It has Larrick Rock that dries to 4.3 metres and covers at the last-quarter flood, 300 metres from Nealand Point. Shag Rock kept open of Lyson Point, to the northwest, will lead south of it. Black Bottle Rock open of Pencarrow Head, to the west, also works.
 Pencarrow Head
Image: Nilfanion via CC ASA 4.0
The coast from Nealand Point trends in a westward direction for nearly 4 miles to Fowey, and between them are Lantivet and Lantic Bays separated by the cliffy 80 metres high Pencarrow Head. The head lies 1¾ miles east of the entrance to Fowey Harbour and makes a good landmark for the harbour from seaward. The cliffs vary from 10 to 60 metres in height, and the rocks uncover nearly 200 metres offshore.
 Lantic Bay as seen from the spine of Pencarrow Head
Image: Michael Harpur
The primary outlying danger for vessels approaching from the east is the Udder Rock that lies a ½ mile off the eastern shore of Lantivet Bay. It uncovers to 0.6 metres at the lowest tides and is marked by the lit 'Udder Rk' south cardinal mark, VQ(6)+LF1.10s, moored in 20 metres about 400 metres south of the danger. A line of bearing 283°T of a white mark on the west side of Lantic Bay, just open of Pencarrow Head, aligns over the position of Udder Rock so that anything higher clears the danger. There is also ample deep water to pass between the rock and the mainland and keeping Looe Island shut in by Nealand Point passes inshore of the rock.
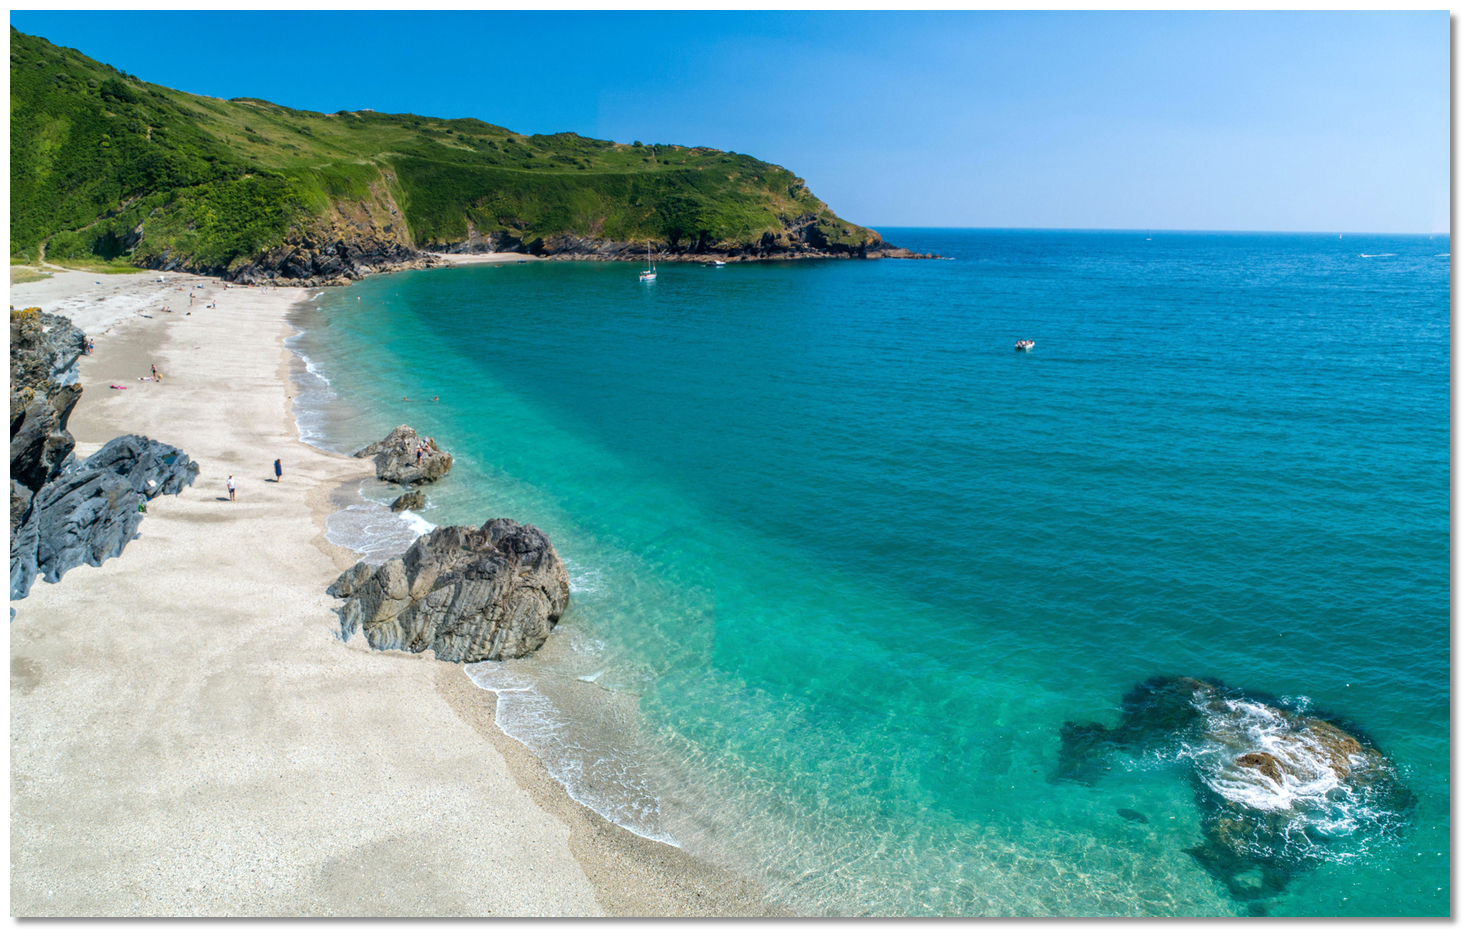 Lantic Bay
Image: Michael Harpur
The ½ mile wide and crescent-shaped Lantic Bay
 to the west of Pencarrow Head is wide open to the Atlantic. However, with a shoreline that shelves quite steeply, high sheltering emerald cliffs with a lovely wide horseshoe of pale sand that is lapped by clear, clean, turquoise water, it makes a very attractive day anchorage for beachgoers. On a fine summer’s afternoon, in offshore winds and the absence of any swell, there will usually be a couple of boats from Fowey or Polperro anchored offshore in the northeast corner.
 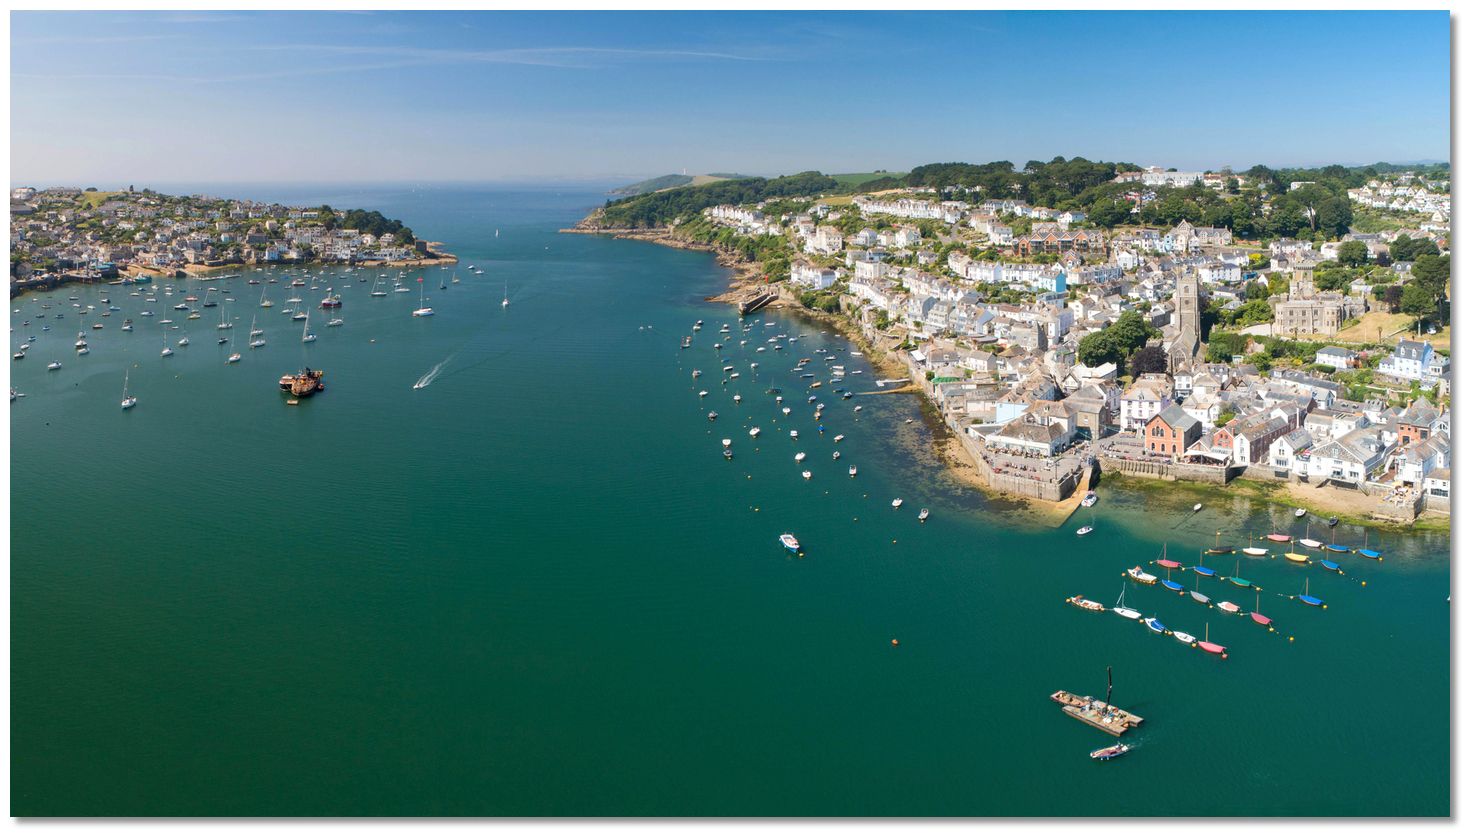 Fowey and Polruan
Image: Michael Harpur
Fowey
 is a small harbour situated just within the entrance of the River Fowey, about 1⅓ miles northeast of Gribbin Head. Fowey is a natural deep-water harbour and entry into the harbour is straightforward by day or night and at all states of the tide. It is a commercial port and an extensive yachting centre.
  Yacht entering Fowey Harbour
Image: Nilfanion via ASA 4.0
The entrance lies between Punch Cross Rocks off Saint Saviour’s Point on the east side and St. Catherine’s Point, on the west side, about 200 metres west by northwest. The harbour entrance takes a north by northeasterly course and then it turns northeast to the swing ground area off Fowey Town Quay. The fairway as far as Wiseman’s Point, 1½ miles above the entrance, has a least depth of 7.0 metres and the town of Fowey stands on the west bank of the river, a ½ mile within the entrance.
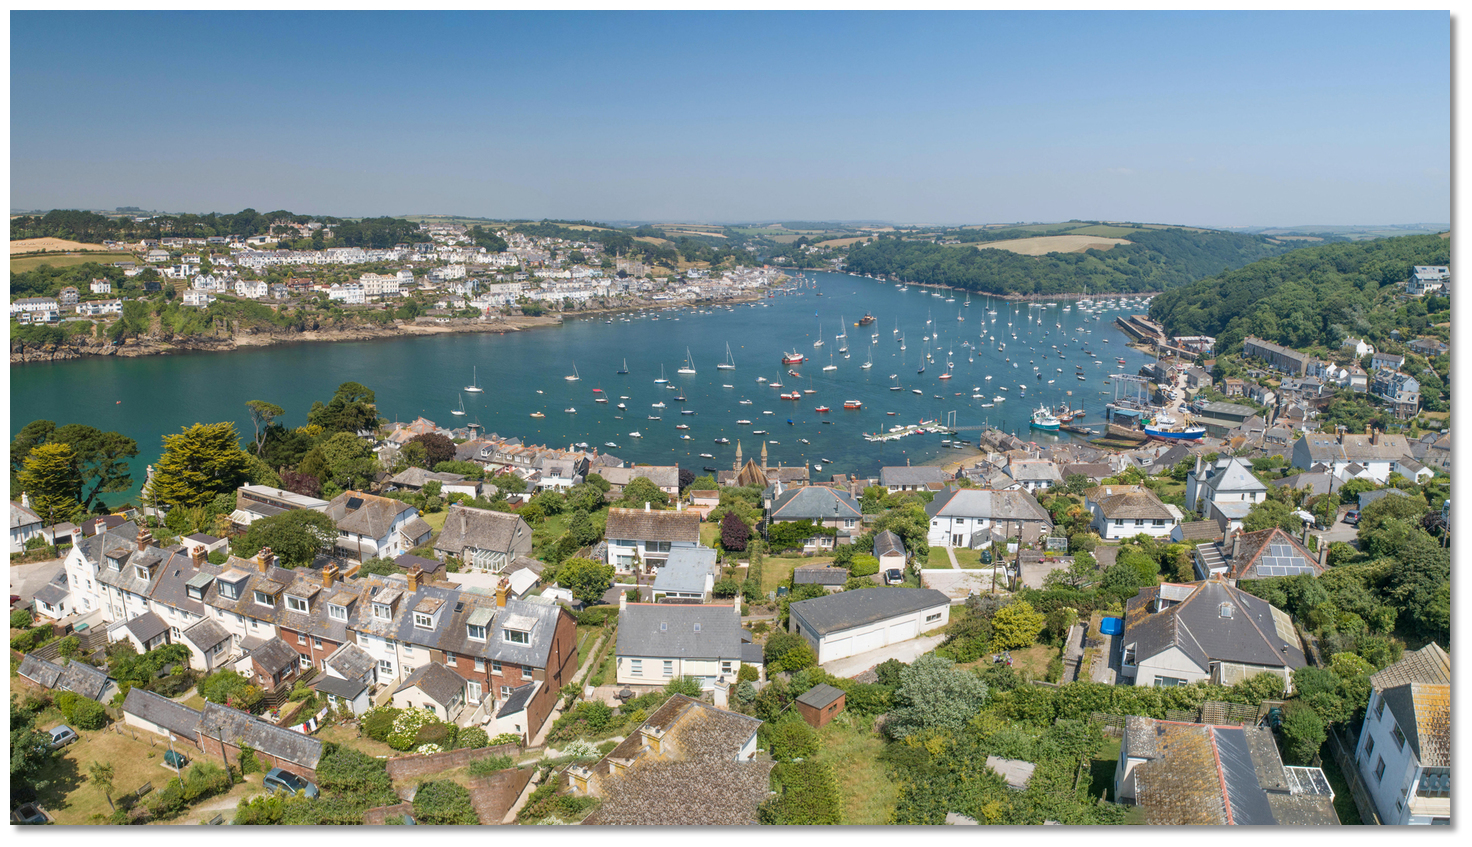 Fowey as seen from above Polruan
Image: Michael Harpur
The village of Polruan lies in a small bight just within the eastern point of entrance. The harbour authority provides a range of sheltered deep water moorings throughout the estuary for visiting boats.
 Lostwithiel's medieval quay
Image: Michael Harpur
The shores are well wooded for a long distance above the town and very pretty. The River Fowey then trends to the northward and is navigable at high-water for 5 miles toward its ancient river port at Lostwithiel where a medieval road bridge marks the head of navigation. Vessels drawing up to 2m can proceed to Lerryn or Lostwithiel but good local knowledge is required.

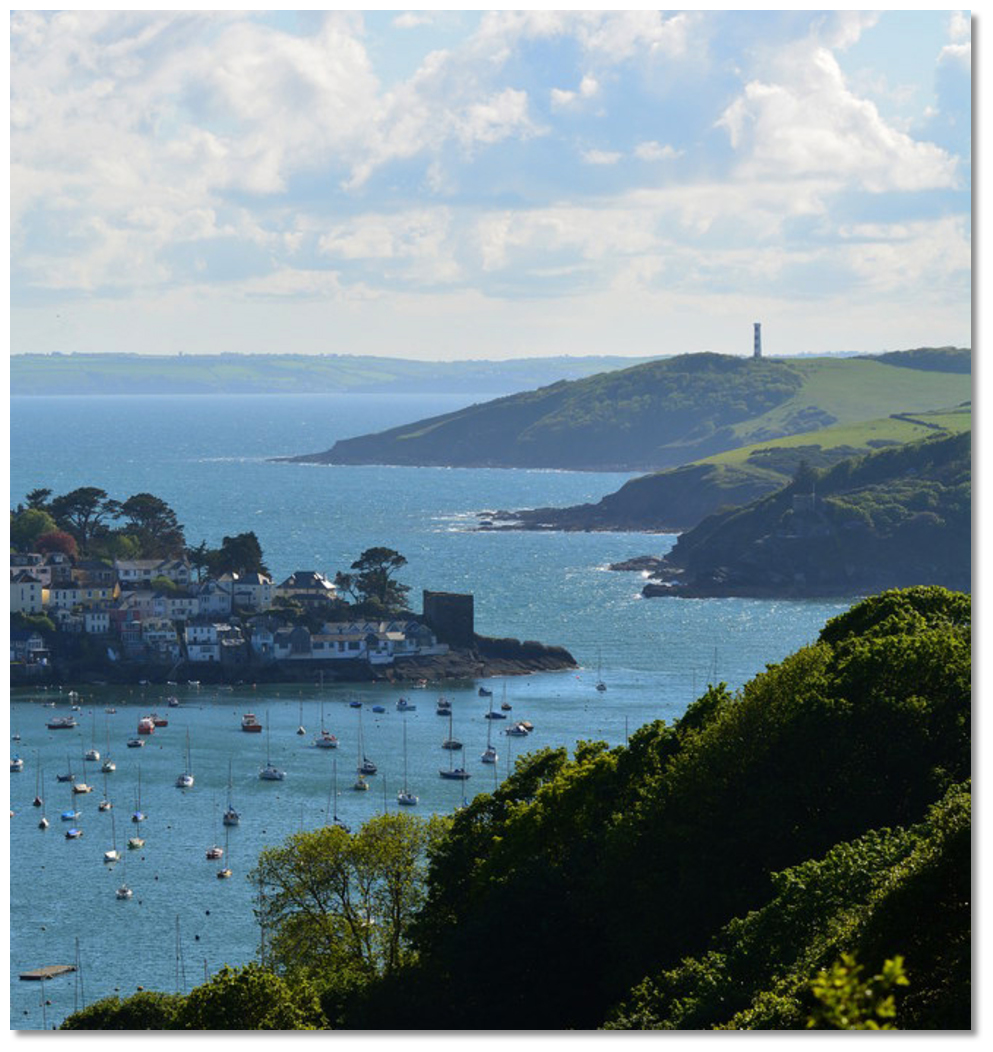 Gribbin Head as seen from Fowey Harbour
Image: Edmund-Shaw via CC BY-SA 2.0
St. Austell Bay is bounded to the east by Gribbin Head and to the west by Black Head 3¼ miles west by southwest. Gribbin Head may be easily recognised by a conspicuous square beacon tower 26 metres high, with red and white horizontal stripes, which stands 104 metres above high water. The head is bordered with numerous rocks on which the sea breaks heavily in bad weather.
 Cannis Rock south cardinal with Gribbin Head and its daymark in the backdrop
Image: Graham Rabbits
The dangerous outlying Cannis Rock lies a ¼ mile south-eastward from the beacon. Cannis dries to 4.3 metres and covers at three-quarters flood. It is marked by the 'Cannis Rk' south cardinal, Q(6)LF1.15s, moored a ⅓ of a mile southward. Keeping Dodman Point open to seaward of Gwineas is a sight line that passed east of the rock.
 Keeping Polruan Point Block house in line with memorial on Penleath Point leads
inside Cannis
Image: Michael Harpur
There is also a 200-metre wide passage with 3 metres of water between Cannis and the mainland which can be used when the rock is showing. Keeping the ruins of the blockhouse on Polruan Point, within and on the east side of the entrance to Fowey, in line with the conspicuous memorial on Penleath Point, 048°T, leads through this cut.
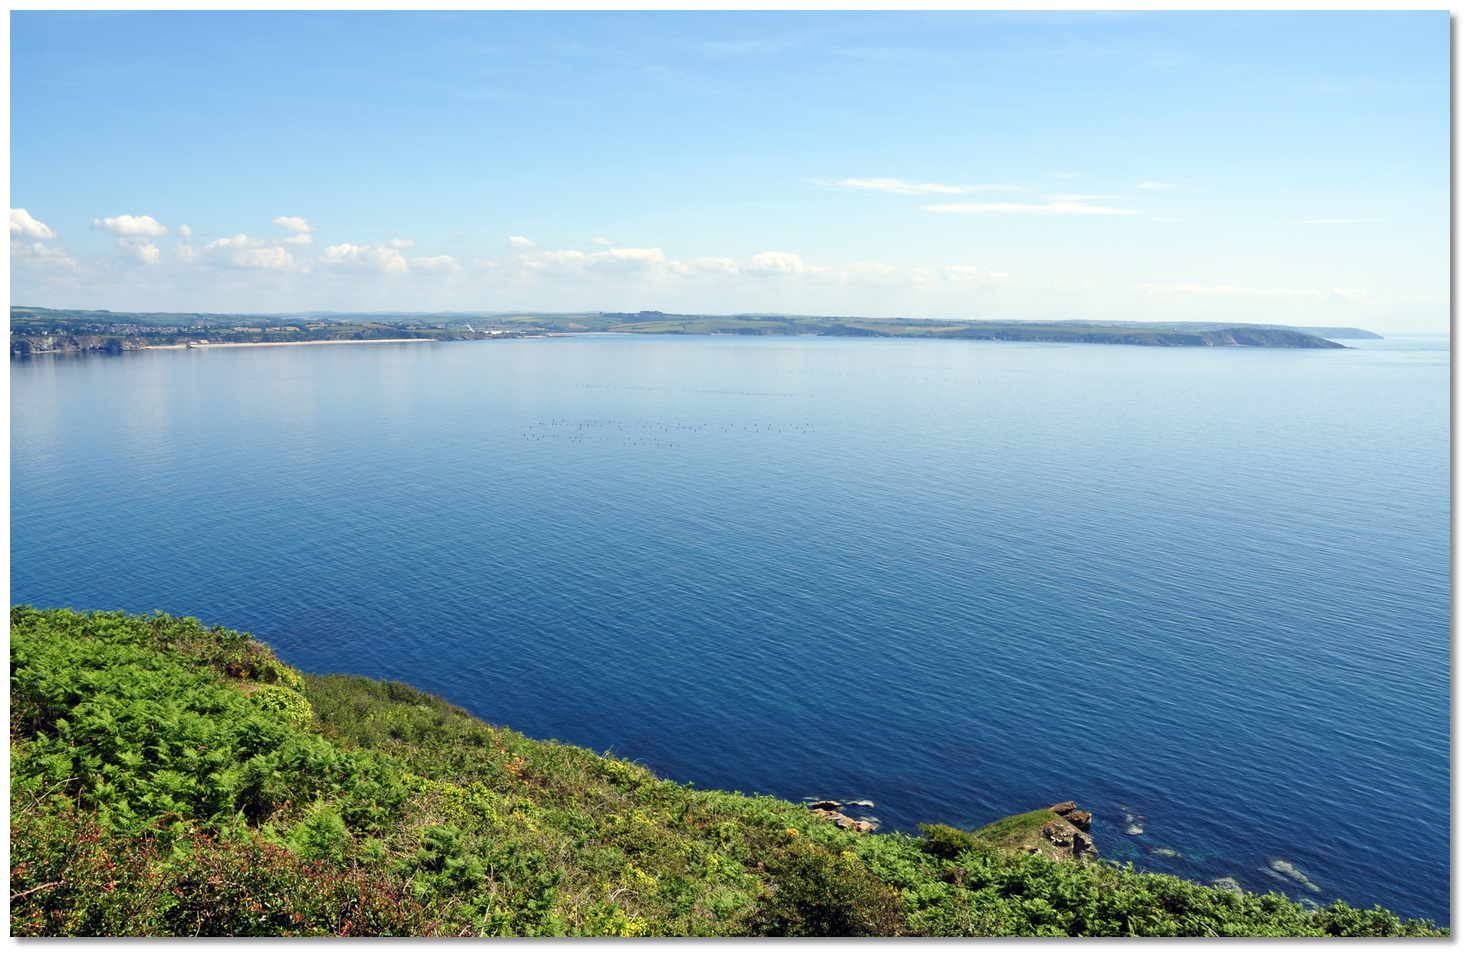 Tywardreath Bay, in the northeast corner of St. Austell Bay, as seen from
Gerranis Point
Image: Nilfanion via ASA 4.0
Rocks extend nearly 200 metres off Little Gribbin Point that marks the southeast extremity of Tywardreath Bay which lies in the northeast corner of St. Austell Bay.
 Polkerris Quay
Image: Nilfanion via ASA 4.0
The small drying harbour of Polkerris
 is situated a mile northward of Little Gribbin Point. The harbour consists of a single 18th-century pier, about 100 metres long, that curves around from the southern shore and the former cellars, boathouses, slipways behind it that date from when it was the primary fishing harbour of St. Austell Bay. The village consists of a small cluster of houses fronted by a beach that is constrained by the area of level ground at the foot of the steep valley behind.
  Polkerris as seen from the southwest
Image: Michael Harpur
The small harbour dries to 2.7 metres but has a depth of 4.2 metres at high-water springs and 3 metres at neaps. It provides some shelter to boats that can take-to-the-bottom from the southwest but the harbour area remains open to the west. There is, however, an excellent anchorage in fine sand holding outside the harbour in any easterly winds.
Image: Michael Harpur
The drying flat of Par Sands lies at the head of Tywardreath Bay. At the lowest tides, the sand dries out to the Killyvarder Rocks, which lie a ⅓ of a mile southeast. About 300 metres in extent, and covered at one-third flood, the Killyvarder Rocks dry to 2.4 metres and are marked by unlit starboard beacon on their western extremity.
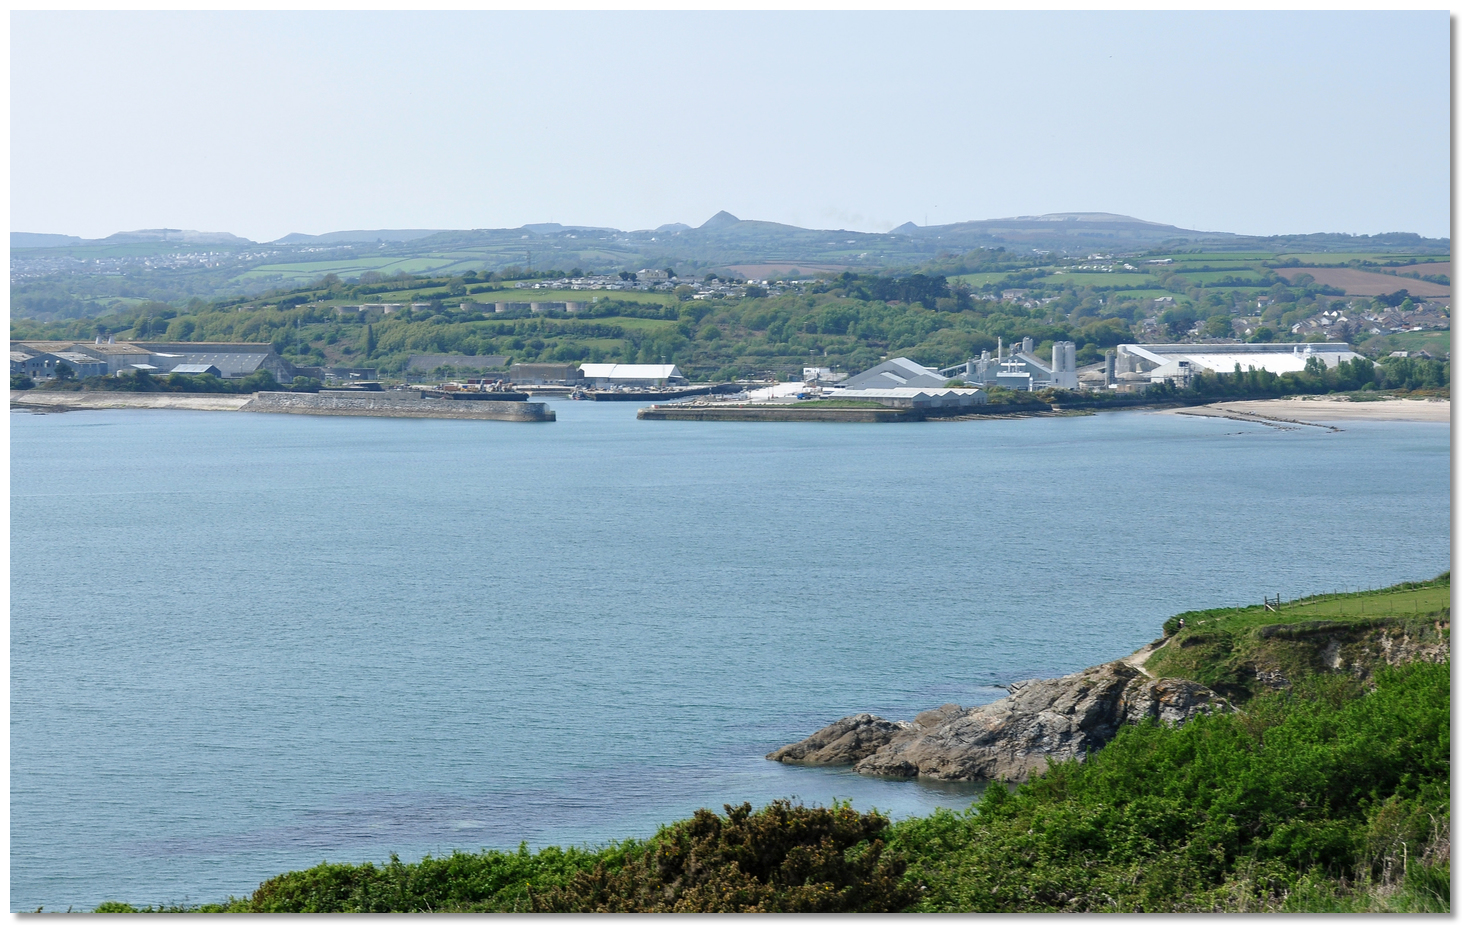 Par Docks as seen from near Polkerris
Image: Nilfanion via ASA 4.0
At the western side of Par Sand, ¾ of a mile to the northeast of Polkerris and in the northeast part of Tywardreath Bay are the industrial buildings connected to the drying harbour of Par
 . The harbour closed to commercial traffic in 2009 and it is operated by the French mineral extraction company Imerys. Today the St Austell Bay Boat Club use the harbour's slipway facilities.
  Par Harbour
Image: Michael Harpur
A good anchorage is available in offshore winds along the shore to the south of it. The primary danger is a rocky ledge called the Spit Rocks that extends southwestward from the breakwater. It extends out 300 metres from Spit Point, southward of the western side of the disused industrial area, where the Bream Rocks dry to 3.4 metres. It remains foul out to 200 metres for a ⅓ of a mile westward to Fishing Point. The 2-metre contour will be found about 50 metres or less from the ledge.
The harbour could be used in an emergency. Formed by two piers, the harbour basin has three quays. It is tidal and vessels lie aground at low water. The entrance is 38 metres wide and it can support vessel carrying 3.4 metres draft during neaps and vessels with drafts up to 5.2 metres at HWS. However, since sluicing and dredging ceased many years ago the harbour has started to silt up. So these depths may no longer be available.
 Charlestown Harbour as seen from the south
Image: Michael Harpur
Charlestown Harbour
 lies in the northwest part of St. Austell Bay about 2¼ miles westward of Par. Built in the late 18th-century, and has remained relatively unchanged up to the present day, it is historically very pretty and Grade II listed. Charlestown can only be approached in offshore winds or calm weather and the harbour is usually closed during south-easterlies. A red light is shown from a flagstaff at the north side of the entrance when the harbour is closed. The best seamark for the harbour is a conspicuous hotel stands at Crinnis, ¾ of a mile eastward of the harbour.
  The inner wet basin of Charlestown Harbour
Image: Michael Harpur
Charlestown is entered between two piers 13.7 metres wide and consists of an outer tidal basin and an inner wet basin is entered between lock gates. The outer basin dries at LWS but has depths of 4.3 metres at HWS and 3 metres at HWN. The inner wet basin lock gates are 10.7 metres wide and it has depths similar to the entrance of the outer basin.
 Yacht alongside in Charlestown's inner wet basin
Image: Michael Harpur
The inner wet basin is capable of supporting commercial ships of up to 57 metres with a maximum draft of 4.2 metres. With prior notice to the harbourmaster, it is possible to enter the wet basin at HW ±0200 when the lock opens on request. A wait-buoy is positioned outside of the harbour. Alternatively, dry out in the outer basin or anchor off in settled or moderate offshore conditions offshore.
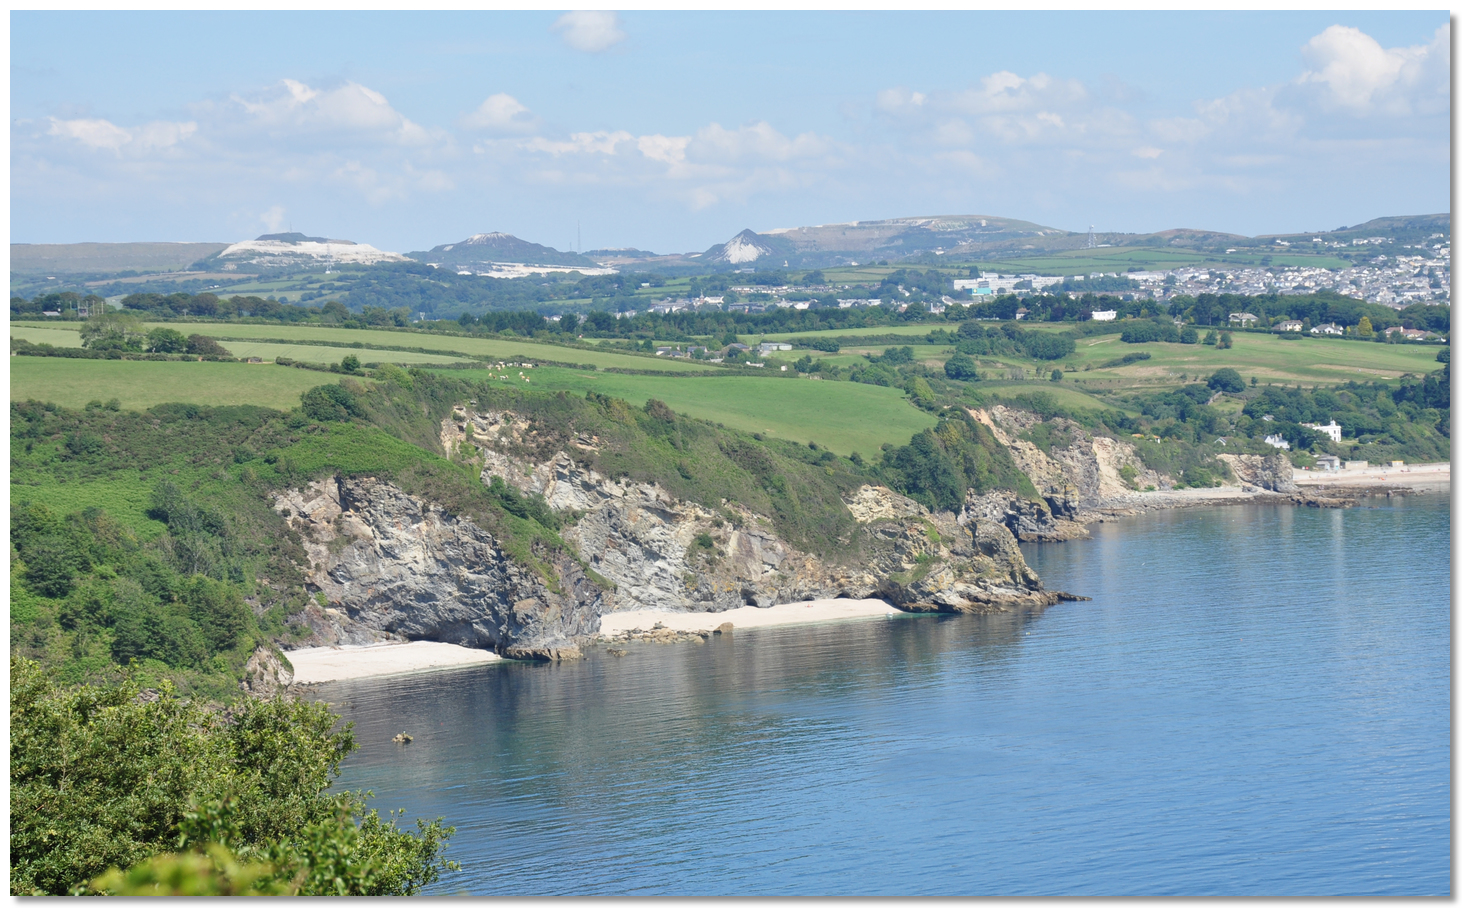 St. Austell Bay’s Ropehaven Roads as seen from Gerrans Point
Image: Nilfanion via ASA 4.0
St. Austell Bay’s Ropehaven, located in the southwest corner bight near Black Head, provides a good anchorage in westerly component conditions as does the sandy bottom, between Polkerris Harbour and Little Gribbin Point in easterly gales.
 Black Head as seen from Polrudden Cove ¾ of a mile southwest
Image: Nilfanion via ASA 4.0
Black Head, which is bold and steep-to, is the western entrance point of St. Austell Bay and the northern entry point of Mevagissey Bay of which Chapel Point, located about 2½ miles southward, forms the southern entrance point. The shore from Black Head is cliffy and bends around south by southwest for about 1¼ miles to the beach resort village of Petewan which extends across a coastal bight.
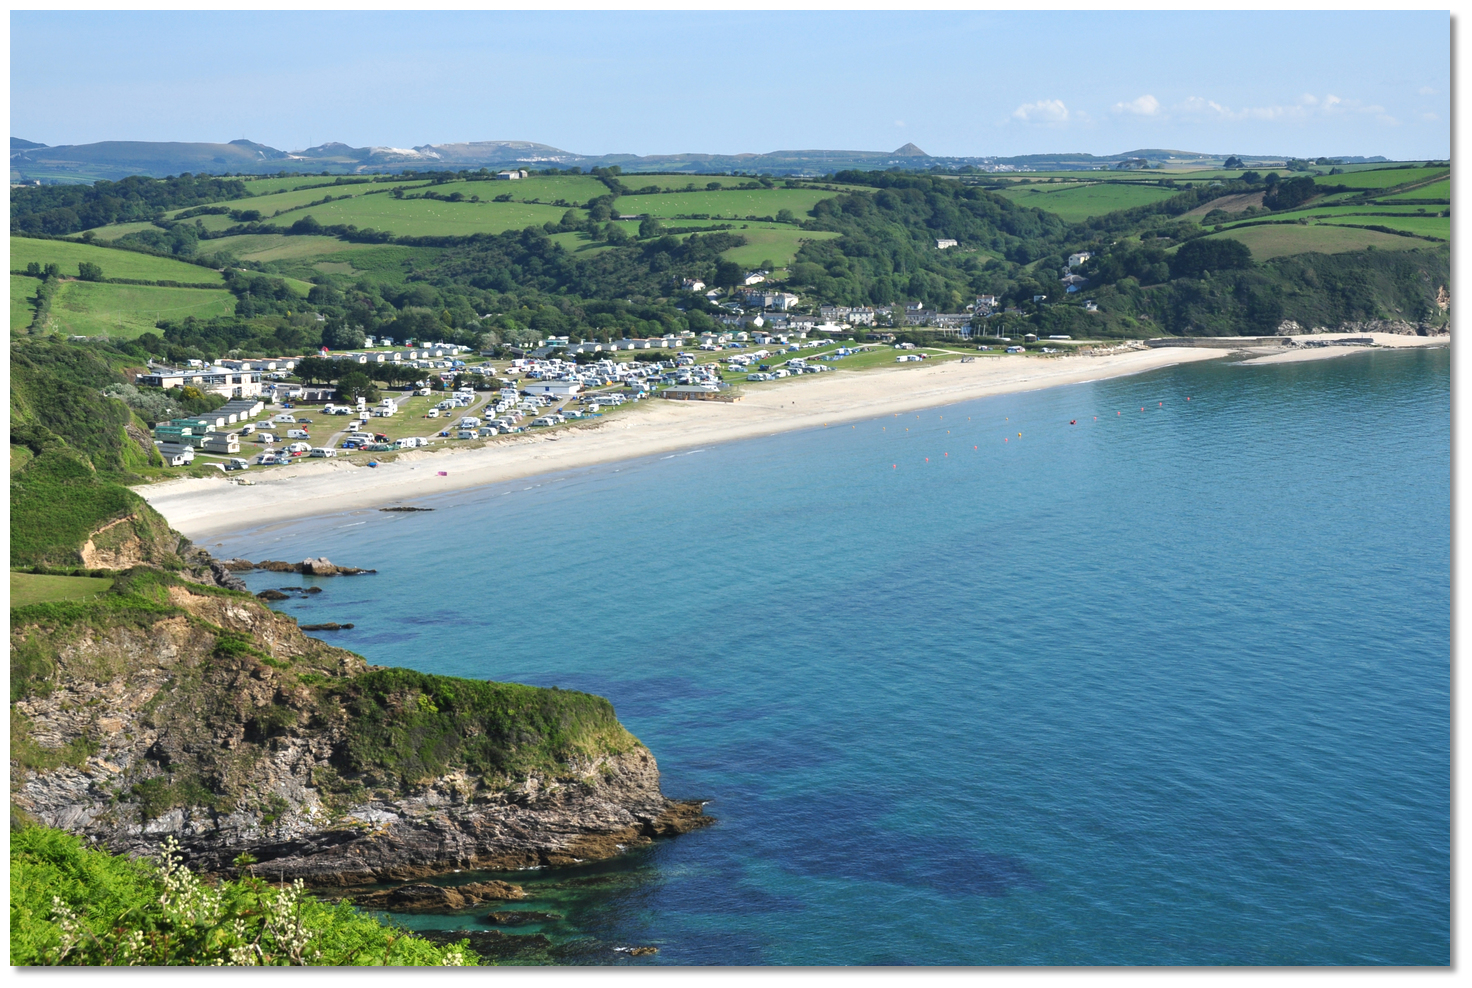 Petewan beach and holiday resort
Image: Nilfanion via ASA 4.0
From the south end of Petewan extends Penare Point that divides Mevagissey Bay in two and ½ a mile farther in a south-easterly direction leads to the harbour and village of Mevagissey.
 Penare and Chapel Points as seen from Pentewan
Image: Nilfanion via ASA 4.0
Mevagissey Harbour
 is a small port that consists of an outer harbour and an inner harbour and is used by fishing vessels and pleasure craft.
  Mevagissey Harbour
Image: Michael Harpur
The outer entrance is 50 meters wide between the outer pier-heads, of which the southern Victoria Pier shows a light, Fl(2)10s 12M, from a prominent structure on its head that is 8 meters high.
 Fishing boats alongside Mevagissey's Victoria Pier
Image: Nilfanion via ASA 4.0
The entrance has a depth of 2.1 metres the Pool in the inner harbour has about 1 metre and the inner harbour dries. A depth of 4.2 meters at high-water springs, and 3 metres at neaps, in the centre of the inner harbour.
 Mevagissey's Inner Harbour
 Image: Michael Harpur
Visiting boats usually come alongside on the inside of Victoria Pier, which always has at least 2 metres alongside its outer end. There are two trots of fore and aft cylindrical visitors' buoys situated inside the breakwater and vessels that can take to the bottom will usually find space to dry out at the head of the outer harbour. Anchoring is not permitted within the harbour walls but it is perfectly possible to anchor outside.
 Mevagissey's inner harbour
Image: Michael Harpur
The bottom dries to 60 metres outside the pierheads of the inner harbour at the lowest tides. Visiting craft must not moor in the inner harbour which is reserved for the harbours highly active fishing fleet.
 Portmellon Cove situated half a mile south of Mevagissey
Image: Michael Harpur
Portmellon
 is a sandy beach set in a small east facing cove less than a ½ mile south of Mevagissey. It is a quiet location with a popular inn, a sandy beach and a public slipway leading down to the beach for launching boats. The shelter and holding are good but it is only suitable as a temporary anchorage in settled weather and offshore winds.
 The low Chapel Point which is the southern entrance point of Mevagissey Bay
Image: Michael Harpur
From Portmellon the coast turns south-eastward for a distance of ¾ of a mile to Chapel Point, which is low, the southern entrance point of Mevagissey Bay.
 Gorran Haven
Image: Michael Harpur
From Chapel Point, the coast turns abruptly to the southwest forming a bight between it and Pen-a-maen Point to the 1¼ miles south by southwest. In this bight the cliff's are high, sloping seaward, and in its western corner is a small sandy cove protected from the southeast by a drying 'L' shaped pier. This is the small fishing village of Gorran Haven
 outside of which vessels may anchor with winds from west-southwest to west.
  Gwineas Rocks as seen over Gorran Haven Quay
Image: Michael Harpur
Gwineas Rock, or Gwinges, that lies ¾ of a mile outside the coastal bight in which Gorran Haven is situated. The highest point of the rock complex is 8 metres above high water springs and it appears black.
 Gwineas, or Gwinges, Rock and its east cardinal
Image: Graham Rabbits
The Yaw, which dries to 0.9 metres at the lowest tides, is an outlier that lies 200 metres from Gwineas Rock. 300 metres to the southeast of Yaw Rock is the lit ‘Gwineas’ east cardinal buoy, Q(3)10s. The passage between Gwineas Rock and the inshore bay is ½ a mile wide and has a depth of 6 to 14 metres.
 Pen-a-maen Point as seen from Dodman Point with Gwineas visible
Image: Hugh Mothersole via CC BY-NC 2.0
Pen-a-maen Point, which is 6 metres high, has a group of rocks, called Curran Vean, which covers at one-quarter flood extends about 200 metres off the point. The coast from Pen-a-maen Point to Dodman Point trends to the south-eastward for 1¼ miles and between them is a bight around which the cliffs are about 30 metres in height.
 Dodman Point
Image: Graham Rabbits
Dodman Point, a precipitous bluff, is 112 metres high. It has a steep east face and is surmounted by a prominent stone cross near the southern extremity. Soundings southward of the head are irregular for the distance of a mile from it causing heavy overfalls in bad weather. It is therefore advisable to stay at least 2 miles south of Dodman Point.
 Stone cross near the southern extremity of Dodman Point
 Image: Shirokazan

 The Blouth and Gull Rock from Manare Point Veryan Bay
Image: Nilfanion via ASA 4.0
The coast from Dodman Point and Zone Point, 8½ miles south-westward and on the eastern side of the entrance of Falmouth, has two bights, named Gerrans, and Veryan Bays, separated by Nare Head, a bold headland 78 metres high, and Greeb Point before it trends south-westward for a mile to Portmellin Head and then continues 1½ miles to Zone Point.
 Portloe
Image: Nilfanion via ASA 4.0
Veryan Bay, which lies between Dodman Point and Nare Head. It is 4⅔ miles wide and 1½ miles deep. The shore is cliffy, from 20 to 200 feet high, and forms a number of bights. Within one of these is the little fishing hamlet of Portloe that supports five small boats which bring in crab and lobster, but it derives its mainstay from tourism. The bay is clear of dangers except for Lath Rock, with a least depth of 2.1 metres, that lies about 1 mile off the shore of Veryan Bay, 1.6 miles northeast of Gull Rock.
 Nare Head
Image: Nilfanion via ASA 4.0
Nare Head is a bold headland 78 metres high located 4¾ miles west by southwest of Dodman Point. Gull Rock, a 38 metres high jagged pyramid, lies a ⅓ of a mile south-eastward from Nare Head with a clear passage between it and the land, the least depth being 6 metres. The spire of the church standing in Gerrans, 2½ miles southwest of Nare Head and conspicuous from seaward, midway between Nare Head and Gull Rock on 248° T leads through the passage.
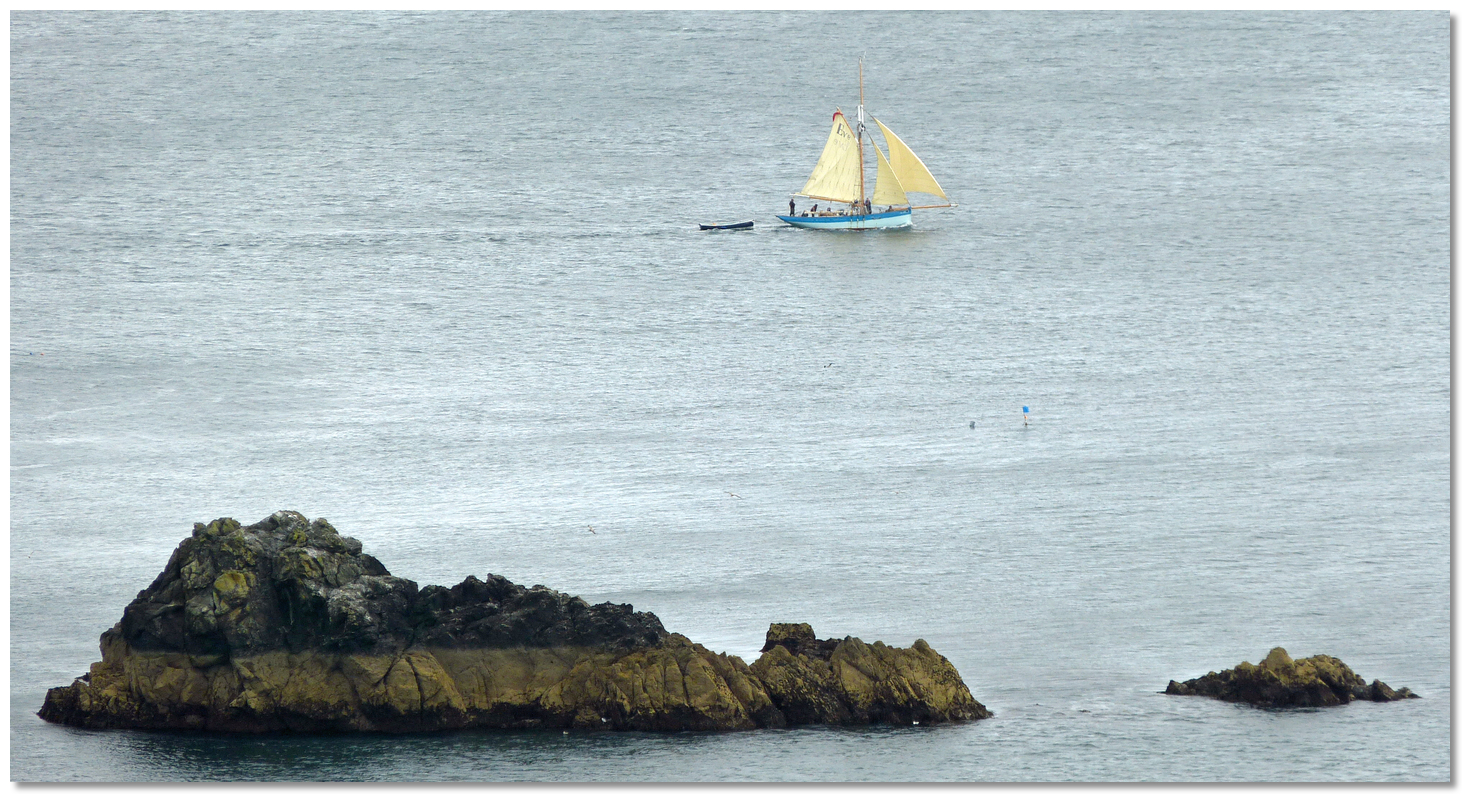 Gull Rock
Image: Andrew via CC BY 2.0
The Whelps are detached rocks that extend to the southwest of Gull Rock. The outer and bigger Whelp is about 600 metres from Gull Rock, is 4.6 metres high. The middle Whelp, which dries to the same height is 250 metres from Gull Rock. Both rocks may be approached to within 200 metres.
 Nare Head, Gull Rock and The Whelps seen over Portscatho Quay
Image: Michael Harpur
Gerrans Bay, between Greeb Point and Nare Head, is 3½ miles wide and 1½ miles deep with soundings from 25 metres in the centre gradually decreasing to the shore. At low water, the rocks dry 200 metres offshore. The cliffs gradually lower from Nare Head to Pendower Beach, at the head of Gerrans Bay, where they are then only 6 to 12 metres high as far as Porthmellin Head.
 Portscatho and Pencabe Point
Image: Michael Harpur
On the western Roseland Peninsula side of the bay stands Gerrans Church. Its 77 metres high spire is clearly visible from offshore and beneath it lies the small coastal village of Portscatho
 which it is the bay's main village. Set into the southern end of a small east-facing cove, located between Pencabe and Pednvaden, it has a small pier on its southern side that gives protection to the drying foreshore.
 Portscatho Quay at low water
Image: Michael Harpur
Nearly a mile northeast of Porthmellin Head is Greeb Point, off which shoal water, with 4 to 6 metres, extends in a south-easterly direction nearly a mile. This terminates in a shoal of 3.7 to 4.6 metres, called The Bizzies where breakers occur.
 Portscatho with Gerrans Bay in the backdrop
Image: Michael Harpur

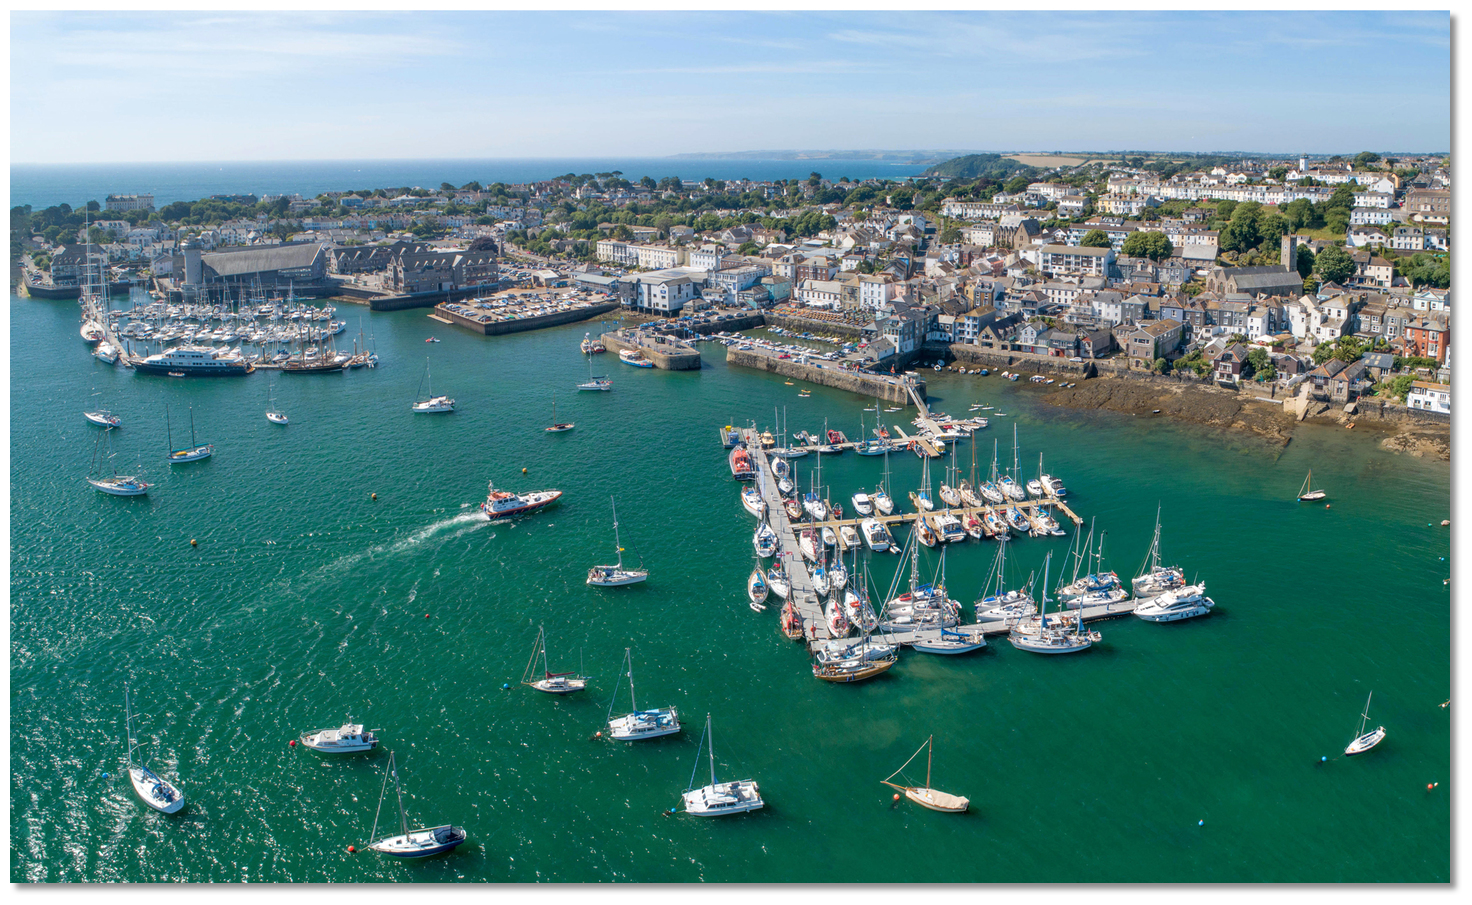 Falmouth
Image: Michael Harpur
Close east of Zone Point lies St. Anthony Head that is the southwestern extremity of the headland which forms the eastern entrance to Falmouth Harbour
 . The extensive and deep water harbour of Falmouth is regarded as one of the major ports of the English Channel and believed to be the world's third largest natural harbour. The entrance to Falmouth is passable under all reasonable conditions and can be considered a safe haven to run to in most all circumstance. It can be a bit rough when a southerly gale collides with an ebb tide but even in this most vulnerable condition, it is still manageable for most vessels. The historic port contains extensive facilities for commercial and cruise vessels. This extends to leisure craft with three marinas as well as moorings and the possibility of anchoring off.
  Inner Harbour Falmouth
Image: Michael Harpur
Falmouth and may be easily recognised by the lighthouse on St. Anthony Head, at the eastern side of the entrance, and by Pendennis Castle with its 69 metres high turret on the western side. The entrance is a mile wide and is divided into two channels by Black Rock, which lies a ⅓ of a mile from Pendennis Point.
 Pendennis Castle
Image: Tim Green
St. Anthony Lighthouse is a white stone lighthouse is 19 metres high, and exhibits and an Iso WR 15s light at an elevation of 22 metres above mean high water. The light should be visible from a distance of 16 miles in clear weather. Coming from the eastward the light is obscured and will open out when a bearing of 295° T to it is attained, and from then it will be seen round seaward and up the harbour. In addition to guiding vessels into the harbour, the lighthouse also serves to keep southern approaching vessels well clear of the Manacles, see below, over which it shows a fixed red light.
 St. Anthony’s Lighthouse
Image: Robert Pitman
The eastern channel, that lies between Black Rock and the lighthouse, is wider and deeper than the other. Port and starboard lateral buoys mark the eastern side of the entrance. However, the western channel is just as usable being deep, clear and 500 metres wide.
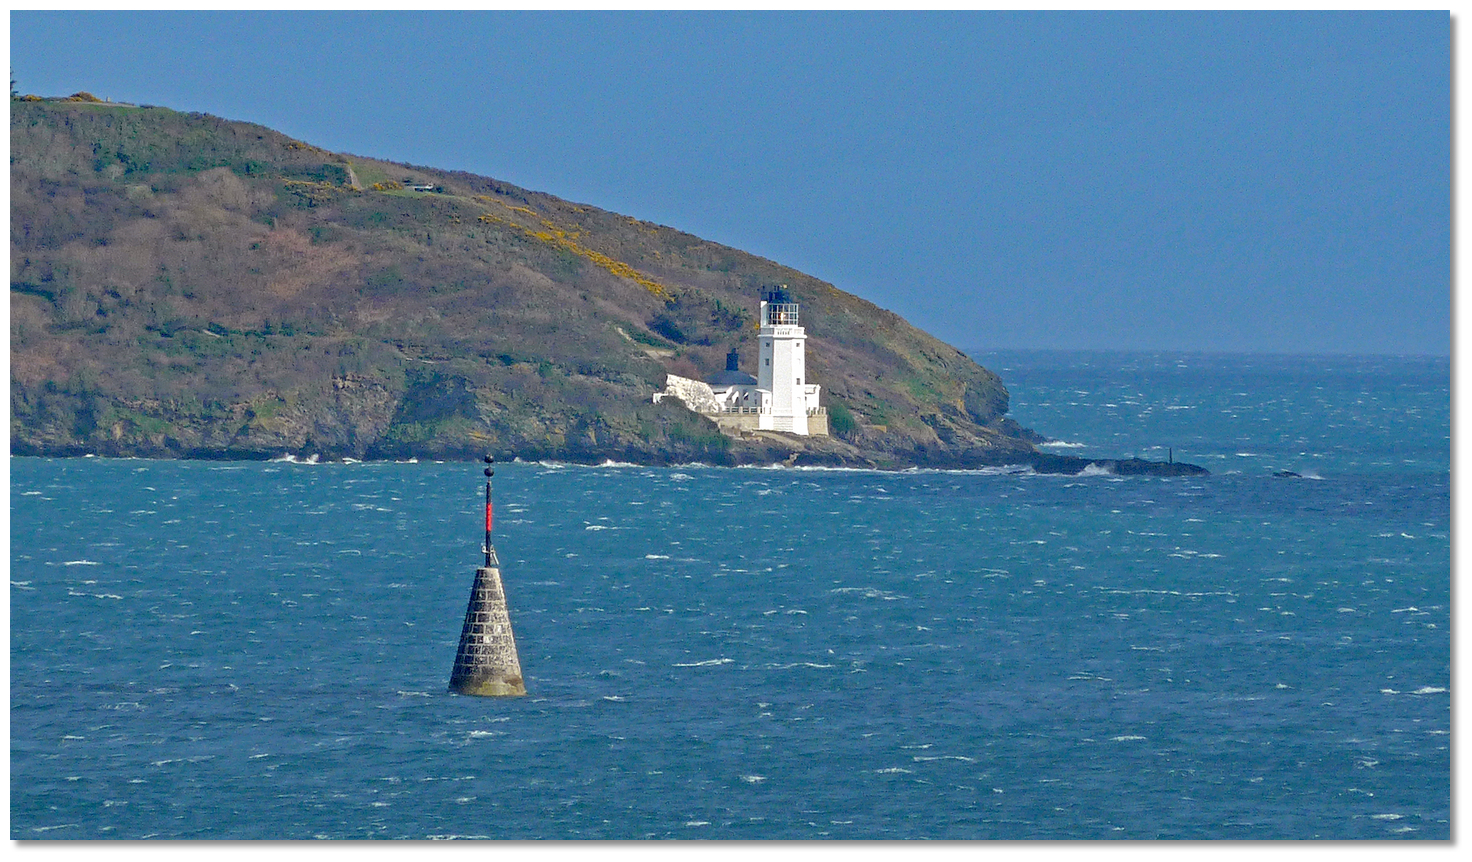 Black Rock as seen from the western side with St. Anthony Lighthouse in the
backdrop
Image: Tim Green
Once Black Rock passes abeam Saint Mawes Harbour
 and the Percuil River branches to the east less than a ½ mile northward. Entered between Carricknath Point and Castle Point it offers a well-protected anchorage unless the wind is westerly which, is the prevailing wind. In any other winds, particularly easterlies, it is a perfectly quiet piece of Cornish bliss.
  Saint Mawes Harbour on the Percuil River entered between Carricknath and Castle
points
Image: Michael Harpur
Saint Mawes could offer an alternative to Falmouth, just a mile to the east, but with the blissful peace of the pretty Roseland backwater as opposed to the bustling town. The distance is short enough to be crossed by a stalwart tender and outboard, in good weather, or by the ferry which crosses daily every 30 minutes during the season for a modest fee.
 The Cathedral City of Truro at the head of the Fal and Truro rivers
Image: Michael Harpur
In addition to the port town of Falmouth, there is also the River Fal
 that is navigable by deep draft yachts to Malpas, just 2 miles short of the city of Truro that can then be reached on the tide. Its 7 miles of sheltered deep water are, to the largest part, surrounded by ancient woodlands backed by quiet pastoral land and the occasional picture perfect little farm or village.
 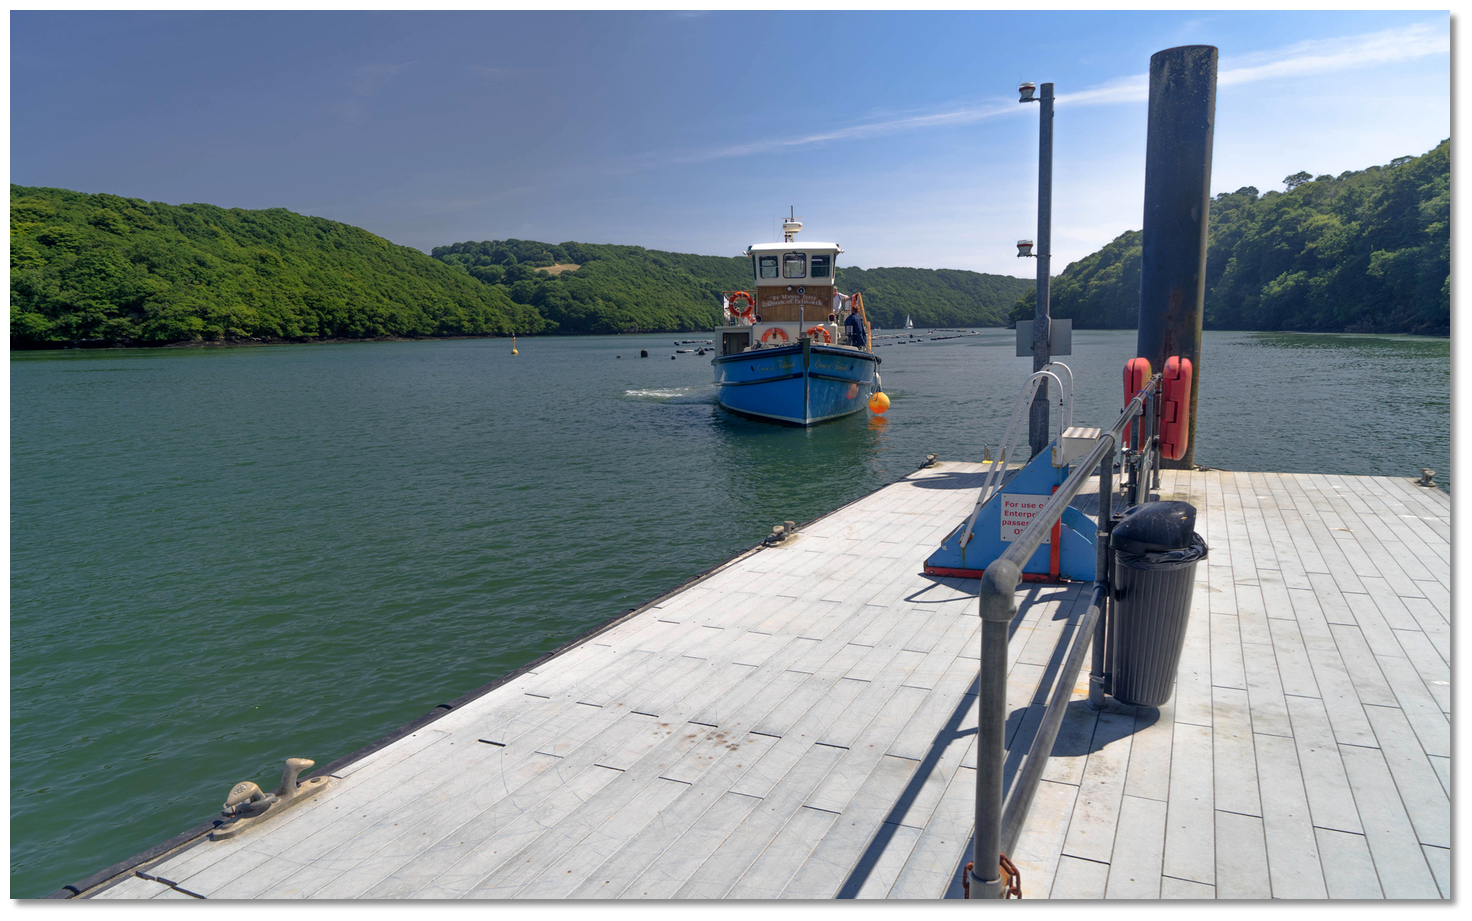 River Fal tripper boat coming alongside the King Harry Pontoon
Image: Michael Harpur
With several landlocked inlets and creeks that all just cry out to be explored the river has it all; deep waters, a choice of excellent locations to moor in complete security, excellent provisioning, pubs galore, fine country walks, locations of interest or the green loneliness of very special hidden places. A Cornish gem that should not be overlooked for those intending to visit Falmouth Harbour.
 Falmouth Bay
Image: Tim Green
Falmouth Bay lies between Pendennis Point and Rosemullion Head the northern entry point of the Helford River 2½ miles southwest.
 Swanpool
Image: Tim Green
From Pendennis Point to Pennance Point, the first bight, to the coast is irregular, the cliffs continue about the same height, and the low-water rocks, which are shelving, extend nearly 200 metres offshore. Within the bight is a deep inlet with a space of retained water named Swanpool.
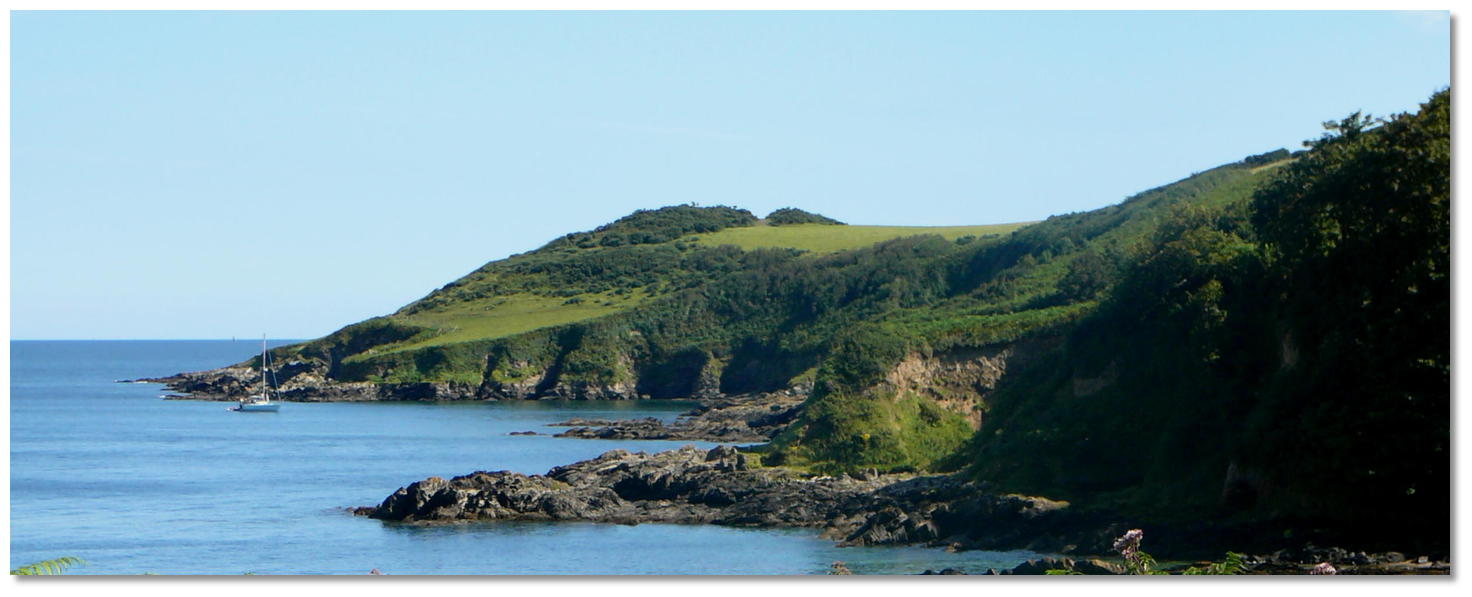 Yacht anchored north of Rosemullion Head
Image: Tim Green
From Pennance Point to Rosemullion Head to cliffs are 15 metres high, and halfway between the points is a sandy cove called Maenporth.
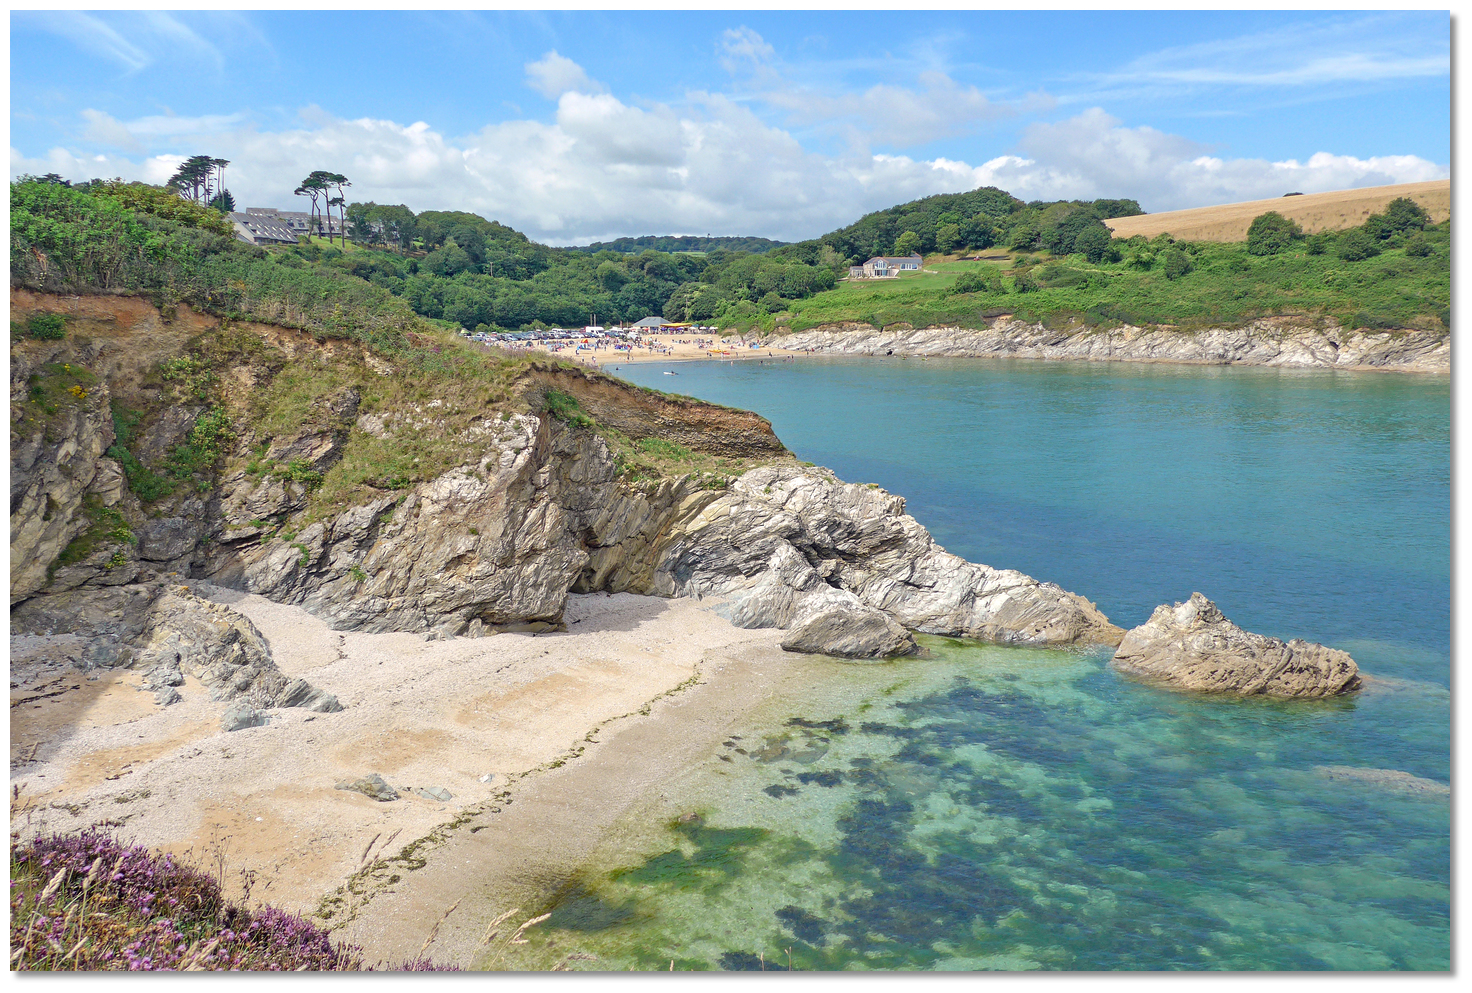 Maenporth
Image: Tim Green
Between Rosemullion Head and Nare Point is the entrance to Helford River
 which is extensively used by yachts and pleasure craft. The river is entered between Rosemullion Head and Nare Point. Although the entrance is hidden away it may be confirmed by the square tower of Mawnan Church, surrounded by trees on a hill and overlooking the entrance from the north side. Boats seeing coming and going during approaches also tend to make its position known.
 The entrance to the Helford River
 Image: Michael Harpur
The low lying Nare Point, readily identified by its Coastwatch station, should be given a wide berth at all states of the tide as it has rocky ledges extending 200 metres to seaward. The primary danger to avoid is the Gedges Rocks, which lie a ¼ mile from the northern shore of the entrance and cover at one-third flood. They are marked during the season by a starboard buoy, Fl.G.5s. After passing the Gedges, give the shore on either side of the river a berth of a good 100 metres until arriving in The Pool off Helford Point.
 Yachts moored in The Pool in the Helford River
Image: Michael Harpur
Once identified it is very straightforward with depths decreasing gradually as the river is ascended with no less than 3 metres for the 2 miles up to where visitors generally lie off of Helford. Expect to encounter numerous oyster beds along the fairway and in the adjoining creeks.
 Gillan Creek
 Image: Michael Harpur
Close to the southern entrance to Helford River is Gillan Creek
 that is also a yachting centre. The entrance is 200 metres wide with a rock marked by an east beacon, nearly mid-channel, which dries to 0.7 metres low-water springs.
  The inner drying section of Gillian Creek
Image: Nilfanion via ASA 4.0
Within the rock, there is 2.7 metres but it dries 300 metres up-creek from the mark. A vessel may anchor, with westerly winds, anywhere between Manacle Point and Nare Head.
 Gillan Creek's Saint Anthony-in-Meneage where it dries
Image: Andrew via CC BY 2.0

Nare Point extends to a low lying point that is readily identified by its Coastwatch station. Originally a MOD observation post focused on torpedo testing it is now manned by Coastwatch volunteers.
 Nare Point as seen from Dennis Head
Image: Nilfanion via ASA 4.0
Nare Head, which is a ¼ mile southward of Nare Point, to Porthkerris Point, a mile south by southeast, the land slopes abruptly to the cliffs, and between them lies Porthallow Bight, which is exposed to the eastward. The shore is bordered by masses of detached rocks. There is a clean shingle beach at the head of the bight called Porthallow Cove that provides an anchorage.
 Porthallow Cove
Image: Barney Moss
Low-water rocks extend up to 200 metres off Porthkerris Point with Drawna Rock always showing. A white building will be seen on the point that is an RAF diving centre. The building was first established on the point in the 1950s as an observatory for gunnery and torpedo testing.
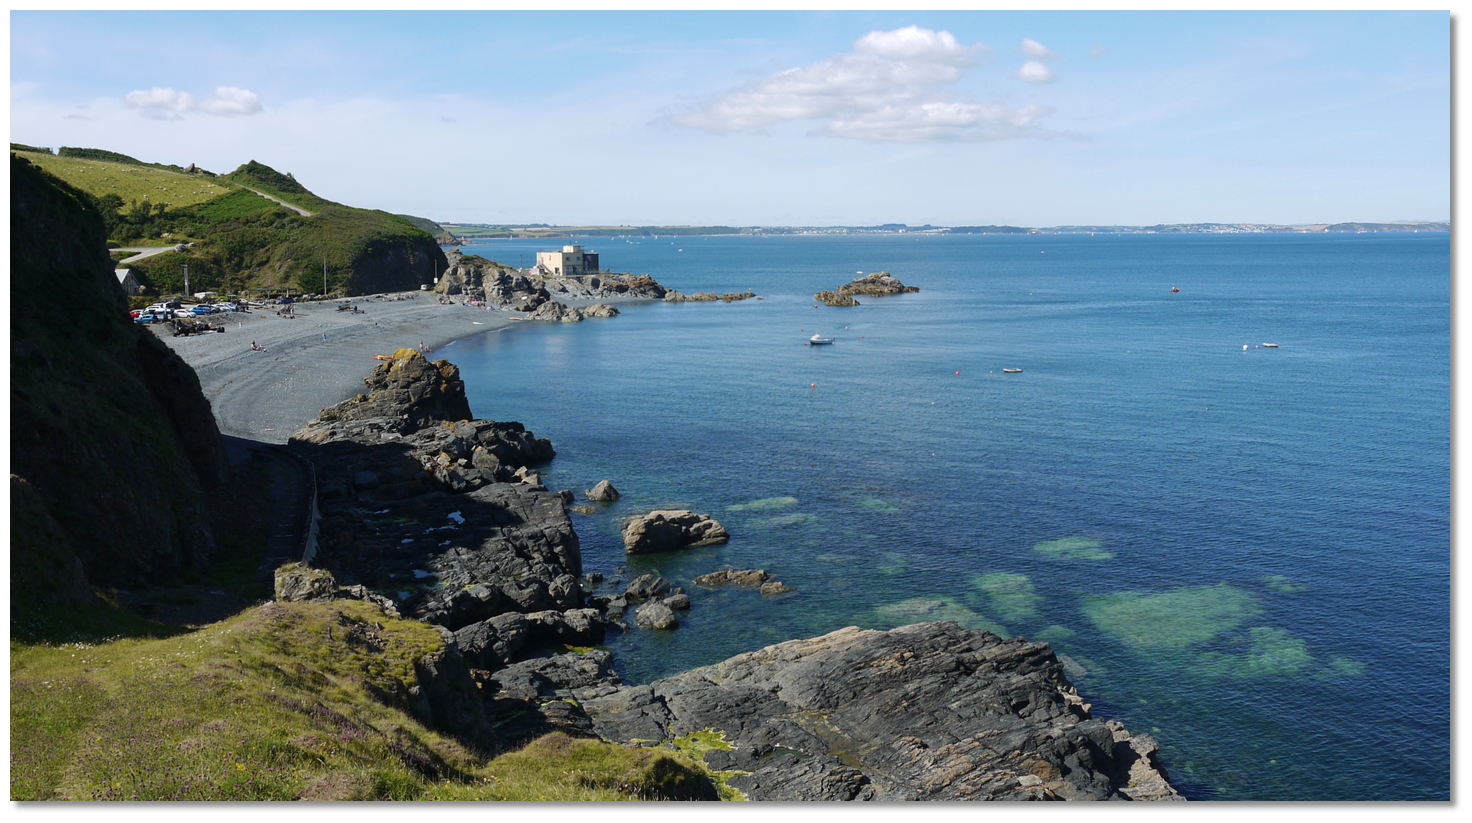 Porthkerris Point and Drawna Rock
Image: DarloRich2009
Soundings are variable from Porthkerris Point to Manacle Point where standing off a ¼ of a mile clears all dangers. The cliffs from Manacle Point to Lowland Point are 6 to 15 metres high, and the shore is composed of large boulders to the north side of the bight, but then it is studded with high detached rocks. Close south of Manacle Point and between it and Dean Point lies the east-facing Godrevy Cove with low lying large flat grassy area with some marshland behind.
 Godrevy Cove
Image: Andrew via CC BY 2.0
Eastward up to almost a mile from Manacle Point and extending for ¾ of a mile southward, are a dangerous Manacle Rock group more often called 'The Manacles'. The Manacles all cover at high-water springs, except the 1-metre high Carn-du, the south-westernmost rock. Maen Chynoweth Rock, the northernmost of the group, dries to 1.9 metres and covers at one-third flood.
 The Manacles east cardinal marker
Image: Graham Rabbits
The outer or eastern rocks, named the Pen-win with 0.4 metres over it, and Vase with 1.6 over it, is marked by the lit ‘Manacle’ east cardinal mark, Q(3)10s, moored ⅓ of a mile eastward. There is a passage inside the Manacles, but this is the domain of the local boatman.
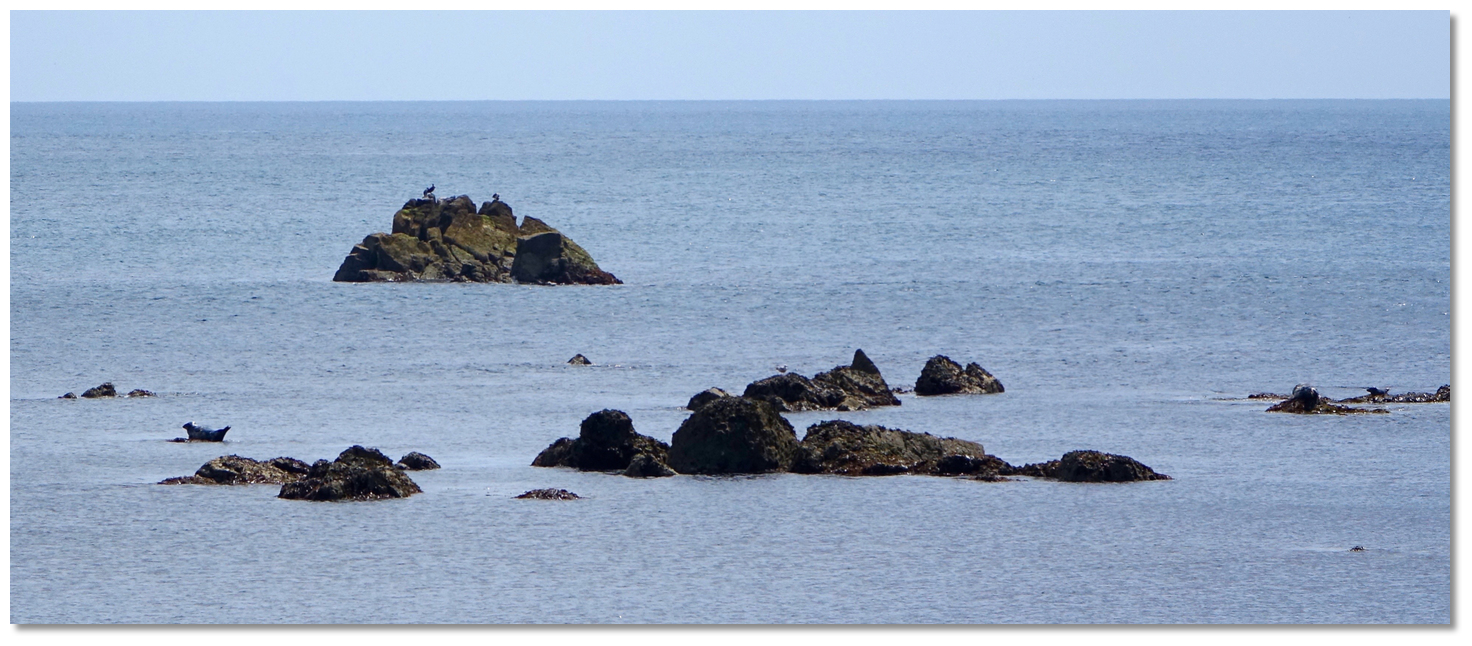 The Manacles
Image: Andrew via CC BY 2.0
Rocks continue to range from 200 to 300 metres offshore of Lowland Point abreast of which is the Great Wrea, drying to 2.0 metres, and without these are three outlying rocks named the Davas, drying to 1.5 metres, the Oar drying to 2.3 metres, and the Little Wrea drying to 2.1 metres.
 The disused Lowland Point jetty
Image: Andrew via CC BY 2.0
A small jetty is situated a ⅓ of a mile north of Lowland Point. It was used by Dean Quarry to load stone onto coasters. The jetty is disused now the quarry is closed but the gantries on the jetty and the buildings standing behind it are prominent. The jetty dries at low water and a rock, which dries to 1.5 metres, lies about 400 metres east-southeast of the head.
At Lowland Point, the cliffs are only 3 or 6 metres high, with a ridge of land rising abruptly to 100 metres at the back. At Chynhalls Point, 1½ miles southwest and projecting eastward, the point is elevated 28 metres and the cliffs are about 60 metres.
About halfway between the pier at Coverack Cove and Lowland Point, is a patch of rocks named the Pedy-myin which extends up to 200 metres in a southerly direction from the shore, dries to 1.8 metres and only covers at the highest tides.
 Coverack on Dolor Point with Chynhalls Point in the backdrop
Image: Michael Harpur
Coverack Cove
 lies between Lowland and Chynhalls Points. The village of Coverack stands on both sides of Dolor Point, a spur of rock that juts out into the sea 1¼ south-westward of Lowland Point. A small pier extends northwestward from this point that provides shelter in with winds from southwest to northeast.
  Coverack Quay
Image: Linda via CC BY-NC 2.0
The pier has depths of 4 metres at high water springs, 2.5 metres at neaps, and it dries at low water. It is used by small craft which can take the ground at low water which normally fully occupy all its space. An anchorage is available to the northeast off the end of the pier. It provides a serviceable berth in settled or moderate westerly conditions with the absence of groundswell. Coverack is about the best anchorage available along this stretch of coast leading down to Lizard Point. Cadgwith, Church Cove and House Bay, near the Lizard, are more suited to short day stops or temporary tide-wait anchorages. But be prepared to leave if there is any indication of a shift of the wind to the south or east.
Between Chynhalls Point and Black Head, the low-water rocks project up to 200 metres offshore, and also in a southerly direction to 300 metres from Chynhalls Point. Chynhalls Point may be identified by a hotel, situated on the heights above the shore, that is particularly conspicuous from the east. To the eastward of the point, and about 200 metres from the shore, lie the Guthens Rocks, which dry to 5.0 metres and only cover at high water.

Black Head is a cliffy and steep headland that rises to a height of 70 metres about 4.8 miles northeast of Lizard Point. A group of high rocks, part of which never cover, extend from the shore about 200 metres south from Black Head, and at their outward extreme is a small detached rock which covers at a quarter flood.
From Black Head to Lizard Point a ¼ offshore clears all dangers. The cliffs continue along the north shore at about 600 metres from Black Head to Kennack Cove where they terminate in a low sandy bight they then turn southward at 40 to 60 metres from between Kennack Cove and Lizard Point.
 Carrick Luz stack as seen from Pedn Boar Point
Image: Glyn Nelson via CC BY-NC 2.0 BLUR
At Black Head, the coast bends abruptly westward where at about 400 metres westward, at Pedn Boar Point, rocks extend in a southerly direction for about 150 metres and cover at a quarter flood.
 Kennack Sands as see from Eastern Cliff with Bass Point in the backdrop
Image: Andrew via CC BY 2.0
About ¾ of a mile westward, a 1.5 metres shallow patch extends about 250 metres from the 6 meters high Carrick Luz stack. At about ½ a mile further and about 300 meters offshore, is the Jay Rock, which dries to 1.2 metres and covers at two-thirds flood. Tucked into the head of the bight at Kennack Cove a mass of rocks, named the Caerverrack, extends 250 metres in a southerly direction from the Kennack Sands, and their outer part covers at half-flood.
 Cadgwith Cove with Black Head in the backdrop
Image: Michael Harpur
Here the shore bends southward where between Kennack and Cadgwith Coves the shore must not be approached within the distance of 400 metres, as it is bordered with outlying rocks which cover from a quarter to three-quarters flood.
 Cadgwith Cove
Image: CC0
Nestled into a rocky cove, at the mouth of a narrow and steep valley, Cadgwith
 a small village with working cove. The cove is split in town by a promontory called The Todden. To the northeast is the larger beach, made mostly of shingle with a shallow slope, that a small fleet of open fishing boats operates. There is no harbour, and the boats are all winched up the shingle on wooden rollers by a tractor. The other southwestern beach is used as the swimming beach by locals and holiday-makers.
 Cadgwith Cove divided in two by The Trodden promontory and its seaward
extensions
Image: Michael Harpur
Cadgwith Cove has two notable outliers. The first of which is Craggan Rocks that lie just over a ½ mile south-by-southeast of Cadgwith with 1.6 metres over it. The other is the small Boa Rock that lies awash obstructing the northern entrance to the cove. Both of these dangers are unmarked.
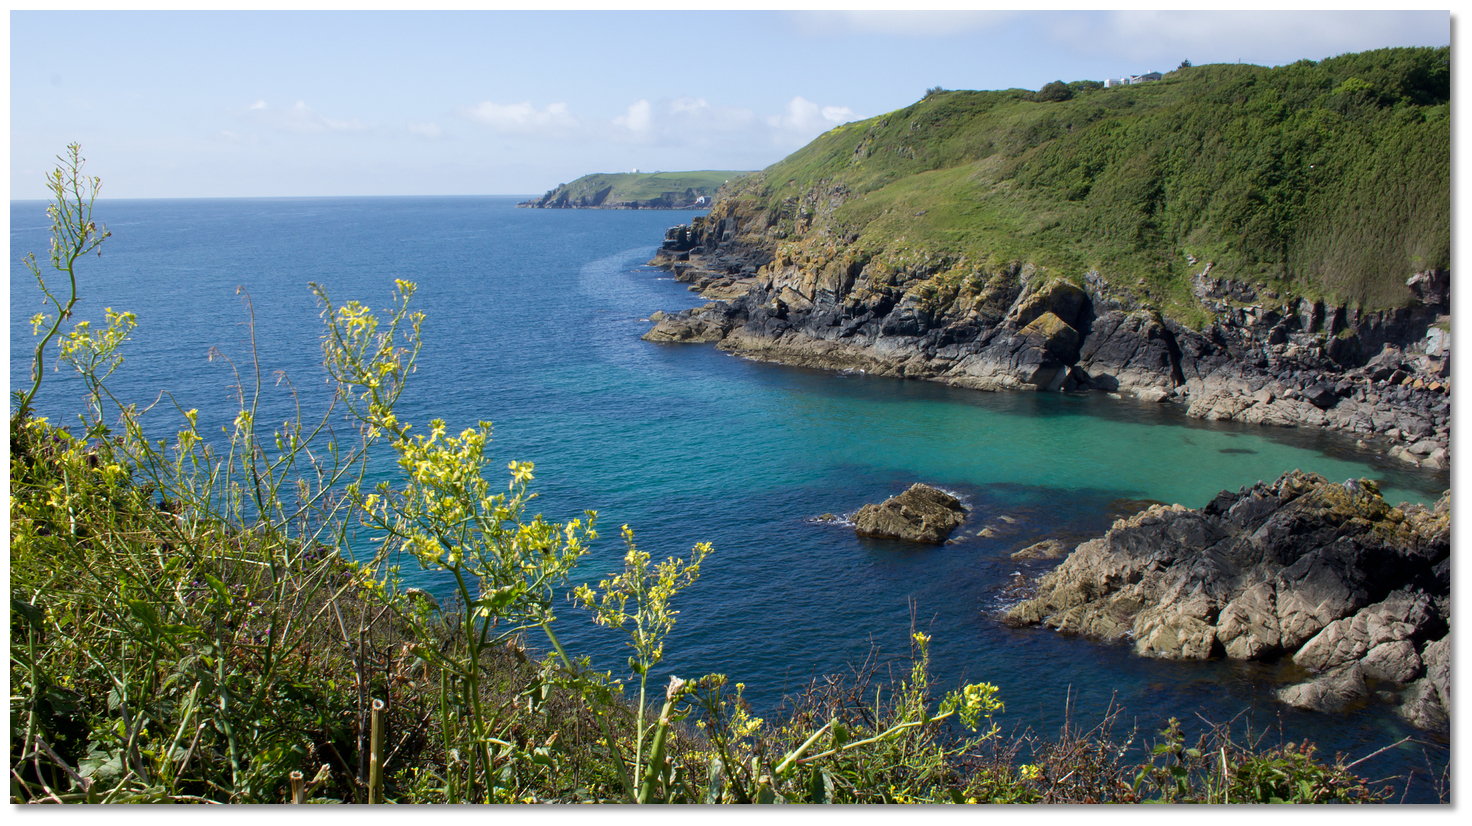 Bass Head as seen from the approaches to Cadgwith Cove
Image: Ian via CC BY-NC 2.0
Nearly a mile southward is the small Parn Voose Cove here it is possible to anchor off in offshore winds. A small rock, called the Va which dries to almost 1 metre at low water, lies about 400 metres southeastward from the extremity of the Balk Beacon, situated above Parn Voose Cove. The outlying Craggen Rocks, with a least depth of 1.6 metres, lies a little over ½ a mile north-eastward of the cove
 The beach in the small Parn Voose Cove
Image: Andrew via CC BY 2.0
The Lizard Lifeboat Station can refer to several Royal National Lifeboat Institution lifeboat stations located on The Lizard in Cornwall, United Kingdom. The first was established at the southernmost point of the peninsula in 1859. Since then successive stations have all been in operation at different locations on The Lizard. The current station is located at Kilcobben Cove nearly a mile northeast of the Lizard Lighthouse.
 Kilcobben Cove with its Lifeboat Station
Image: Andrew via CC BY 2.0
Bass Point is the southeast facing promontory situated close east of Lizard Point. It is considerably higher than the Lizard lights and limits their range of visibility in-shore to the eastward. The Vrogue, a rock with 2.5 metres, situated a ⅓ of a mile southeastward from Bass Point with depths of more than 6 metres close around it.
 RNLI Lizard Lifeboat Station
Image: Kernowfile via CC ASA 4.0
There are two red/white beacons on Bass Point that in line, on a bearing of 292°, lead over the position of Vrogue Rock. The Balk Beacon, over Parn Voose Cove, in line with the extremity of Hot Point on 325.5°, leads 200 metres northeast of the Vrogue and Polpeor Point open of the Bumble Rock, to the west, leads the same distance to the south of the Vrogue.
Image: Andrew via CC BY 2.0

The bold and precipitous promontory of Lizard Point is the southern extremity of the mainland of England. Visible from a distance of about 24 miles, and easily distinguished by its two white lighthouses, vessels generally make Lizard Point their landfall when proceeding into the channel from the southwest.
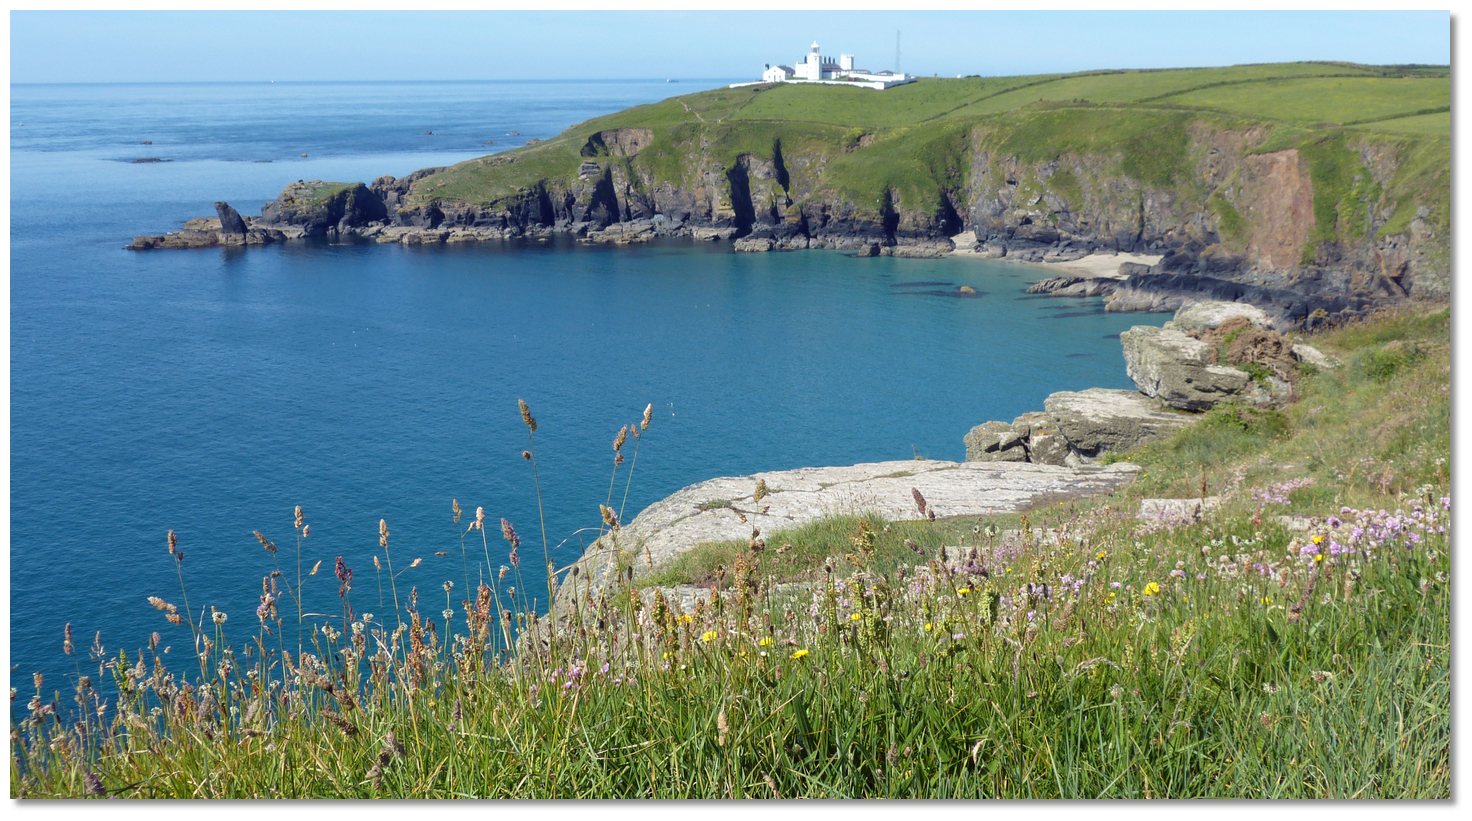 Lizard Point Lighthouse seen over Housel Bay
Image: Andrew via CC BY 2.0
Occupying such a significant position Lizard Point has historically had two white octagonal lighthouses, an eastern and western tower, that stand about a ½ mile east of the point. In 1903 the western tower’s lantern was removed and the eastern tower alone now guides shipping up the channel. This is a 19 metres high white tower that exhibits a light, Fl 3s, 70 metres above Mean High Water that can be seen in clear weather from a distance of 26 miles which includes the vicinity of Wolf Rock. It is however obscured from the north until west-northwest by Bass Point.
 Lizard Point Lighthouse
Image: Sanil Photography CC ASA 4.0 Lizard
On closer approaches, a conspicuous large hotel will be seen ¼ of a mile to the northeast of the light and at the head of the small Housel Bay. 5 miles north of the light, on Goonhilly Downs, stand several dish-shaped antennas stand that is also conspicuous from seaward.
 The old disused lifeboat station at Lizard Point
Image: Hardo Müller
The headland is very dangerous as a cluster of rocks, collectively known as The Stags, extend up to ½ a mile south of Lizard Point. The outer rocks cover at from half to three-quarters flood and terminate in Men Hyr, a rock which dries to 1.2 metres. Within them are masses of detached rock that nearly join the shore at low water. Beyond this is an extensive race laying to the southeast of Lizard Head that is brought about by the confluence of the tides on either side of the headland and shallow uneven soundings that extend southwards from the head. The tidal race extends up to 2 miles south of these rocks and during south-westerly gales, the sea in this area is short and heavy. Vessels are advised to pass well to the south of all of these.
 Sunset Lizard Point
Image: Hardo Müller
The complete course is 75.32 miles from the waypoint 'Start Point' to 'Lizard Point' tending in a west south westerly direction (reciprocal east north easterly).
Start Point, 50° 11.840' N, 003° 38.614' W
This is 1½ miles south of Start Point Light and clear of the tidal rips that occur up to a mile south and east of the point that is particularly pronounced during spring tides. The velocity of the stream, off the point, can attain rates of 3 knots but when blowing fresh there is a strong race, both on the flood and ebb.
► Next waypoint: 5.17 miles, course ⇓ 268.34°T (reciprocal ⇑ 88.34°T)
Salcombe, 50° 11.686' N, 003° 46.682' W
This is on the entrance leading line of 000°T, and white sector light. This is marked by a red and white striped pole with red topmark on the Poundstone Rock, with the second beacon behind it on Sandhill Point, which is white with a horizontally striped red and white diamond topmark. The rear beacon, 27 metres high, displays the directional flashing light WRG 2s visible from this point of which the white sector 357°-002°T.
► Next waypoint: 15.16 miles, course ⇓ 295.37°T (reciprocal ⇑ 115.37°T)
Plymouth, 50° 18.145' N, 004° 8.119' W
This is in the white sector of Plymouth Sound's eastern end breakwater marked with a conical daymark topped by a beacon with the sectored light L Fl WR 10s 9m 8/6M. The narrow white sector, from 353° degrees 001°, leads into the harbour by the eastern channel between Tinker shoal and the Shagstone.
► Next waypoint: 20.08 miles, course ⇓ 270.89°T (reciprocal ⇑ 90.89°T)
Fowey , 50° 18.385' N, 004° 39.541' W
This is in the centre of the white sector of the Fowey Lighthouse on Whitehouse Point, ISO RWG 3s close west of 'Cannis Rock' south cardinal Q(6) + LFl.15s.
► Next waypoint: 8.01 miles, course ⇓ 216.99°T (reciprocal ⇑ 36.99°T)


 Starehole Bay
 The mouth of the River Avon
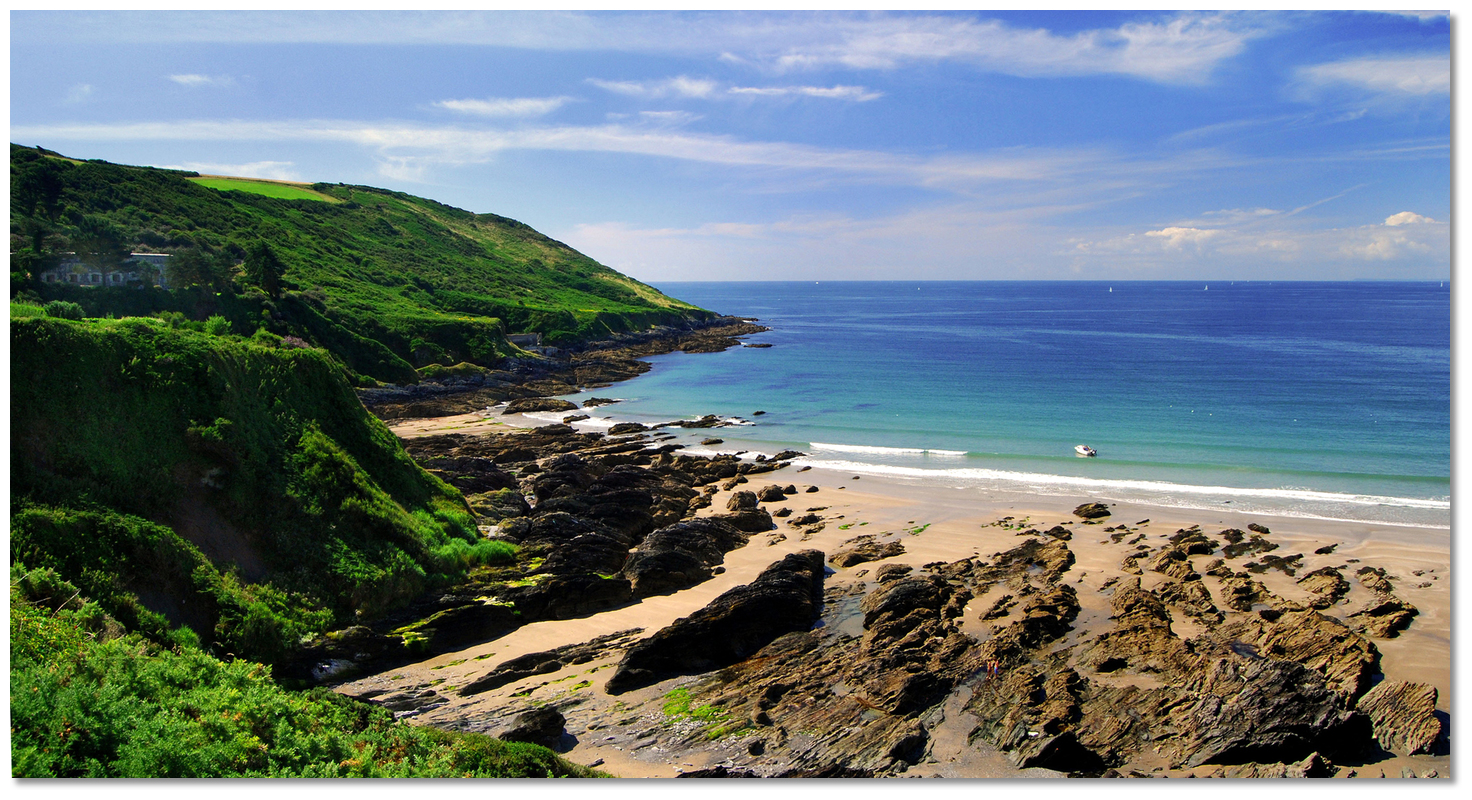 Polhawn Cove
 Chynhalls Point