
What is the issue?
Electricity is one of the most important blessings that science has given to mankind. It has become so much a part of modern life that we couldn't think of living without it. All devices which facilitate our activities and impact on a big portion of our life require electricity. But once we cast off from the dock we also unplug from the almost limitless power source that we have become accustomed to. Aboard a seagoing vessel, we have to generate all the power that the vessel and its crew require.Why address this?
Electricity plays a pivotal role aboard a seagoing vessel, not only for our personal comforts but also running key sailing equipment such as the vessel's instruments, radar, self-steering, navigation lights etc. Indeed the vessel itself and its crew may be put in jeopardy if there is not enough power to start the engine.Aboard a vessel one has to become totally familiar with the vessel's electrical resources and make detailed plans for its generation, storage and conservation. This article aims to provide a good first overview of what is entailed, the primary components and some of the options available.
How to address this?
Electrical power generation on a sailing yacht is used for two purposes:- • Charging the batteries which are used to power the onboard equipment (lighting, autopilot, refrigerator, freezer, etc).
• Providing AC current to power onboard AC systems such as refrigeration, air conditioning, watermakers, power tools, etc.
Battery Charging
Charging a battery is much like pumping air into a tyre. The voltage in the battery equates to the air pressure in the tyre, and the voltage at the charging source equates to the air pressure in the pump. When the voltage in the battery is low, a high voltage at the charging source causes a significant amount of charge, or current measured in Amps, to flow into the battery. As the battery voltage increases (like increasing the air pressure in the tyre), the amount of current flowing into the battery reduces.
This continues until the difference between the voltage in the charging source and the voltage in the battery is too small to allow any more current to flow into the battery. The only way to continue charging the battery at that point is to increase the voltage at the charging source.
The effect of this is that multi-stage or "smart" chargers are required to bring a battery bank up to full charge and keep it there. Older style chargers simply poured current into the battery until the terminal voltage reached a certain level (and frequently used up excess power by dumping it into a resistor bank, converting it to heat).
Modern multi-stage chargers usually have a set number of phases, for example:
- • A "bulk charge" phase where the charger brings battery voltage up to a certain level by increasing voltage at a fixed current level.
- • A "top up" phase where the charger holds the voltage at a certain high level (say around 14.4V) until the current drops indicating that the battery can take no more charge.
- • A "float" phase where the battery voltage is held somewhere around 13.4V to 13.8V to replace any natural losses.
Some power generators will have this type of smart charging built into them, whereas others will simply dump charge into the battery at a fixed voltage level (e.g. around 13.4V or 13.8V) until the battery can take no more. Solar panel regulators tend to be of the first type, whereas engine alternators tend to be of the second type unless an external regulator is fitted.
AC Power Generation
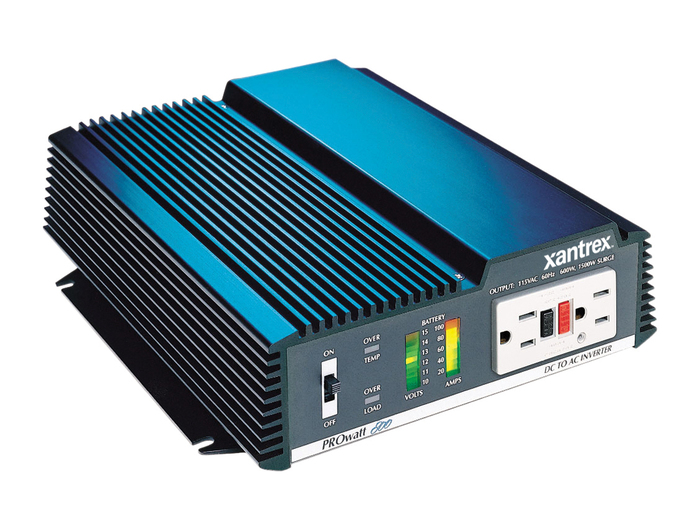 DC to AC 110V Inverter
Photo: Delatbabel
There are two different methods of providing AC power on board from power generating devices. These are:
- 1. Run a direct feed from the AC output of a genset into the AC distribution board of the boat.
- 2. Run a feed from an inverter running from the house batteries, and use any power generating devices simply to top up the house batteries.
Larger boats fitted with inbuilt gensets usually choose the first method, because the types of AC powered equipment that they use (e.g. fridges, air conditioners, etc) use more power than can efficiently be produced by an inverter.
Smaller boats without inbuilt gensets often choose the second method because the wiring is simpler. All of the power generation on board (including shore power via a battery charger) is used to charge the battery bank, and any AC powered equipment runs from the inverter.
This often requires a larger capacity inverter than very small boats might carry, but to run a small computer or laptop, or perhaps a battery charger for a cordless drill, and occasional use of galley items such as a blender or small microwave, this is often sufficient. This method also has the advantage that the voltage of the AC power on board is independent of any power generation or the shore power. For example, 110V shore power can be fed into a battery charger and this used to top up the batteries along with 12V solar panels, and a 240V inverter run from the battery bank giving 240V AC on board independent of the shore power voltage.
Another advantage of this method, usually best applicable to steel boats, is that an isolation transformer is not required.
Some boats use a hybrid system, where the AC distribution on board can be fed either from an inverter, from a genset, from a shore power system, or from a combination. This is usually fitted in conjunction with auto-start devices for the genset, where the genset can be automatically fired up should the load increase or the battery charge drop to the point where charging is required. This does have the disadvantage that the shore power system, the genset, and the AC distribution on board, all need to run at the same voltage.
Load Analysis
The first step to determine how much power generation needs to be fitted to a vessel is to estimate the amount of power that is used onboard. There has been quite a lot written about this already so it is worth summarising the main points:
- • Consider the load, in watts or amps (converting everything back to amps at 12V is often the most convenient approach) of all of the equipment on board. This includes autopilot, TV, fridge, freezer, stereo, portable battery chargers laptop computers, etc. Do not underestimate the '12V to USB' converter power drawn required for charging various phones and tablets on board.
- • For each item, multiply the number of amps by the number of hours in the day where the item is likely to be used. For example, fridges and freezers tend to run 24x7 if they are cycling mode, but for fewer hours if they are eutectic. A phone charger might only be used for 1-2 hours per day, but a navigation laptop and an autopilot might also be used full-time while on passage.
- • Consider both on-passage and at-anchor loads. For example, on passage, the autopilot might be running constantly while at anchor it might be turned off.
The result will be a number of amp hours (Ah) of the total load to supply each day. Ideally, the daily power generation should be more than the daily load. The below table provides an example of the aggregated power usages for devices aboard a seagoing vessel:
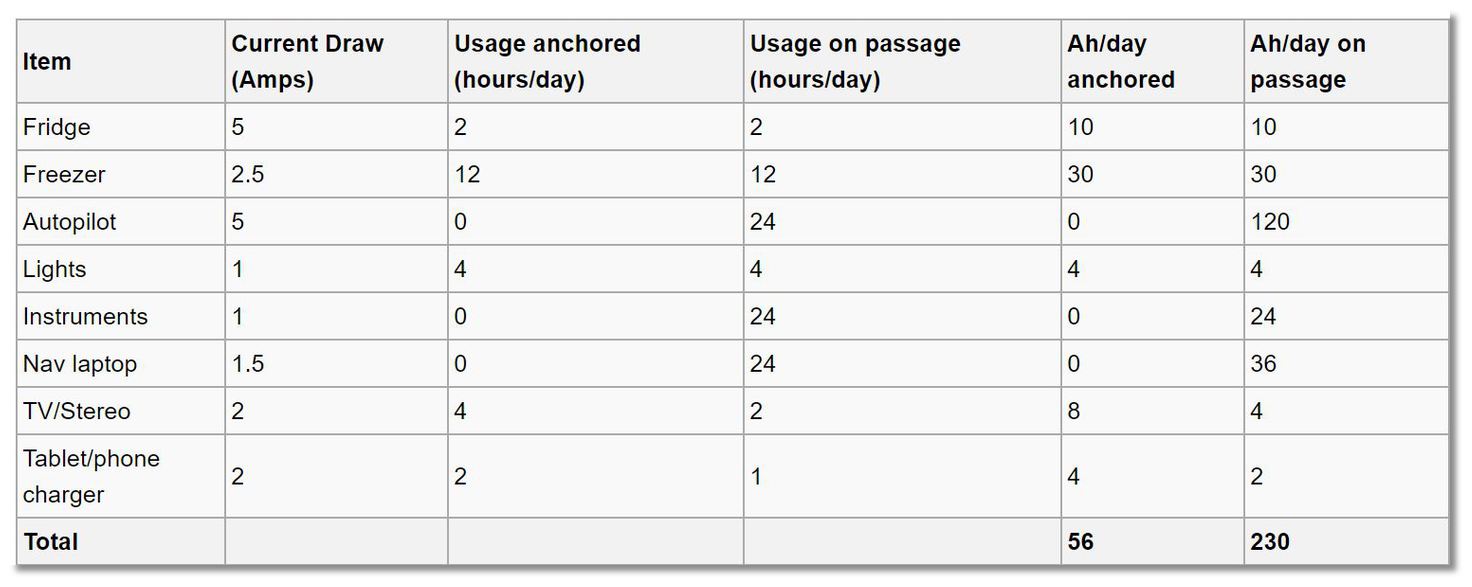 Typical device power consumption aboard a yacht
Photo: Delatbabel
Battery Capacity
Consider how long it might be comfortable running without any charging capacity - for example if the primary solar regulator should fail that would necessitate running for 24 hours or longer while it is replaced.
A good 'rule of thumb would be to have a battery capacity that was no less than 2x the daily load of all of the equipment that uses power. For example, if the total daily load is around 200Ah, then it is advisable to have a battery bank that is not less than 400Ah. See eOceanic's battery options for boating for an overview of the different types of battery available, but in the end, it comes down to what you are prepared to pay for what you are prepared to have. Flooded lead-acid batteries are still the cheapest type of battery to have on board although their charge capacity per weight is lower than that of Lithium batteries. If you are prepared to pay the lithium premium then, by all means, do so!
Take into consideration that most battery types do not like to be dropped below a certain percentage of their full charge. For AGM and deep cycle flooded batteries this is around 50%, although lithium batteries can frequently be dropped to 30% of charge or less without significant damage.
Charging Capacity
All things being taken into consideration - gensets, alternators, solar regulators, shore power, etc, it is best to aim for a charging capacity that is not less than 10% of a vessels total battery capacity, and not more than 25%. For example, with a battery bank around 400Ah, the total charging capacity should be somewhere between 40A and 100A. Lower capacity will generally be unable to bring the battery bank up to full charge, and higher capacity will have a tendency either to overcharge batteries or waste power by attempting to put more current into the battery bank than it is able to absorb (although some battery types, e.g. AGM can charge at a higher rate).
Charging capacity needs to be examined both underway and at anchor. Some sailing yacht considerations include:
- • Anchoring is usually done in quiet sheltered anchorages where wind generators do not generate a significant amount of power.
- • Tow generators usually generate a steady power output while underway, but of course zero while at anchor.
- • While at anchor, solar panels may be more efficient than while underway. This is because the panels may be partially shaded by the sails while underway.
- • A petrol generator can usually be used while at anchor, but there may be nowhere to safely run it while underway.
A similar view to the typical load analysis overview presented above can be used to estimate daily charging capacity whilst at anchor or making passage:
 Estimate charging capacity per system
Photo: Delatbabel
Of course, it is possible to adjust the hours/day ratings for each item as you see fit. Note that this is being a bit generous with the capacity of solar panels - assuming an average day in the tropics, you may have to adjust your estimate of the number of hours during the day that you think the solar panels can generate at capacity depending on your latitude, the amount of sun / cloud cover, etc.
Engine Alternators
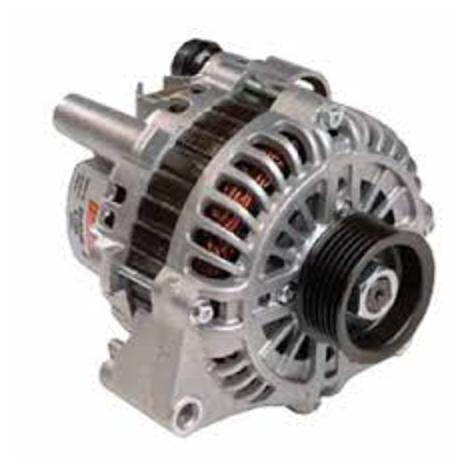 An example of a typical alternator
Photo: Delatbabel
An engine alternator works by having a rotating electromagnet (rotor) spun by a belt driven by the engine. The rotor creates a magnetic field, around which are placed some fixed outer windings made of wire (stator). The electromagnet in the rotor is powered by a small field current which creates a rotating magnetic field. This creates an alternating current in the stator by the magnetic field. A solid state rectifier mounted on the outer case of the alternator converts the AC into DC and a charge controller (or regulator) converts that DC into a current used for charging the battery.
Regulators
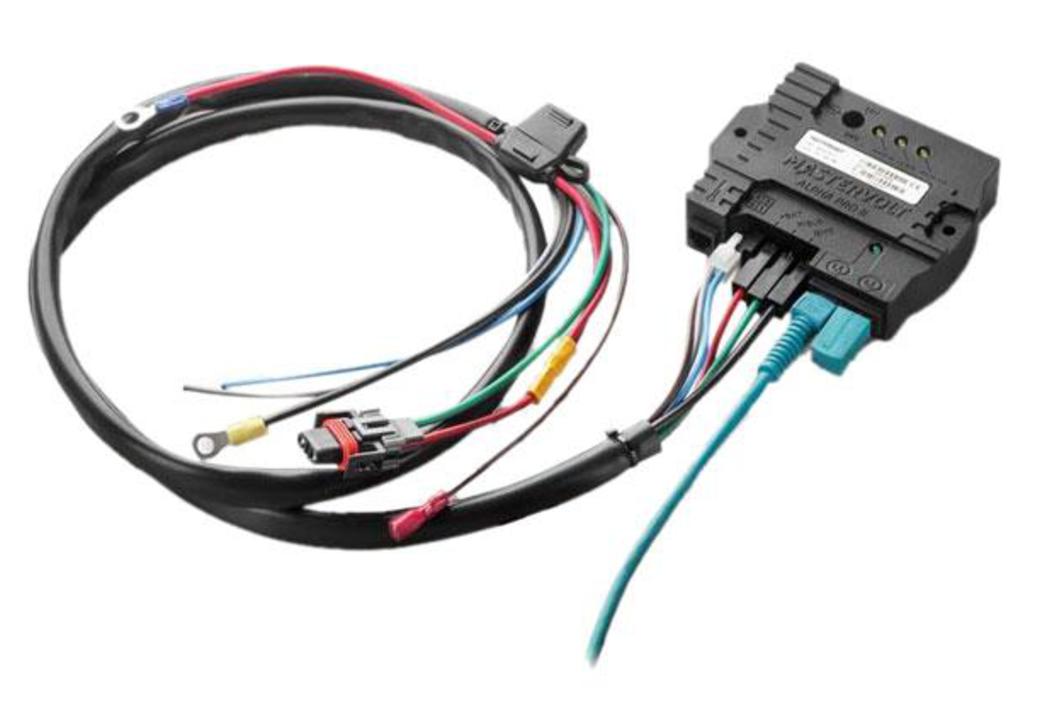 A MasterBus external charge regulator
Photo: Whit thanks to MasterBus
Because an inbuilt alternator reduces the output voltage of the alternator, as the battery becomes more fully charged the regulator will quickly reduce the output of the alternator to a fraction of the alternator's capacity, and the motor will be spinning for a long time to recharge the battery. This problem can be overcome by fitting an external regulator to the existing alternator. These are stand-alone electronic units that can drive the alternator as hard as possible to fully charge house batteries in the shortest possible time.
Companies such as Ample Power, Mastervolt and Sterling produce external alternator regulators, these usually require some form of modification to the existing alternator such as unscrewing the existing standard alternator regulator and brush holder assembly, which can be done by an auto electrician.
Generators (Gensets)
Gensets are the thing that all cruising yachties love to hate, whether you're bothered by the purchase, installation and maintenance cost of a diesel genset or whether your night's sleep is disturbed by the noise from the genset of the boat next door. They have their advantages, however, those being:
- • They generate power whether it's sunny or not, windy or not, or whether there is any boat speed or not, unlike solar panels, and wind or tow generators. The only thing that they require is fuel.
- • Especially diesel gensets, they generate an amount of power that's impractical to generate via solar or wind on a space as small as a sailing vessel. This power can be used to run AC devices such as air conditioning, water makers or even an electric stove.
- • In comparison to running an engine alternator to charge batteries, they are fuel efficient. Also, they don't end up damaging the pistons or cylinders, which can happen when an engine is run for long periods at low revs just for the purpose of charging batteries.
Petrol Generators
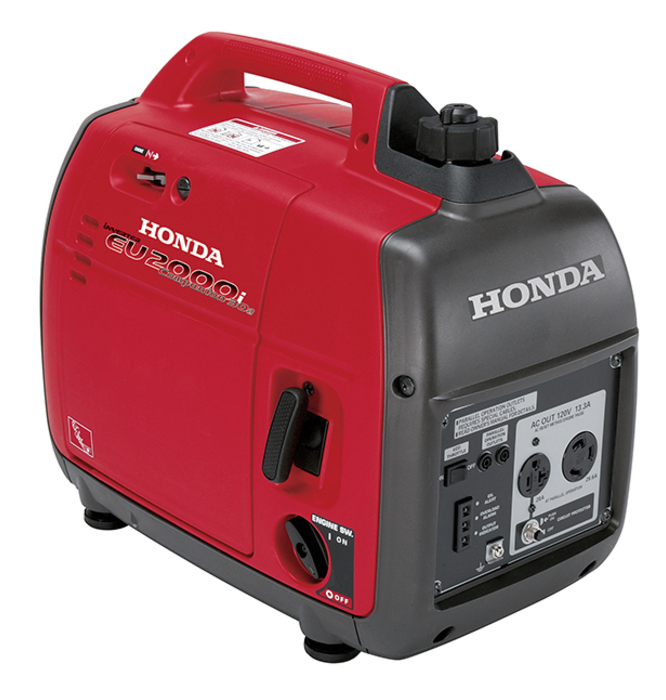 The very popular Honda petrol genset
Photo: Delatbabel
Petrol generators come in fixed or variable RPM types, with generating capacities usually between about 1kVA and 3kVA. For any larger capacity onboard generator, a fixed diesel genset is usually preferred.
Fixed RPM generators are cheaper, but have to run at a fixed RPM to create AC power at 50 or 60Hz. They have a tendency to be somewhat noisy and run less reliably. They also generate either a square wave or a modified sine wave power output, which is suitable for running a battery charger but not ideal if you are going to run sensitive electronic equipment such as computers or laptops.
Variable RPM generators, otherwise known as inverter gensets, create 3 phase power which is rectified to DC power internally and then inverted to a fixed AC voltage and cycle afterwards. They generally create a better sine wave output and their fuel consumption is lower than a fixed RPM generator.
The Honda EU1000i/EU2000i generators are quite popular amongst cruising sailors especially as I have noticed in the South Pacific where spares for other types of generators might not be easily available. They have a reputation for being quiet, reliable and efficient. They come in 120V AC and 240V AC versions.
Diesel Gensets
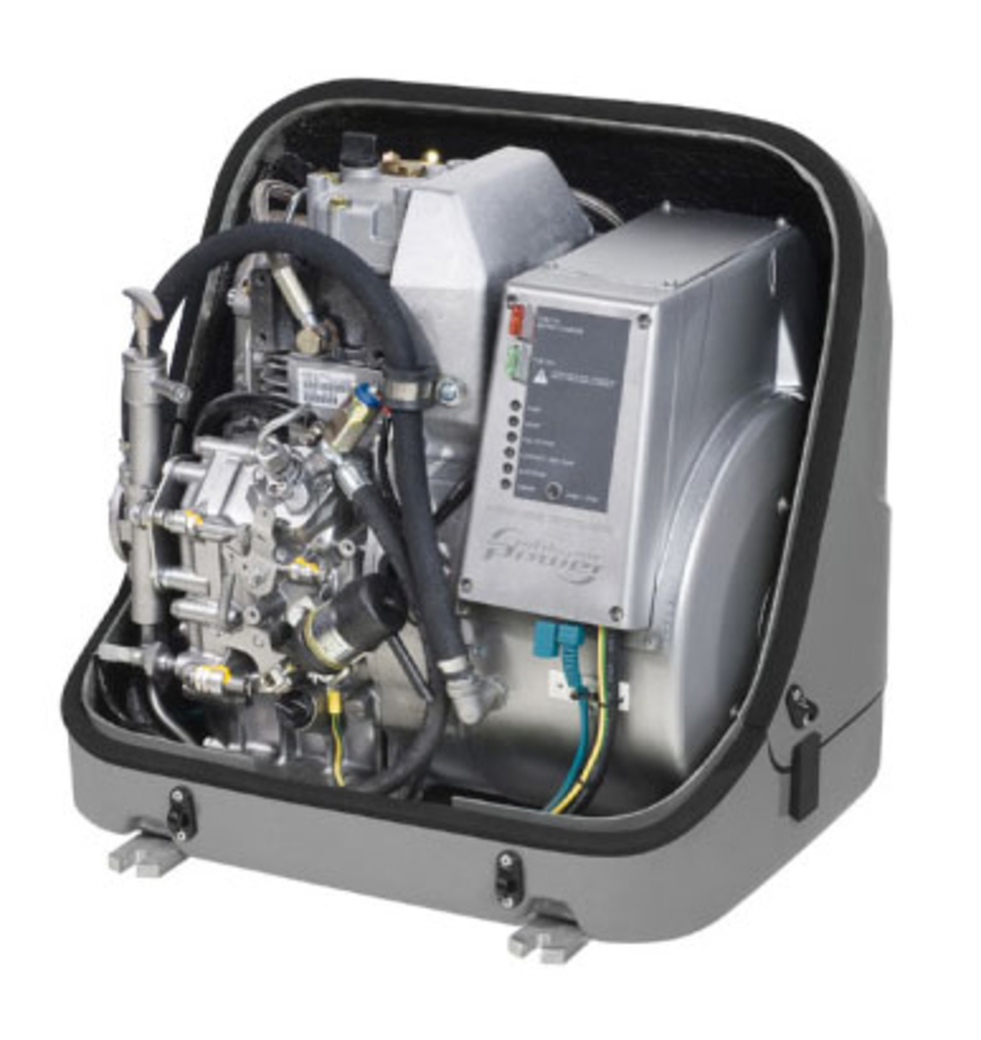 Diesel and inverter genset with its cover removed
Photo: With thanks to WhisperPower
Installing a diesel genset is just like installing an engine - with the same attention to detail. Routing fuel lines, routing the exhaust pipe (using a waterlock system just like an engine exhaust, because the genset is normally mounted below the waterline), and connecting battery wiring all requires some attention.
As with petrol generators, diesel gensets are either fixed RPM or inverter types. Fixed RPM gensets run at a constant speed (usually either 3000rpm or 3600 depending on whether 50Hz or 60Hz AC is needed), whereas an inverter type only runs as fas as needed to power whatever is connected. Fixed RPM gensets have a reputation for being noisier than equivalent inverter gensets however it depends on the capacity as well as mounting considerations such as noise baffling around the genset installation area.
Most small diesel gensets are single phase only, and so if you have a need to power a welding unit requiring three phase power it may be better to look at a medium sized 3 phase portable petrol-powered genset, perhaps in conjunction with an inbuilt diesel genset. There are sea water cooled and fresh water cooled gensets in both fixed RPM and inverter types.
Freshwater cooled gensets have a seawater heat exchanger much like a diesel engine, these are the only types that I would consider in a yacht because sea water cooled gensets will generally have more corrosion issues with hot sea water running through the engine block. There are also small air-cooled gensets available.
Nanni, Fischer Panda and Mase are well-known companies that manufacture diesel gensets for marine use. Examine their product offerings before making a decision.
Solar Panels
Typically when we say "solar panel" on a boat we mean a photovoltaic module (PV module). A PV module is a packaged, connected assembly of solar cells in an array which can provide an output voltage (typically in the 12 - 24 volt range).
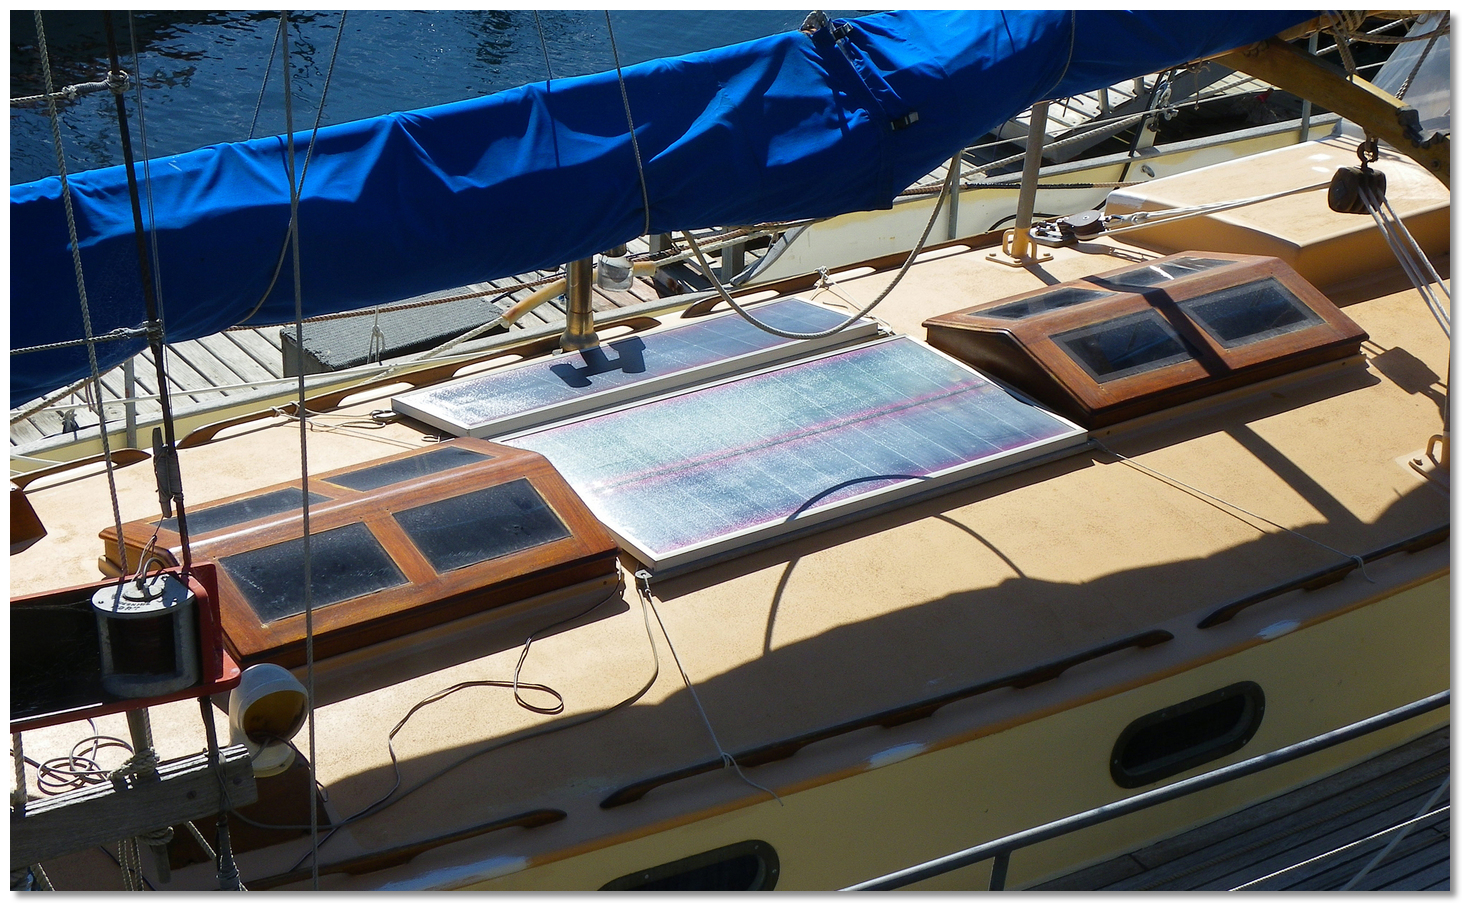 Solar panel mounted on the deck
Photo: Liese Coulter, CSIRO via CC ASA 3.0
The main types of PV modules in use on boats include:
- • Polycrystalline modules packaged under glass
- • Monocrystalline modules packaged under glass
- • Thin film modules on a steel or flexible substrate, without a glass coating
The type of solar panel you want may depend on mounting considerations. For maximum efficiency per dollar spent, monocrystalline panels are the best choice. However thin film / flat panel type PV modules have their advantages especially in situations where they may need to be walked on.
Shade
Shade is the enemy of power generation with solar panels - this should go without saying, however, the effect of shade on a solar panel is more than one might think. For example, a typical solar panel rated at 12V nominal / 100W peak might produce 80W on a typical sunny day in a subtropical region at ideal temperatures, but shading 25% of the panel might reduce that not to 60W, but perhaps as low as 10W or 20W.
This means that mounting considerations are important when mounting solar panels. Mount them as high as possible or at least where there is the smallest possible amount of shade during the course of the day.
Solar panels don't work at night. Some people seem to forget this. A 100W rated solar panel will not generate as much power over 24 hours as will a 100W tow generator with the yacht cruising at 6 knots.
MPPT vs PWM Controllers
The choice of an MPPT vs PWM controller is much more important with solar panels than with any other type of power generation system. Typically the maximum output of a solar panel will occur at a particular voltage, and that voltage will vary depending on sun conditions, ambient temperature, etc.
A PWM controller will pull the voltage of the panel down to a certain level, equivalent to the voltage required to charge the batteries. Typically this will be somewhere between 12.5 and 13.8 volts, whereas the maximum power point of a solar panel nominally rated at 12V may be closer to 15V or even 17V. An MPPT controller will allow the panel to output at its maximum power point and step the voltage so generated down to the voltage of the battery.
Using MPPT controllers it is also possible to run multiple solar panels in series. For example, 4 x 12V panels could be run together in series to produce an output voltage around 48 - 60 volts total and the MPPT controller will step this down to the voltage required to charge the battery. Note that this requires a lot more current handling capacity inside the controller which means a larger and more expensive MPPT controllers will do this better than smaller and cheaper controllers.
Wind Generators
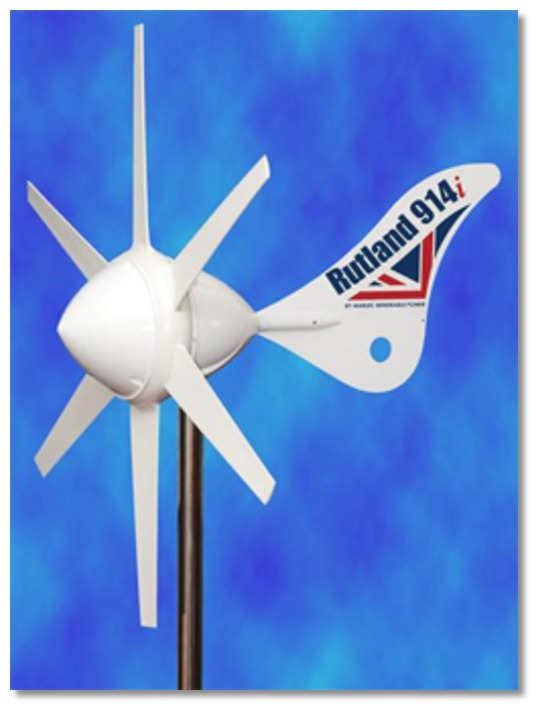 Rutland 914i wind generator
Photo: Michael Harpur
There is a range of different types of wind generators that can be fitted on board from a number of different manufacturers. Some examples are:
- • Ampair produce a 100W and a 300W generator. The 100W generator can be converted for use as a tow generator.
- • Marlec produce a range of wind generators, the most well-known of which is the Rutland 914i. This has a reputation as being a quiet and reliable generator. Their previous model, the 913i, has created a number of similar cheap knock-off versions mostly made in China.
- • Silentwind range made in Germany includes a 400W generator.
When assessing wind generators don't just consider the "rated" output (e.g. 300W, 100W, 400W, etc). Look at the power generation curves for various wind speeds - some wind generators sold as 400W won't actually output 400W of power unless they are exposed to 50 knots or more of wind, which doesn't happen often, thankfully. Consider their generating capacity at 5 knots, 10 knots, 15 knots, and maybe 25 knots to get an idea of how much power a wind generator will actually generate.
Here are some manufacturer provided data points:
- • Silentwind 400W generator model generates 170W @ 22kts.
- • Rutland 914i generates 140W @ 11m/s (22kts)
- • Ampair 100 generates 54W @ 22kts. In comparison, the same generator rigged for tow generator use generates 60W @ 6 knots of boat speed.
- • Ampair 300 generates 180W @ 22kts
Some wind generators have a reputation for being noisy so it is highly advisable to check product reviews before purchase and if possible find a vessel already using the product you intend to buy.
Contrary to common belief, the number of blades on a wind generator does not affect its output. The output capacity of a wind generator is mostly dictated by the overall diameter of the blades.
Tow Generators
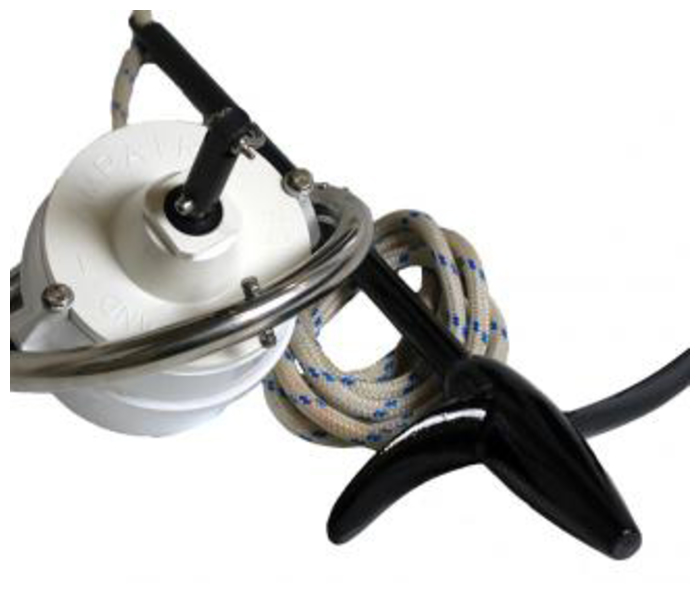 Aquair 100 towing generator
Photo: Delatbabel
- • Aquair 100 by Ampair. This is a generator that can be rigged either way, as a wind generator or as a tow generator. The unit can have a water turbine attached on a long line in tow generator mode, or can have a tail and blades added to operate as a wind turbine. The unit is rated at 100W which means around 8A at 12V. In personal sea trials, you tend to get a steady 4 - 6A out of it at cruising speed, or an Amp per knot was our simple rule of thumb with six being the top end as the trailing propeller starts to ride up and pull out of the wave tops at speeds above this.
- • Ferris Waterpower 200 from the USA is sold as a tow generator but can also be converted to a wind generator. This one claims to generate 200Ah per day which means approximately 8A at 12V, also approximately 100W.
- • Eclectic Energy in the UK make 2 types of tow generator, one being the DuoGen 3 which is a convertible wind/water generator and the other being the Sail-Gen which uses the same components but is a dedicated tow generator.
Charge Controllers
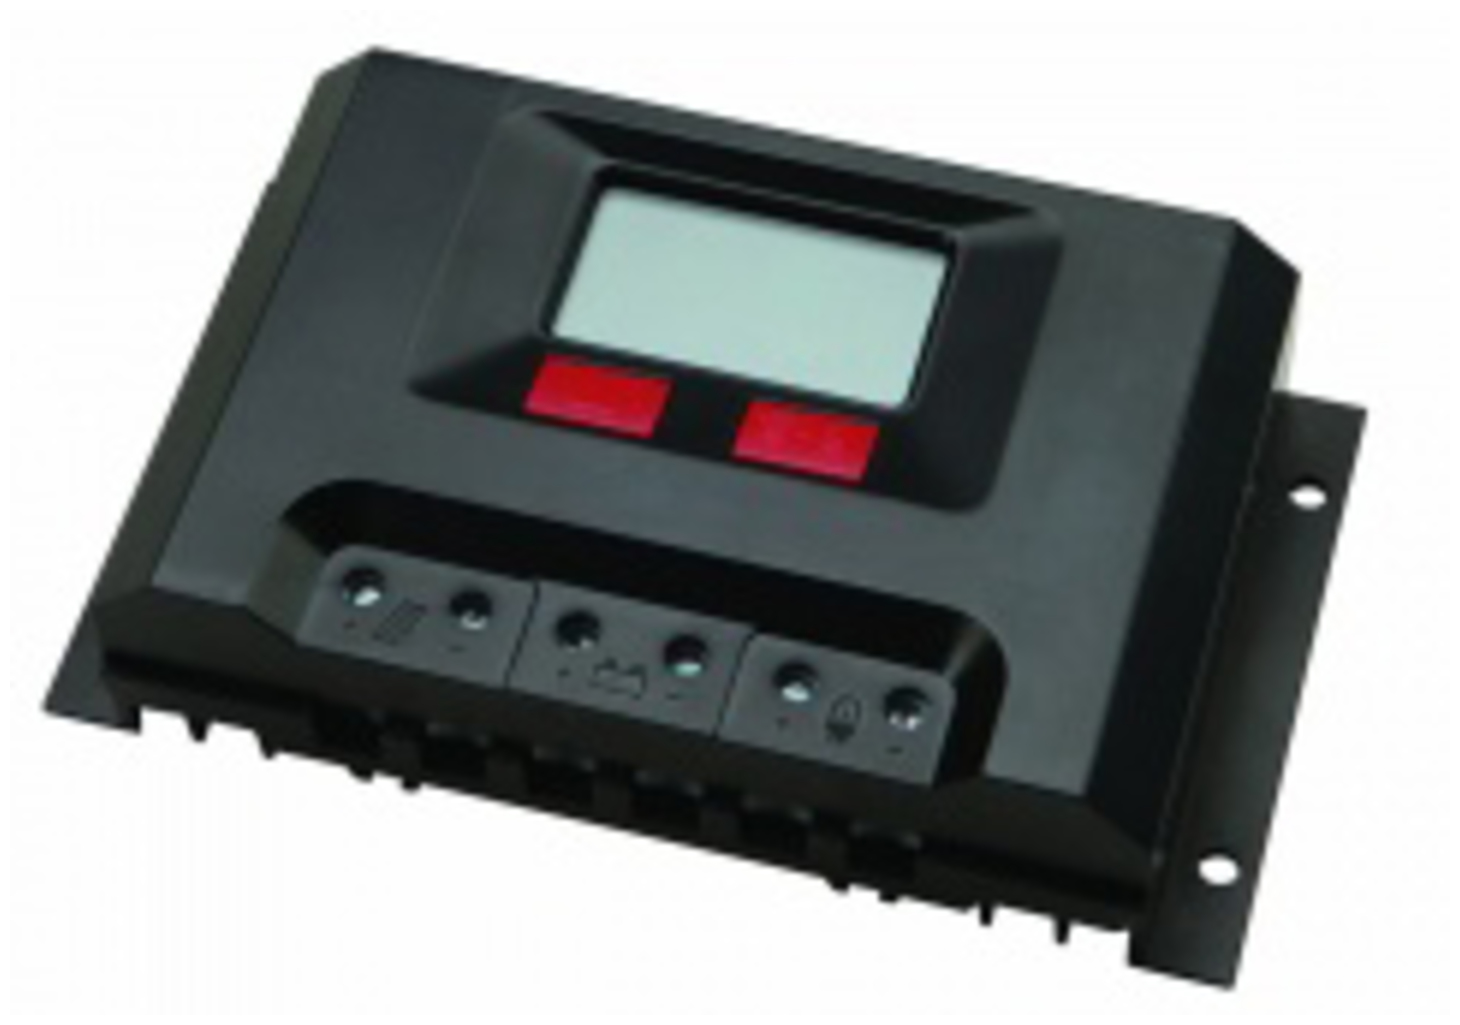 A modern solar charge controller with LCD
Photo: Delatbabel
These days series charge controllers have taken over from the old shunt regulator style. Newer technologies such as smart chargers and MPPT charge controllers have become more prevalent and also reduced in price.
Pulse-width modulation (PWM) controllers
Until a couple of years ago, most charge controllers seen on the market were PWM type charge controllers. The PWM controller is, in essence, a switch that connects a solar array to a battery. The result is that the voltage of the array will be pulled down to near that of the battery.
More complex PWM controllers had various added features, such as the ability to split charge between two battery banks, to add a "load" output which could be disabled automatically by the controller when the battery voltage dropped to too low a level, digital readouts, etc.
However, the basic principle remains that a PWM controller, even a well-made one, does not allow a solar panel to run at its most efficient level. The main advantage that PWM controllers have is that they are cheap and their circuitry is reasonably simple in comparison to an equivalent MPPT controller.
Maximum power point tracking (MPPT) controllers
The output voltage of a solar cell can be varied by varying the load resistance in ohms. As the load increases on the cell, the voltage will increase, however for most of the operating range of the cell the current remains constant, which means that the power increases. At a particular point the current starts to decrease as the cell cannot handle the load that's applied, and at around this point, the maximum Power of the cell (calculated by multiplying the voltage times the current) is reached. This is known as the maximum power point of the cell.
.jpg) MPPT Controller installed at the navigation station (aft of VHF)
MPPT Controller installed at the navigation station (aft of VHF)Photo: Michael Harpur
MPPT controllers have reduced in price significantly over the last few years so that the cost difference between a PWM controller and an MPPT controller is now not as much as it used to be.
One issue with cheap MPPT controllers is that they frequently do not have sufficient current handling capacity in the transformer to be able to efficiently step the voltage down and continue to work reliably over a long period of time. A saying that's often quoted in the electronics and computer industries is fast, cheap, reliable - pick any two. If you're relying on a cheap MPPT controller while on a long passage then it might be wise to have a similarly cheap but reliable PWM controller of about the same capacity stashed away as a backup. See MPPT on Wikipedia for more information.
AC Battery Chargers
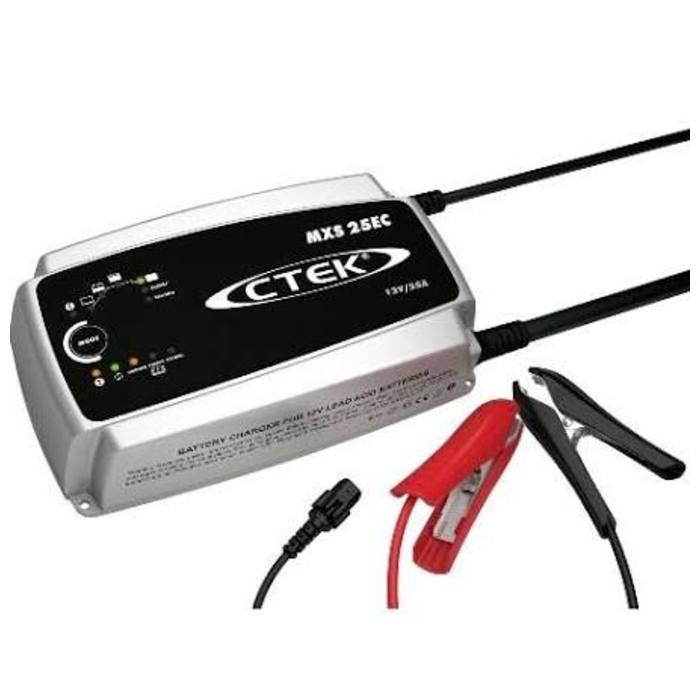 CTEK Automatic Lead Acid Battery Charger
Photo: Delatbabel
For instance, a Honda 1000i genset can typically output 8A at 12V but can also output 1000W at 240V, which is around 4A. A battery charger providing 40A to the house batteries can usually run fine from the AC output of such a generator, which means that the same amount of generator fuel is used to provide 40A of battery charging via AC as would be used to provide 8A of charging via DC.
Battery chargers vary in size and capacity from 10A or less up to 100A or more. Usually, a battery charger should be sized to approximately 10% of the total house battery capacity, so a 400A battery bank should be equipped with a 40A charger. A smaller charger will run OK but will take longer to charge the batteries, while a larger charger will not be able to run at full capacity because of the inability of typical deep cycle batteries to absorb charge at a faster rate.
Battery chargers are becoming more common and cheaper these days with companies like CTEK and others producing them at commodity prices. Auto shops and marine chandlers will usually have a range of different capacity chargers.
Desirable Features
Most AC battery chargers have a temperature sensor which can read the ambient temperature. The charger then adjusts the charge rate to compensate for changes in battery temperature. This can be significant with larger battery banks.
Other desirable features in a battery charger are thermal overload protection, reverse polarity protection against accidental reversal of the output leads, short circuit protection, output overload protection and some kind of charge status readout (LEDs or LCD display).
A smart move might be a battery charger that accepts multiple input voltages - Victron and Xantrex make battery chargers that accept any input voltage in the range 90V - 270V and can, therefore, be plugged into shore power anywhere in the world and still provide the same charging capacity to your battery banks.
Combined Charger/Inverters
One reasonably recent introduction is the combined charger/inverter. This combines the functions of an AC battery charger with an inverter, having one AC input, one AC output, and an input/output for the house battery bank. Companies like Magnum Energy, Victron Energy and Mastervolt produce a range of inverter/chargers with different input and output capacities.
DC Battery Chargers
A DC battery charger is a method of charging one battery bank from another battery bank. In the past, this has typically been achieved by using diode splitters, voltage sensitive relays (which link the two battery banks together when a charging voltage is applied and disconnects them when there is no charging voltage), relays, or simple manual switches. All of these methods have their disadvantages - diodes can cause voltage drops and generate heat, and relays can cause large inrush currents when a fully charged battery is connected to a depleted battery and can cycle (switch on and off repeatedly) when the charge voltage is fluctuating as frequently happens from wind and tow generators.
More recent innovations from companies such as Balmar, CTEC and Redarc have created DC to DC series chargers, which perform various functions to effectively charge an engine battery from a house battery bank. They include features such as current limiters, multi-stage charging, etc.
InterVOLT is another company in the market that has created a DC to DC charging unit that provides a stable output voltage regardless of the input voltage. It can even provide sufficient charge to an engine battery to allow the engine battery to start the engine when both the house battery and the engine battery are effectively flat - providing a 13.8V output voltage and charging current from an input voltage as low as 10.75 volts.

Whether you run shore power into your yacht just for charging the battery bank, or for running AC appliances as well, there are some things that need to be taken into consideration.
AC voltage
Most ocean-going sailing vessels are designed to sail in many places around the world, and it's a fact of life that there are different voltages present at shore power installations at various marinas.
Almost every country in the world uses 220V or 240V AC power these days - the main exception being in the Americas and Caribbean where 110V is more common. If you have a yacht that's wired for 240V and arrive at a marina that's powered for 110V then you have 2 main options:
- • Run the shore power only into a battery charger (one that is capable of dealing with multiple different voltages), and run all onboard AC appliances from an inverter that delivers the correct voltage.
- • Run a transformer to step up / step down the shore power voltage to whatever is required on board.
Do not rely on marinas worldwide to carry the correct transformers for your yacht, you should decide what type of transformer you require and then carry one with you if you need to.
Fuses and RCDs
Any AC safety issue can be solved using fuses or a Residual Current Device (RCD), sometimes known as a Ground Fault Current Interrupter (GFCI). A fuse will blow if there is an oversupply of current to the boat or to an electrical component on board. A RCD will trip in case of a short circuit or current leakage to ground. Current leakage to ground is undesirable for many reasons:
- • It can cause large amounts of galvanic corrosion on any metal parts of the boat that are exposed to ground.
- • It can leak potentially lethal currents into the water - current leakage in AC systems has been implicated in deaths amongst swimmers in marinas in the past.
Even if only a small amount of current, perhaps a small fraction of an amp, leaks between onboard AC and earth, it's possible for that leakage to set up a significant amount of galvanic corrosion in a fairly short space of time. RCDs protect against this type of leakage.
Isolation Transformers
An isolation transformer eliminates any electrical continuity between AC shore power and the boat. Especially in steel hulled boats, this is considered a significant advantage because it prevents any galvanic corrosion caused by a direct connection between the on-board earth and the on-shore earth in an AC system.
Connecting the ground wire of the shore-side supply to the metal parts of the boat will result in galvanic corrosion if there is a potential difference between the on-shore earth and the water. In some marinas, this difference has been measured to as much as 40 volts!
Bringing only the live and neutral wire on board results in an unsafe situation because RCDs will not work nor will a fuse blow in case of a short circuit to a metal part on the boat.
The main disadvantage of isolation transformers is that they are bulky, expensive, and generate quite a bit of heat.
The effect of an isolation transformer is to create an onboard AC system and a shore-side AC system that are electrically disconnected. This allows a greater degree of protection from galvanic corrosion than just RCDs by themselves.
The obvious alternative to isolation transformers and RCDs is to only run a battery charger from the on-shore AC supply and to run all onboard AC electrics from a suitably sized inverter.
Shore Power Connectors
110V systems
Especially in the USA and other countries in the Americas where 110/150/120V AC is the norm, there are a wide range of different sockets that you might find at a marina to plug into your shore power system. Because the voltage in these systems is lower, you need more current to carry the same amount of electrical power. A 10A fitting is not sufficient and you frequently find a number of different sockets in use for 15A, 20A, 30A and 50A connections. Two things need to be taken into consideration:
- • The current carrying capacity of your shore power cable. If you're putting more amps down your shore power cable then you need to have a heavier cable. Of course, the number of amps will depend on what you have boat-side that's drawing current. That could be one or more of battery chargers, washing machines, fridges, TVs, power tools, etc. You won't hurt anyone by having a heavier cable running a lower current than it is rated for, but a cable that's rated for 10A, that's carrying 20A, could be a problem.
- • The rated capacity of the connector on the end of your shore power cable. Although it's frequently the case that your cable can carry the rated current, the connector may not be able to. If you've got a 30A connection on shore and you're running from a pigtail into a 15A connector on the end of a 30A rated cable, then the connector may be a problem.
In most cases, it probably pays to have a single shore power cable and connector that's capable of carrying sufficient current for your boat. Whether that's 15A, 30A or 50A, choose a cable and connector that will work.
When you arrive at a marina that doesn't have sufficient current carrying capacity to feed to your boat it may be the case that you need a Y adapter so that you can take two shore cables and run them into one boat side inlet.
240V systems
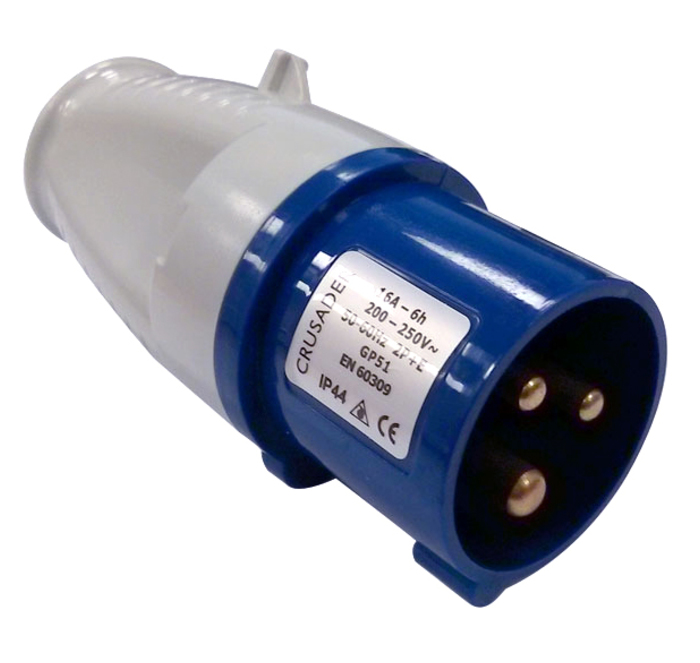 15A caravan style plug
Photo: Delatbabel
In most countries that run 240V, you will frequently see shore side power sockets requiring the pictured '15A caravan style plug'. This is probably the one that's most useful to carry on board, although be aware that it does come in 15A and 30A versions (with the 30A version being slightly larger). I did find one marina in French Polynesia that only had 30A sockets but most have 15A sockets.
Frequently it's possible to run a cable with bare wire ends and find sufficient connectors that can be attached and detached with set screws or similar. It may alternatively be preferable to use a pigtail adapter - in this case, you would have one shore power cable with this type of connector and a number of different 'pigtail' adapters to choose from so that you could pick the correct adapter for whatever marina you are in.
Be aware that New Zealand has some odd regulations in terms of connecting boats to shore power - you need something called an electrical warrant of fitness from an electrician before you can even be supplied with the correct cable, and pigtail adapters will usually not be allowed.
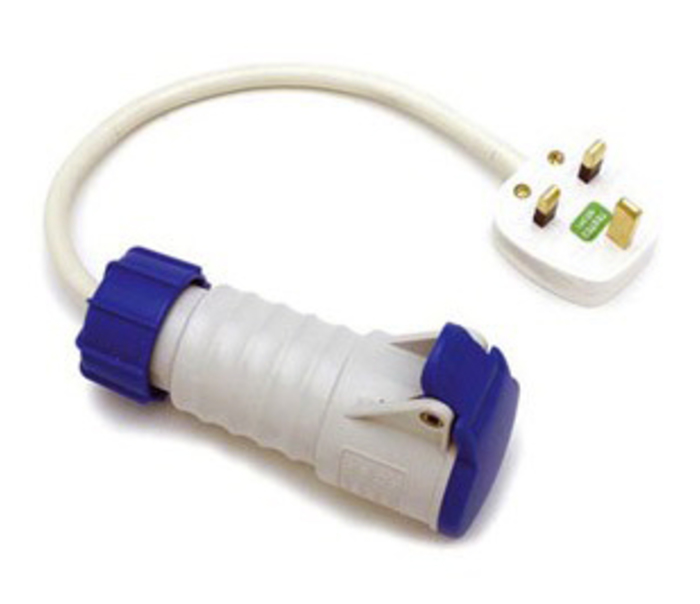 UK pigtail adapter
Photo: Delatbabel
Similarly, in Australia, you will find that most marinas have household style 10A or 15A sockets present rather than the caravan style sockets. These can be connected to using a pigtail adapter, although that may restrict you to using a 10A plug on your pigtail - Australian 15A sockets will take a 10A plug, but a 15A plug won't fit into a 10A socket.
Hybrid systems
It's not uncommon to find, especially in the USA, marinas that have both 110V and 220/240V sockets. Make sure that you plug into the correct one!
When you are travelling you will frequently find that the voltage on shore is not the same as the voltage that your yacht was designed to take.
One option is to find a step up or step down transformer that will convert the available shore power to the required power for your yacht. For example, you could plug a 110V boat into a 240V system using a step-down transformer. Assuming that you have a transformer in a rain-proof housing, the following suggestions should be taken into account:
- • If you are stepping down voltage, e.g. from 240V to 110V, then place the step-down transformer as close to your boat as possible (or on board).
- • If you are stepping up the voltage, e.g. from 110V to 240V, then place the step-down transformer as far from your boat, and as close to the shore power outlet, as possible.
This is because once you have stepped up voltage the current will be lower, and once you have stepped down voltage the current will be higher. The current loss (and heat generated) in an electrical cable will be more if there is a higher current and less if there is a lower current - basically higher voltages transmit better than lower voltages.
Another option is to move to a system where the shore power only feeds a battery charger, and that battery charger is capable of taking a range of voltages. That means you can run any voltage into your shore power leads and it will be turned into the appropriate charging voltage for your batteries, without having to worry about transformers.
Permission is granted to copy, distribute and/or modify this document under the terms of the GNU Free Documentation License, Version 1.2 or any later version published by the Free Software Foundation with author restrictions as may be seen on CruisersWiki.
With thanks to:
Delatbabel at the World Cruising WikiShore Power Systems Overview
Add your review or comment:
Please log in to leave a review of this tip.
eOceanic makes no guarantee of the validity of this information, you must read our legal page. However, we ask you to help us increase accuracy. If you spot an inaccuracy or an omission on this page please contact us and we will be delighted to rectify it. Don't forget to help us by sharing your own experience.

